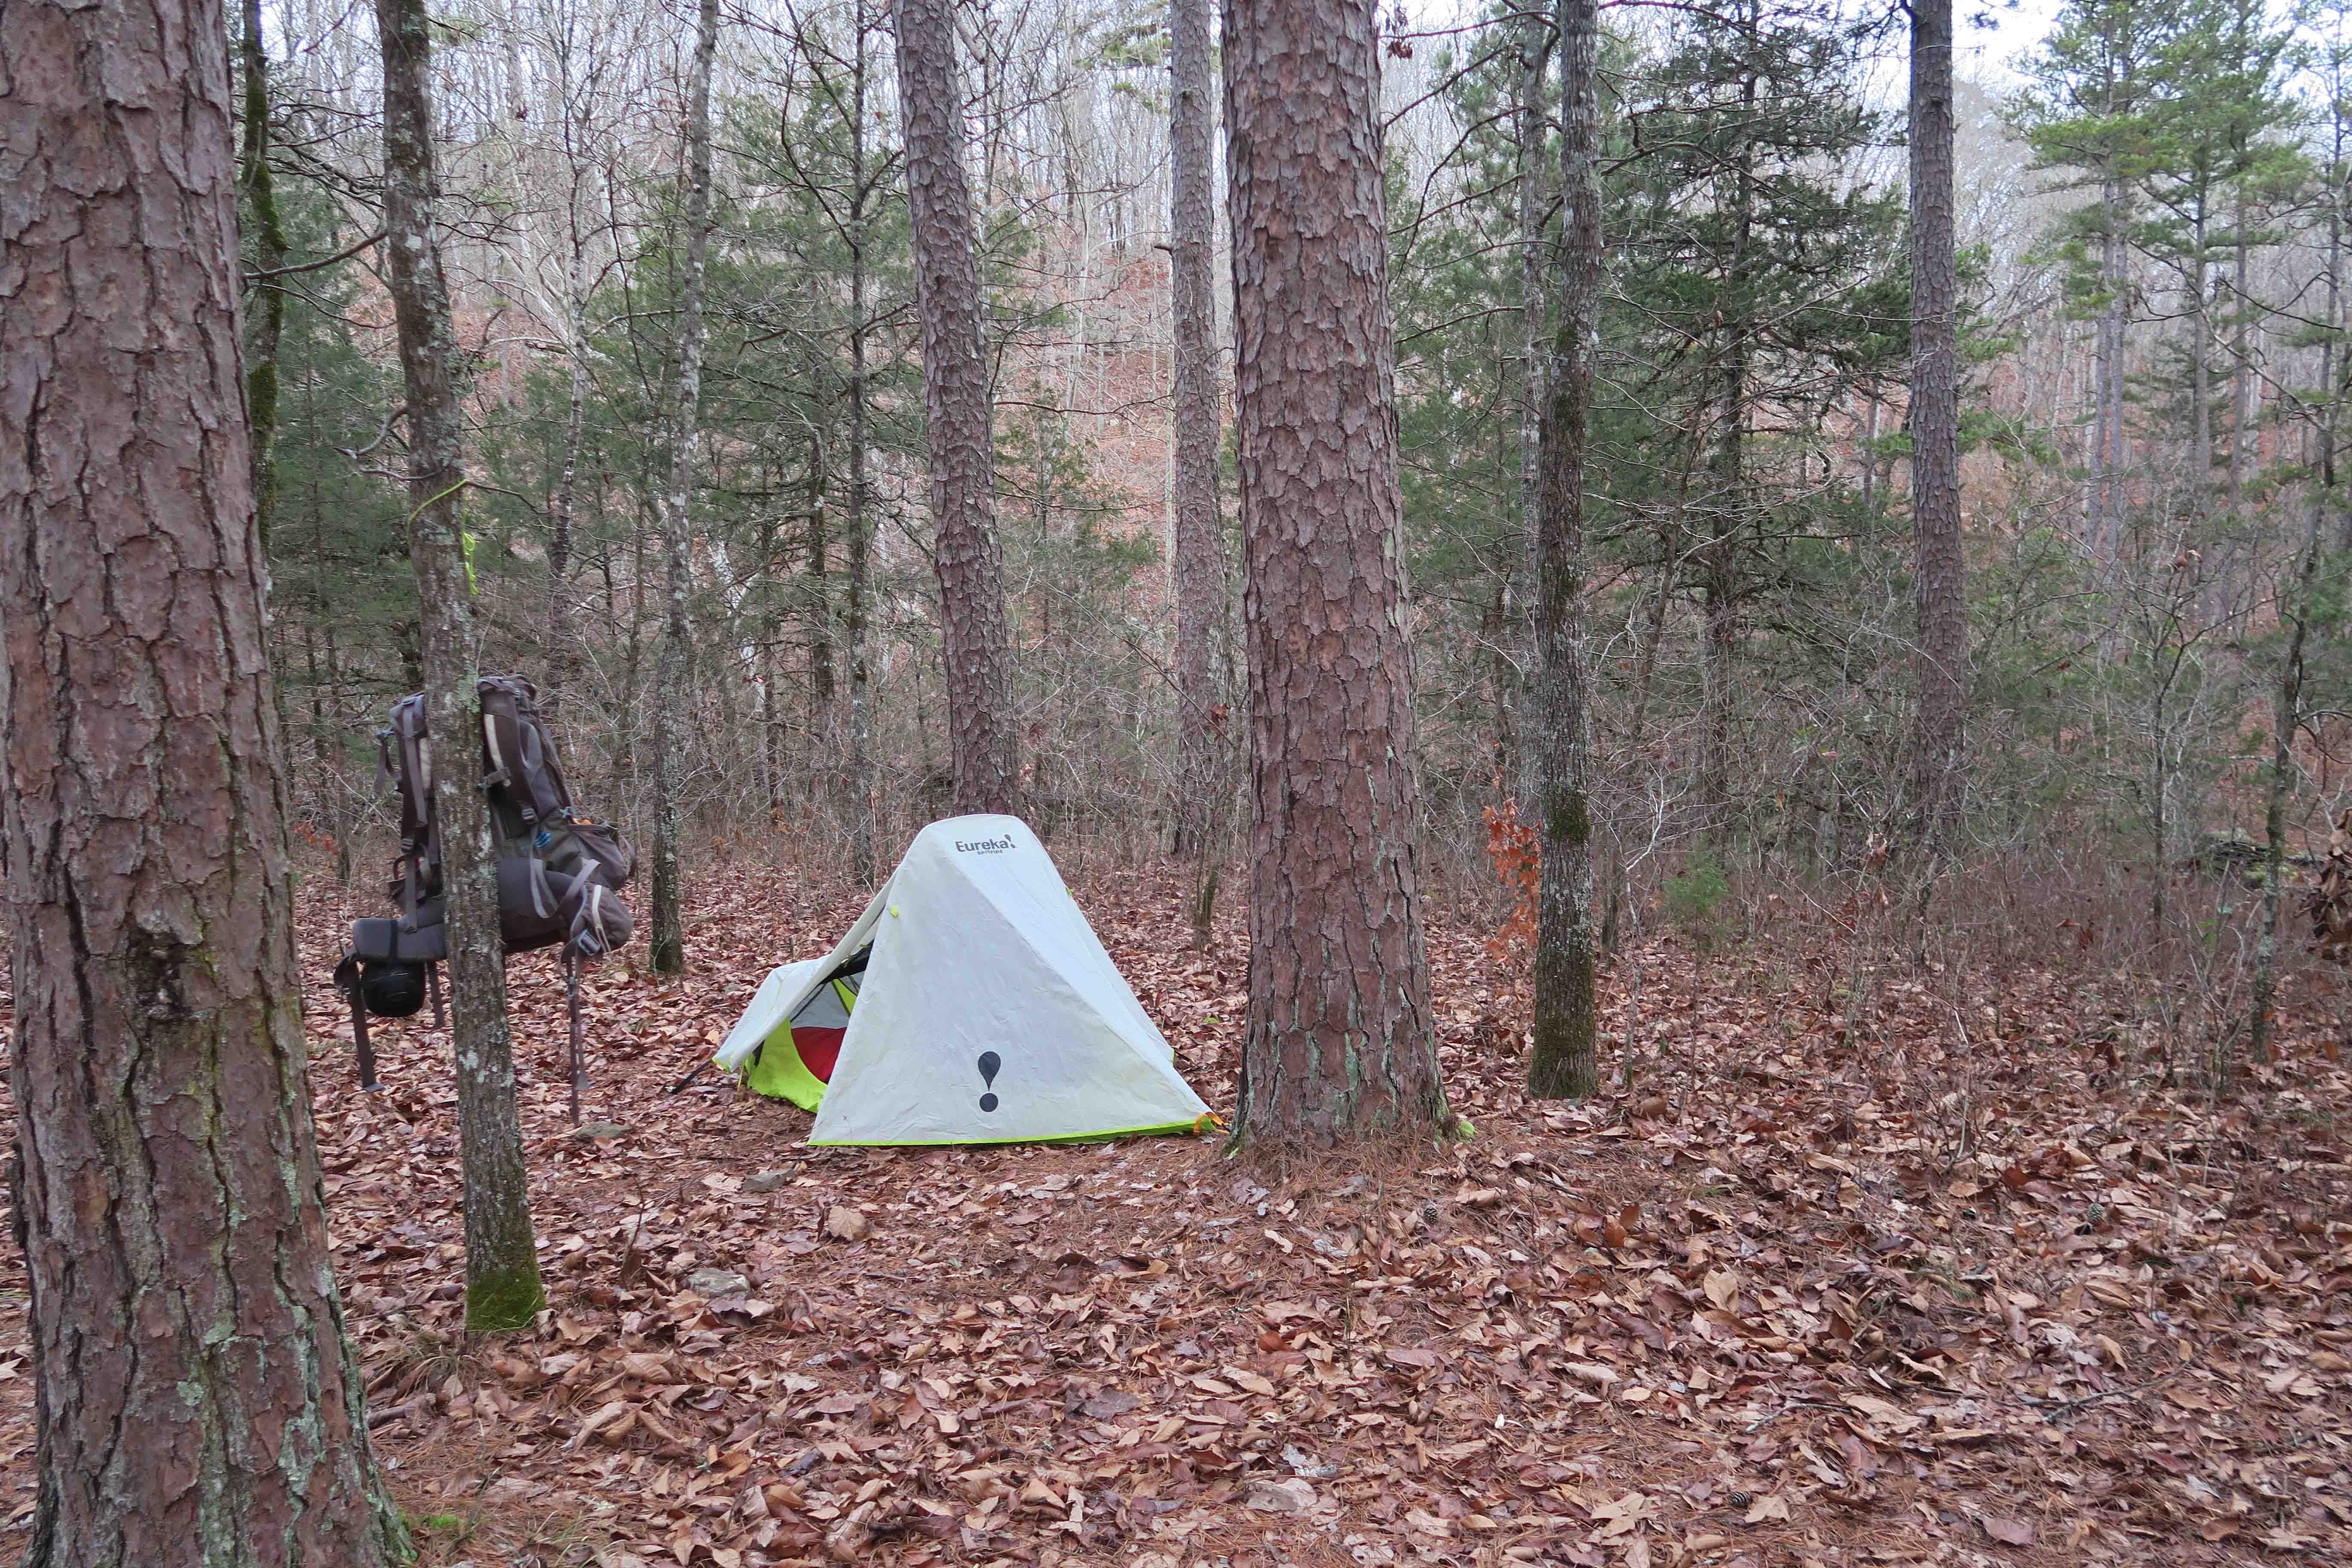
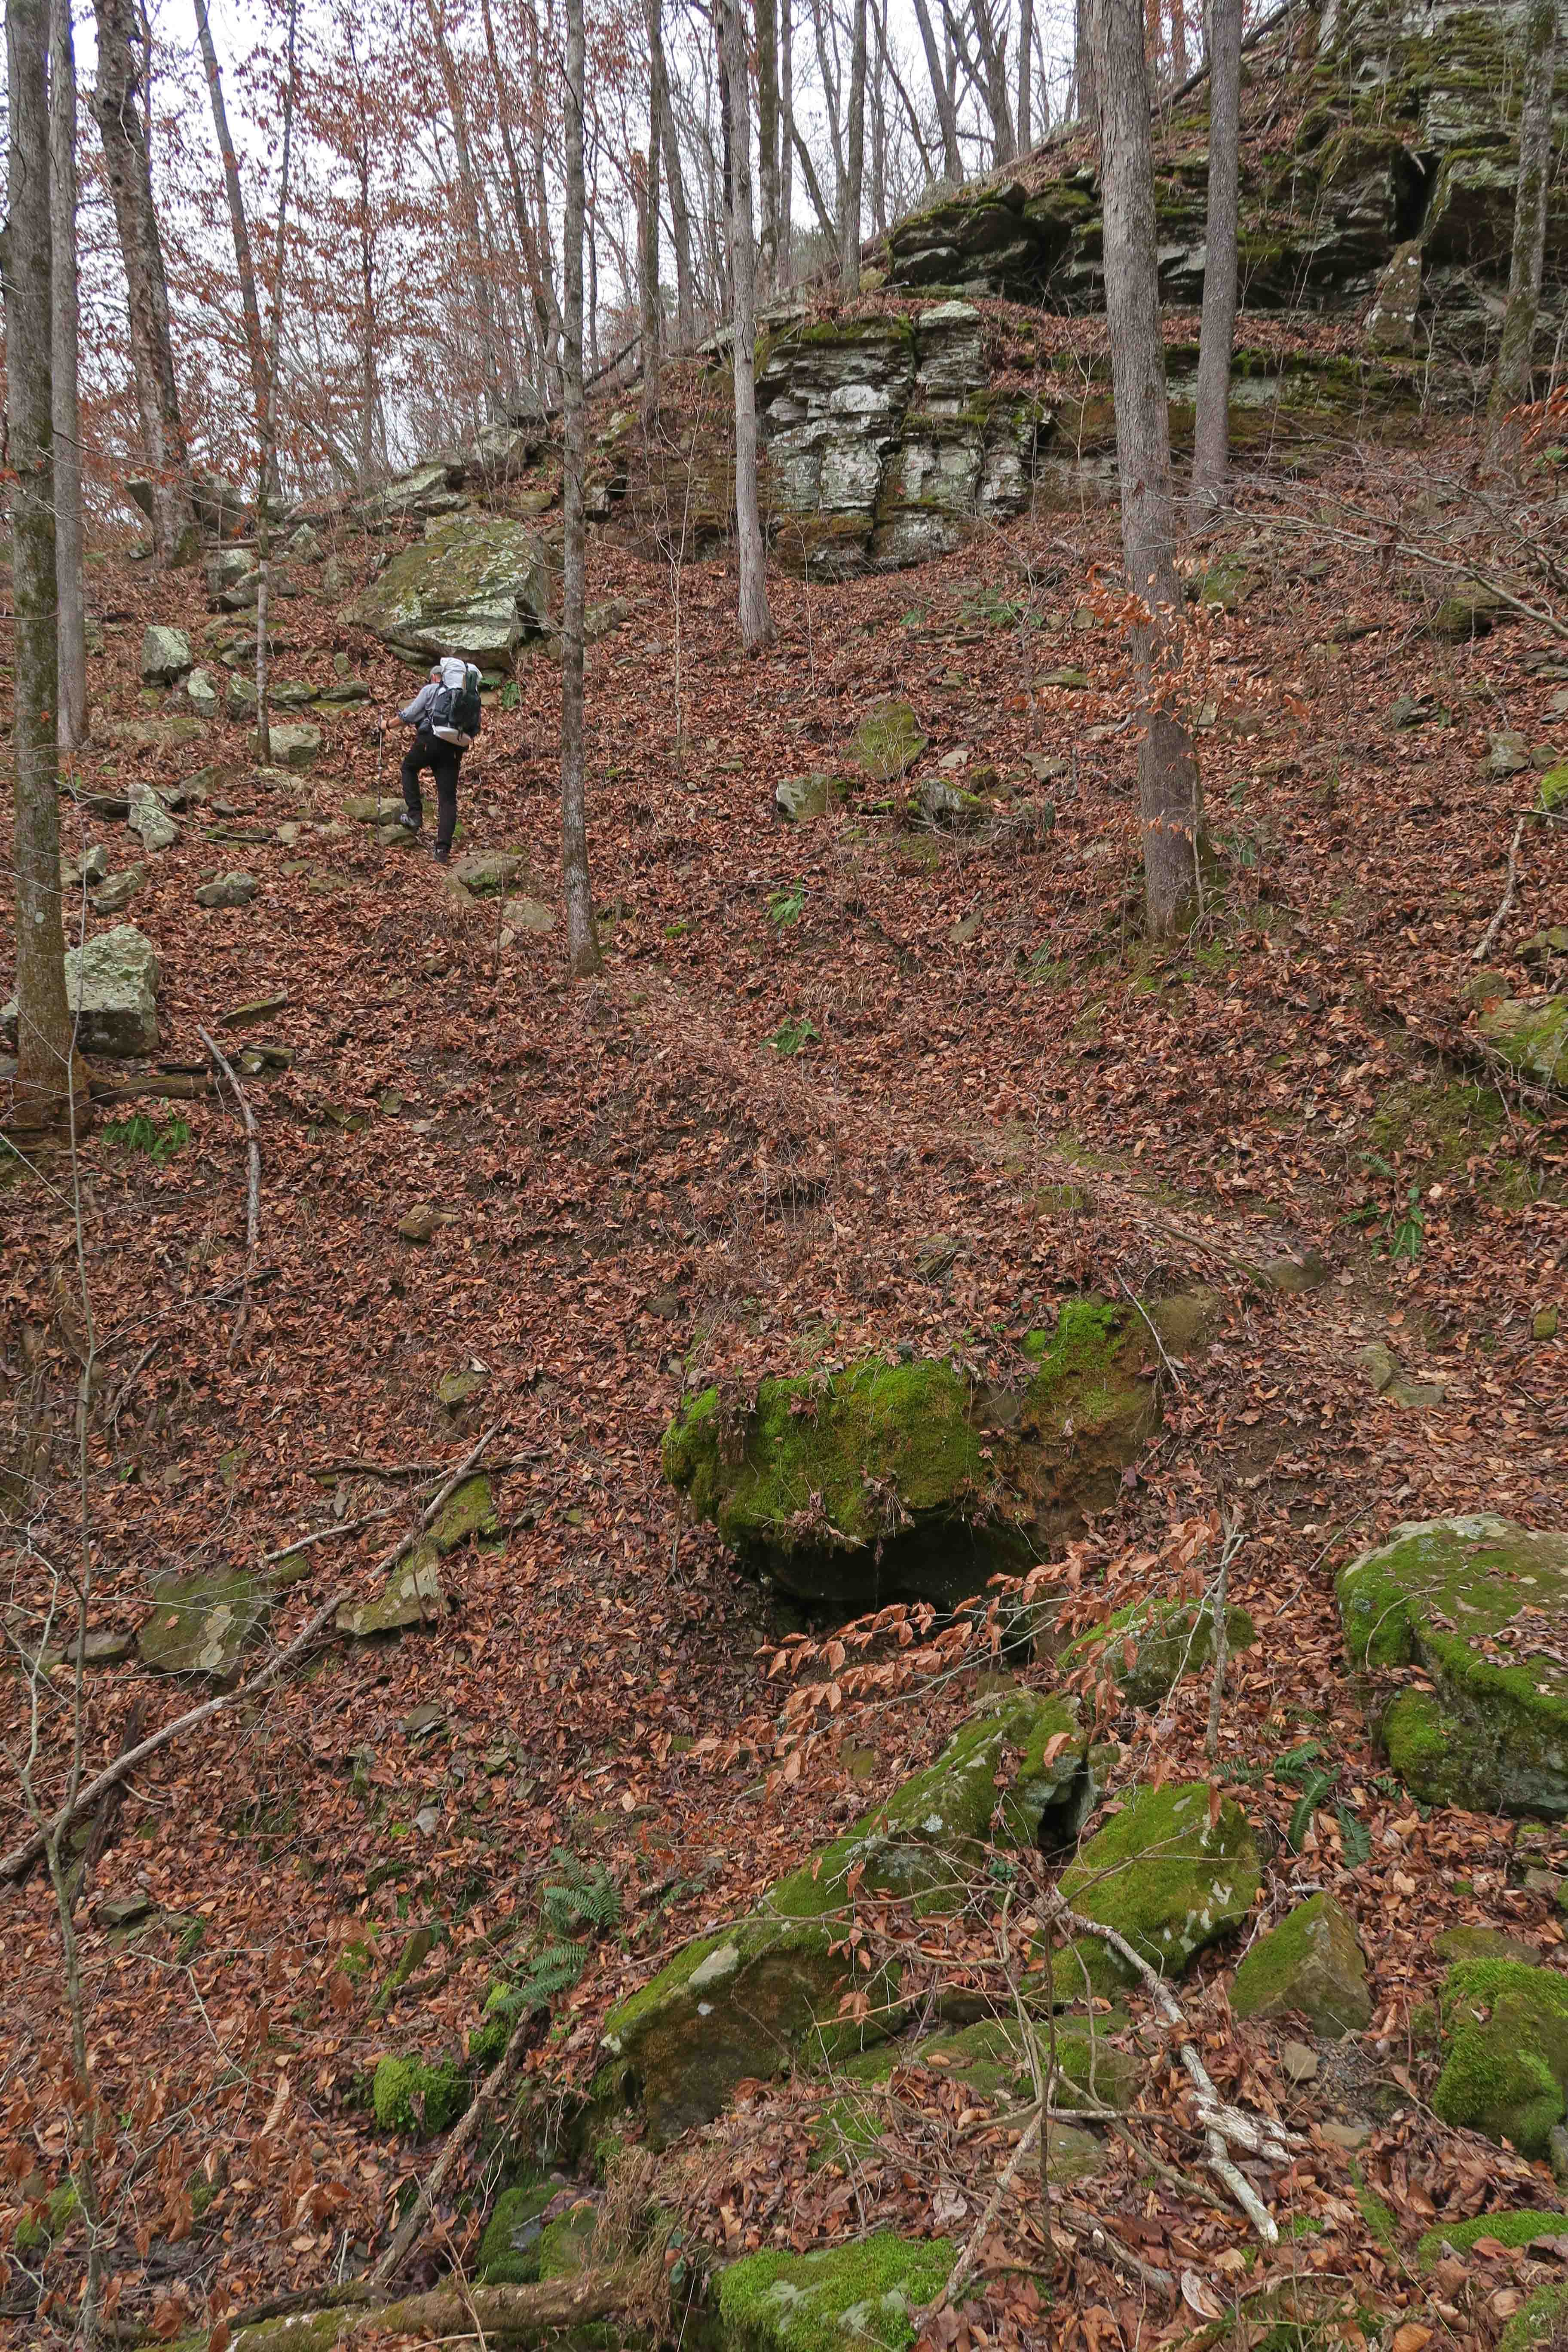
The plan was to spend two nights on the Ozark Highlands Trail. After planting shuttle vehicles, we entered from Ozone traveling eastbound. We hiked about four miles and camped close to Little Piney Creek. On day 2, we hiked approximately eight miles and camped at the Cedar Creek pool.
With the limited length of daylight during winter, dinners came early. Backpacking makes you realize how nice it is to read a while and then sleep for around nine hours before rising and walking through the next day. Such a simple agenda is refreshing!
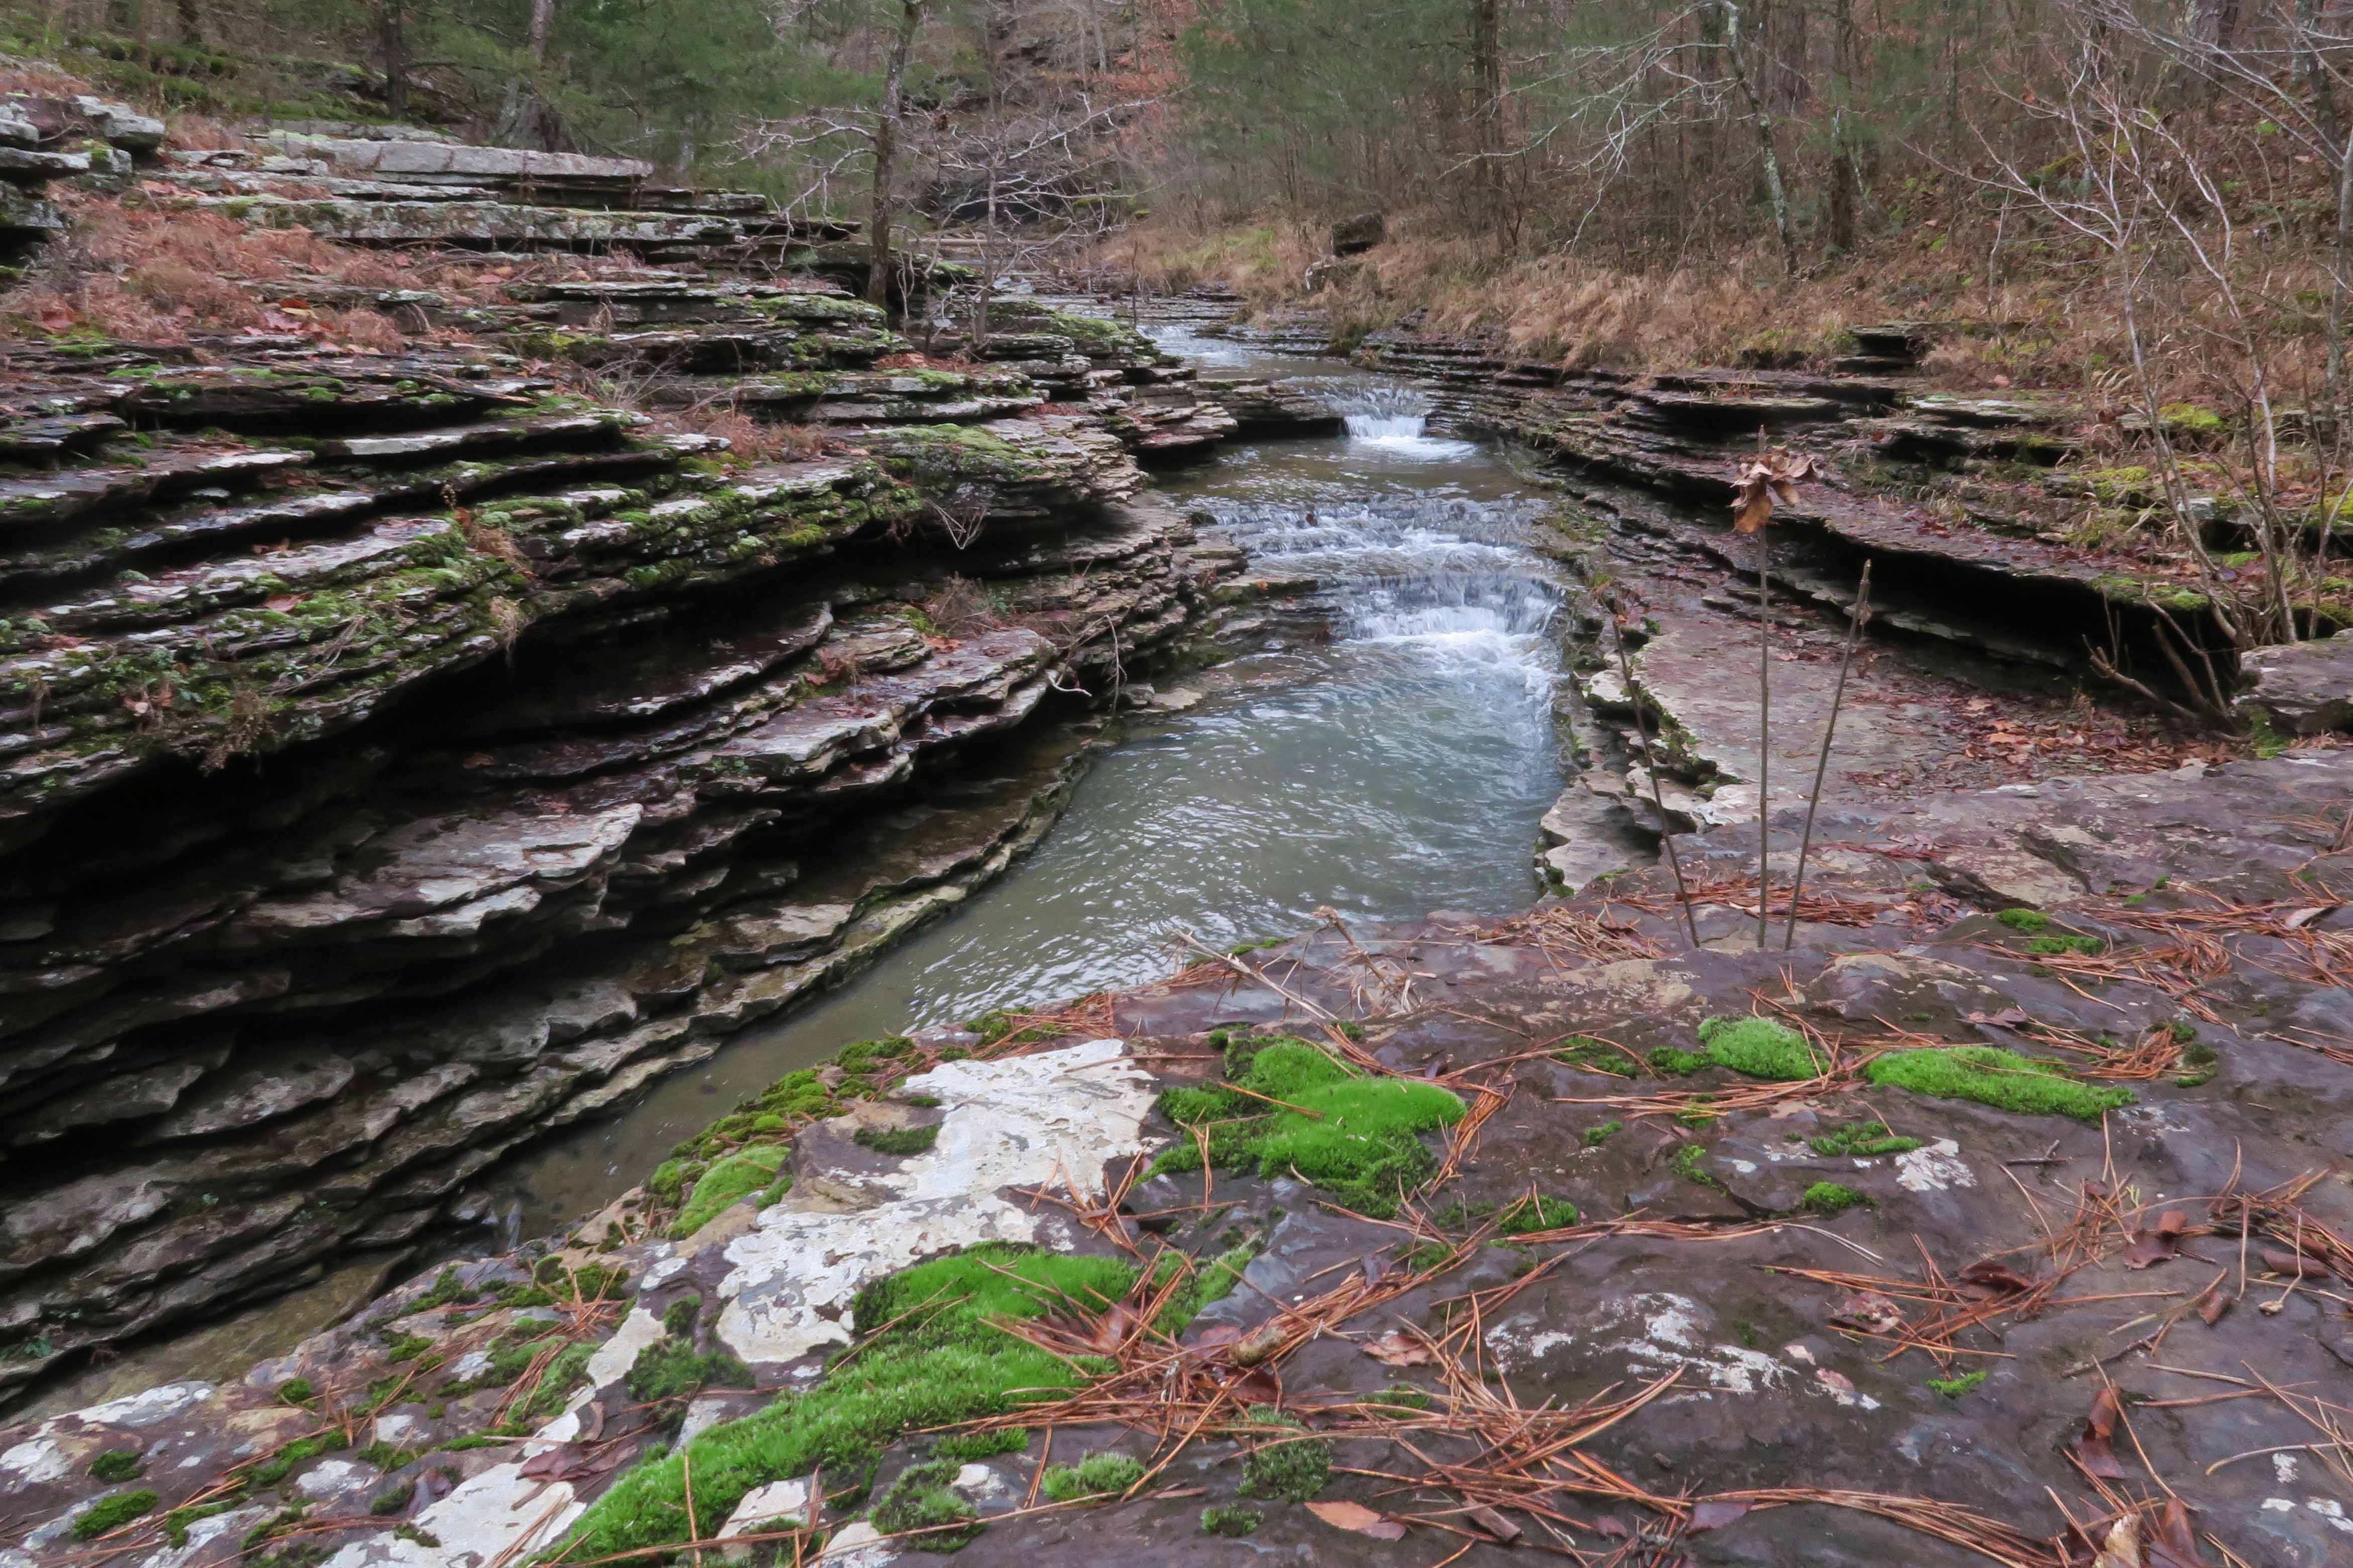
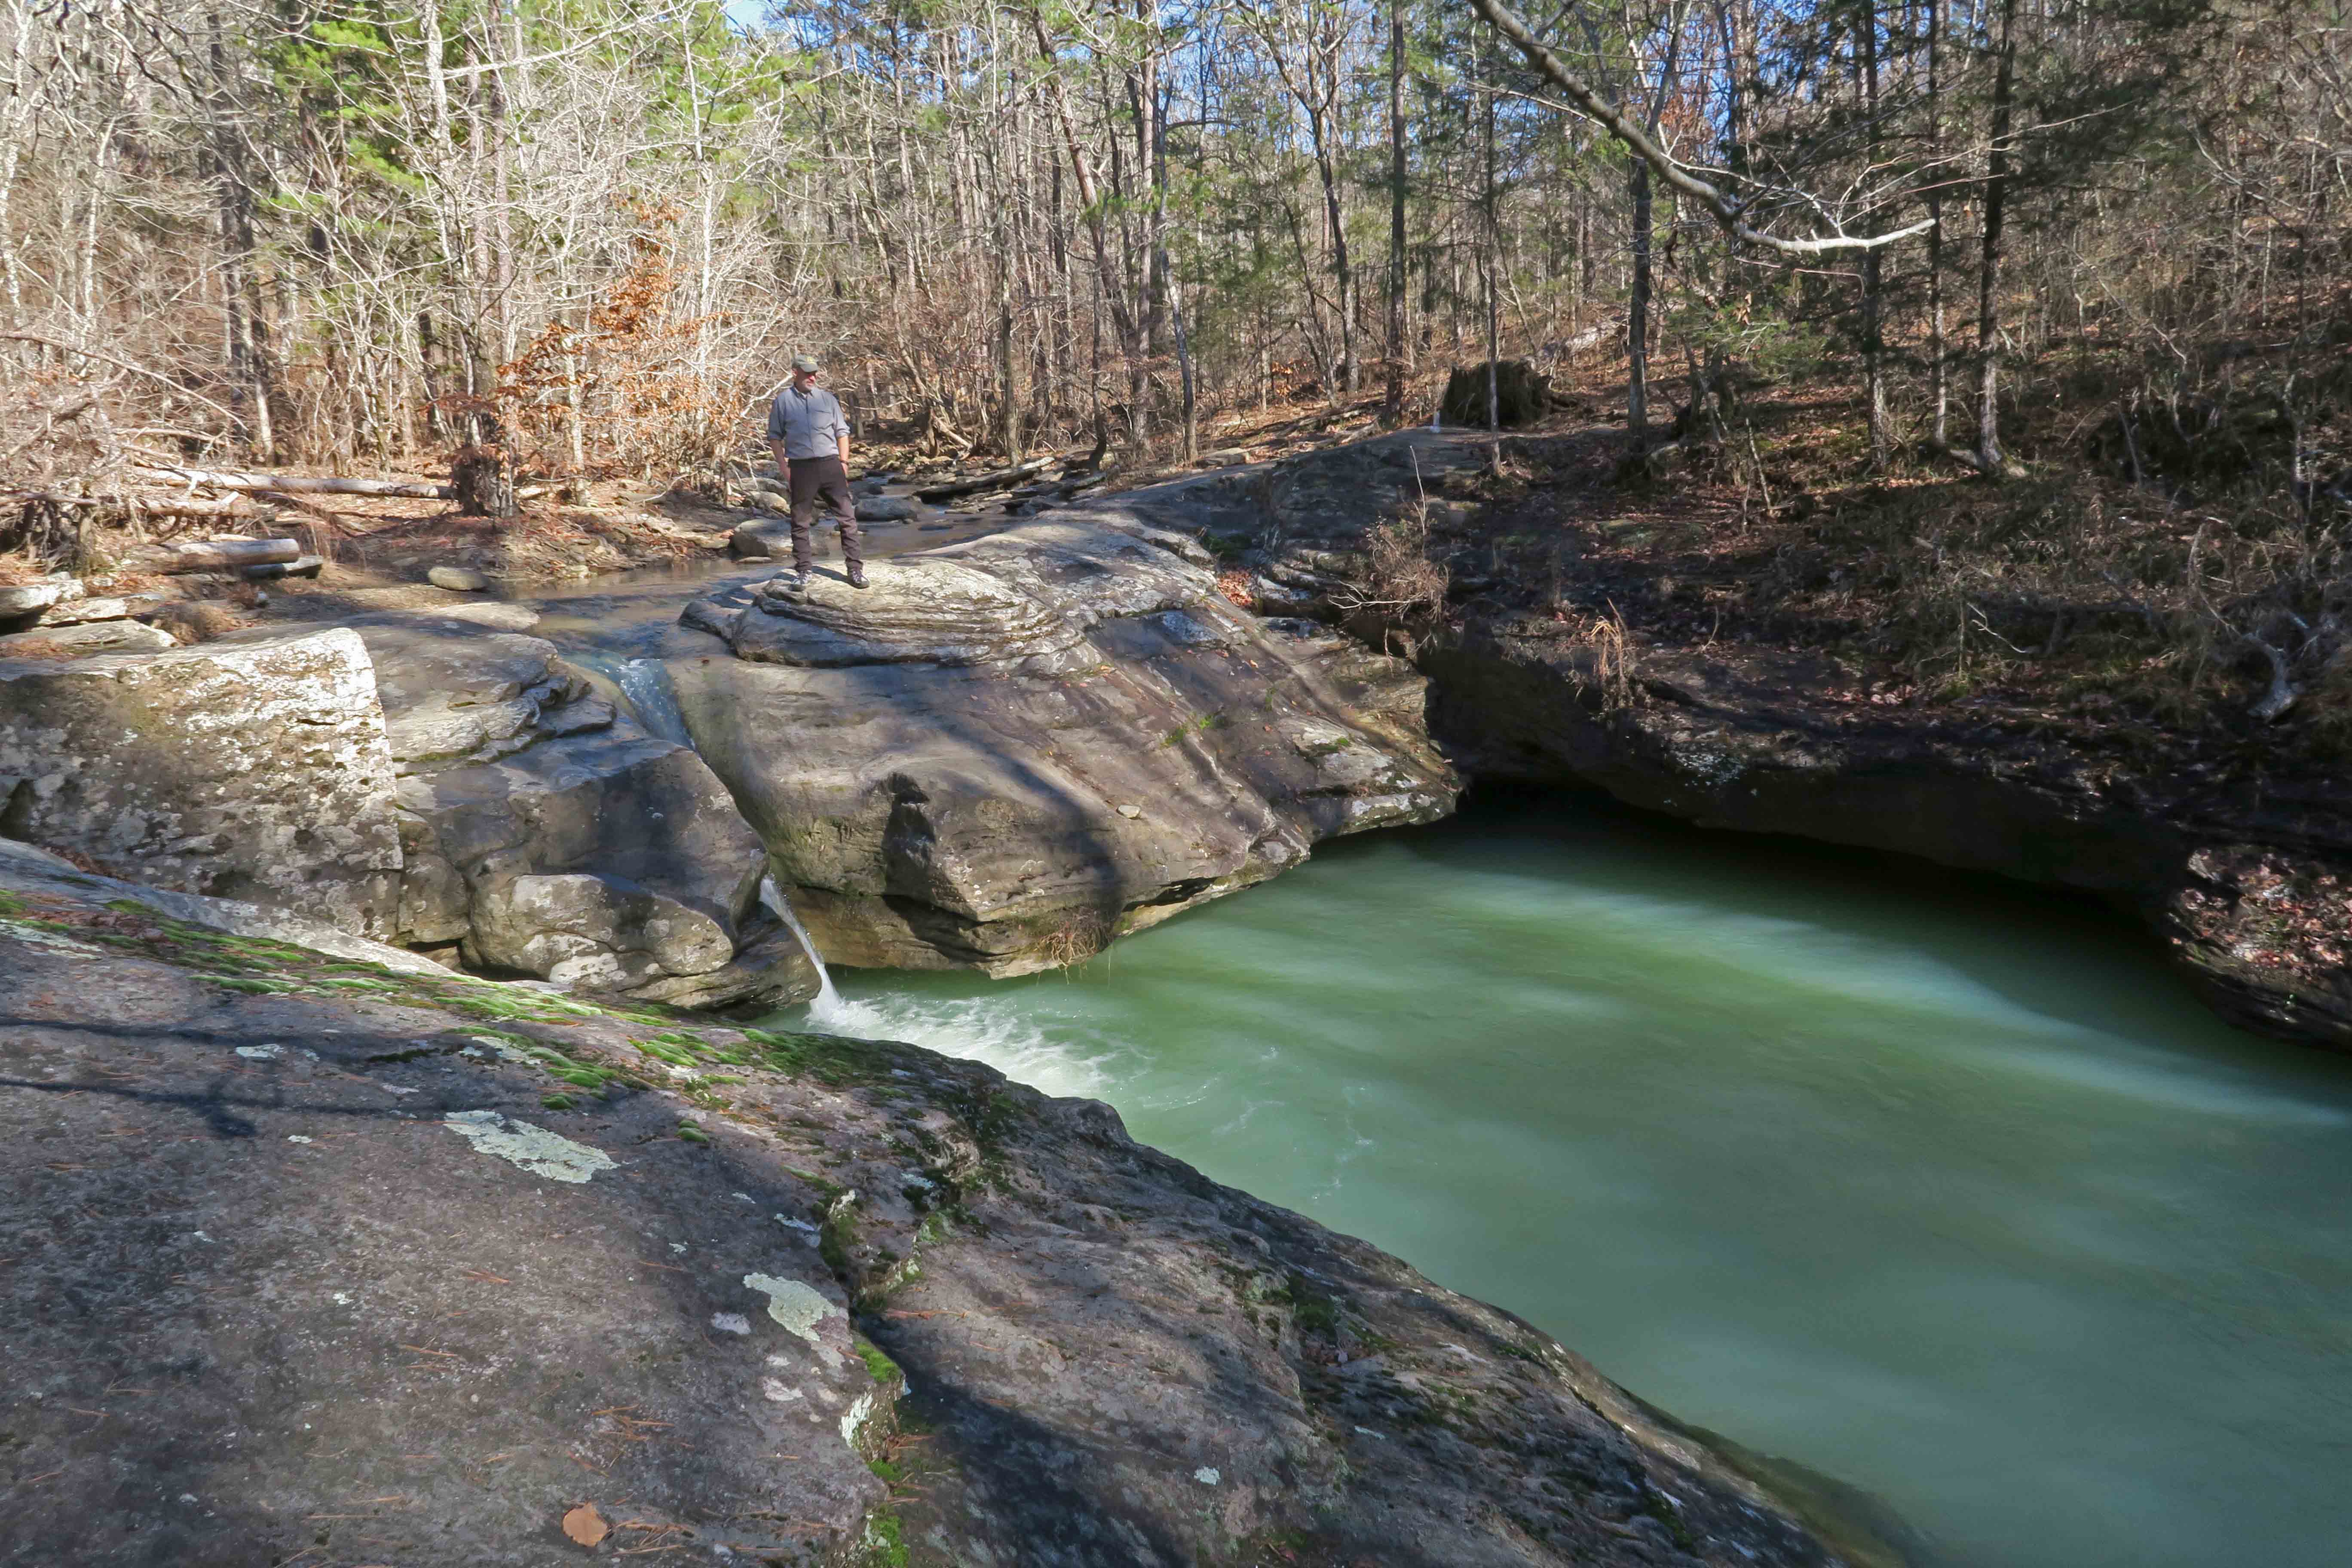
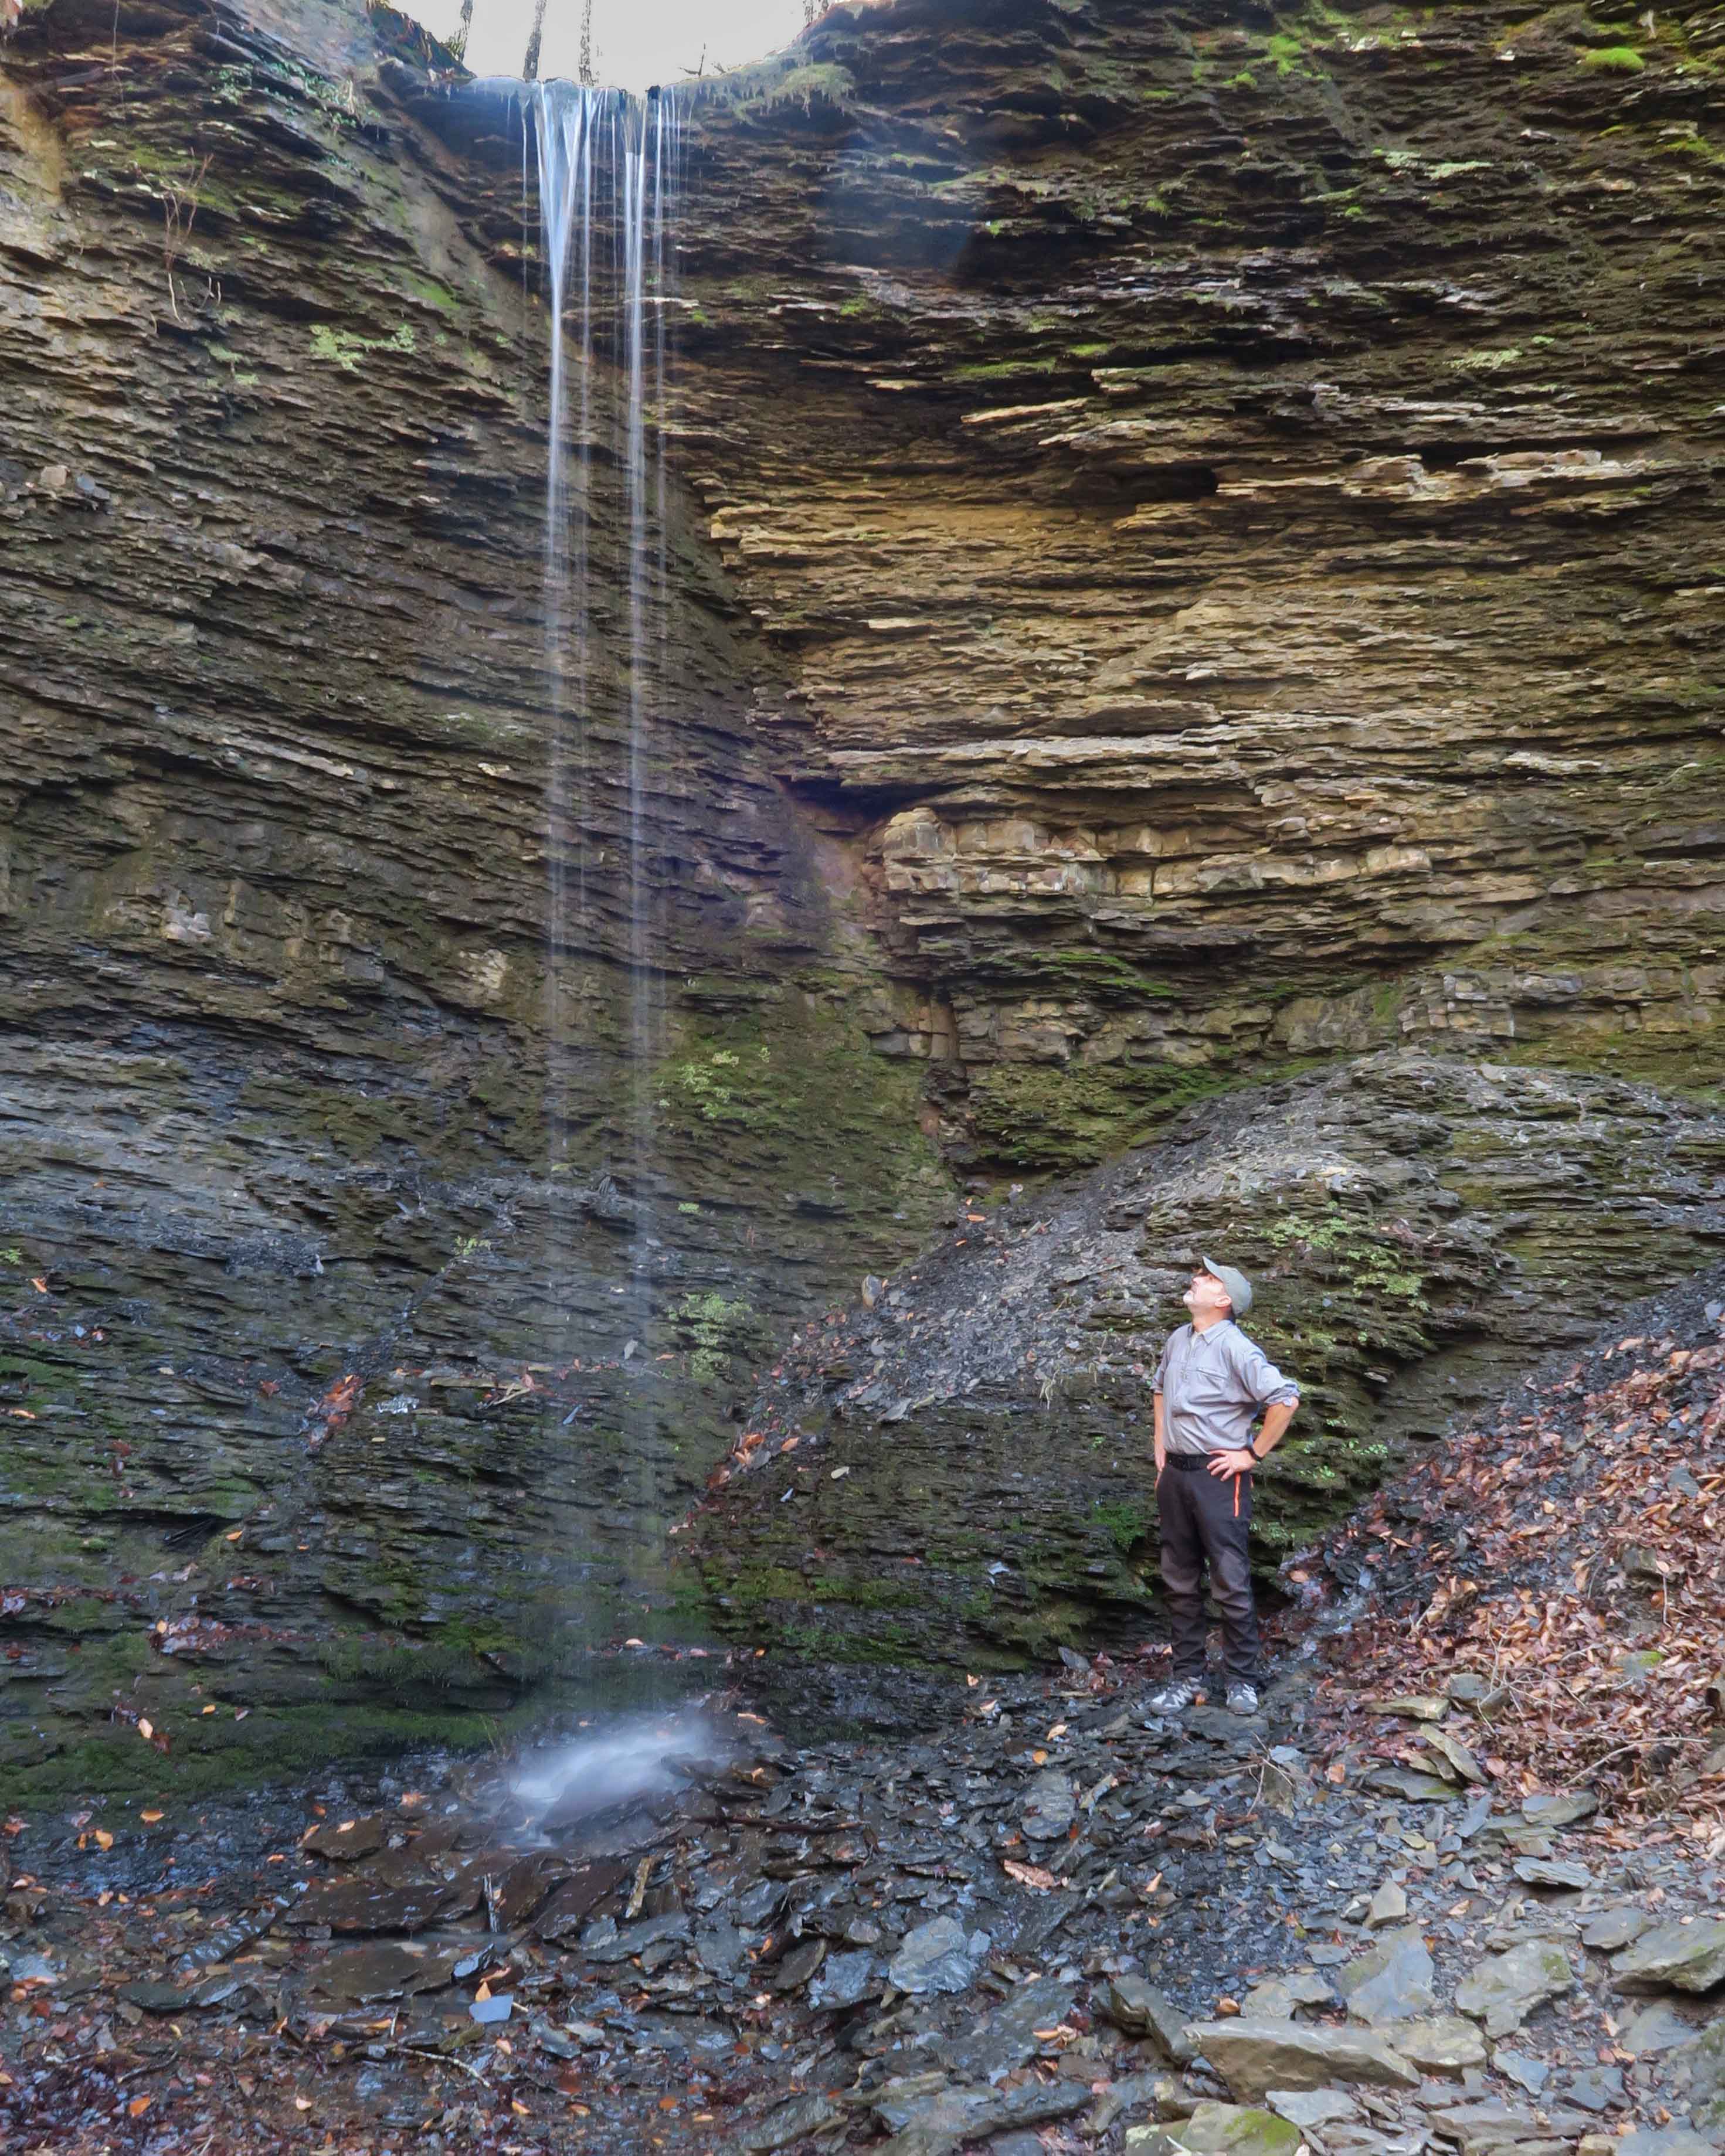
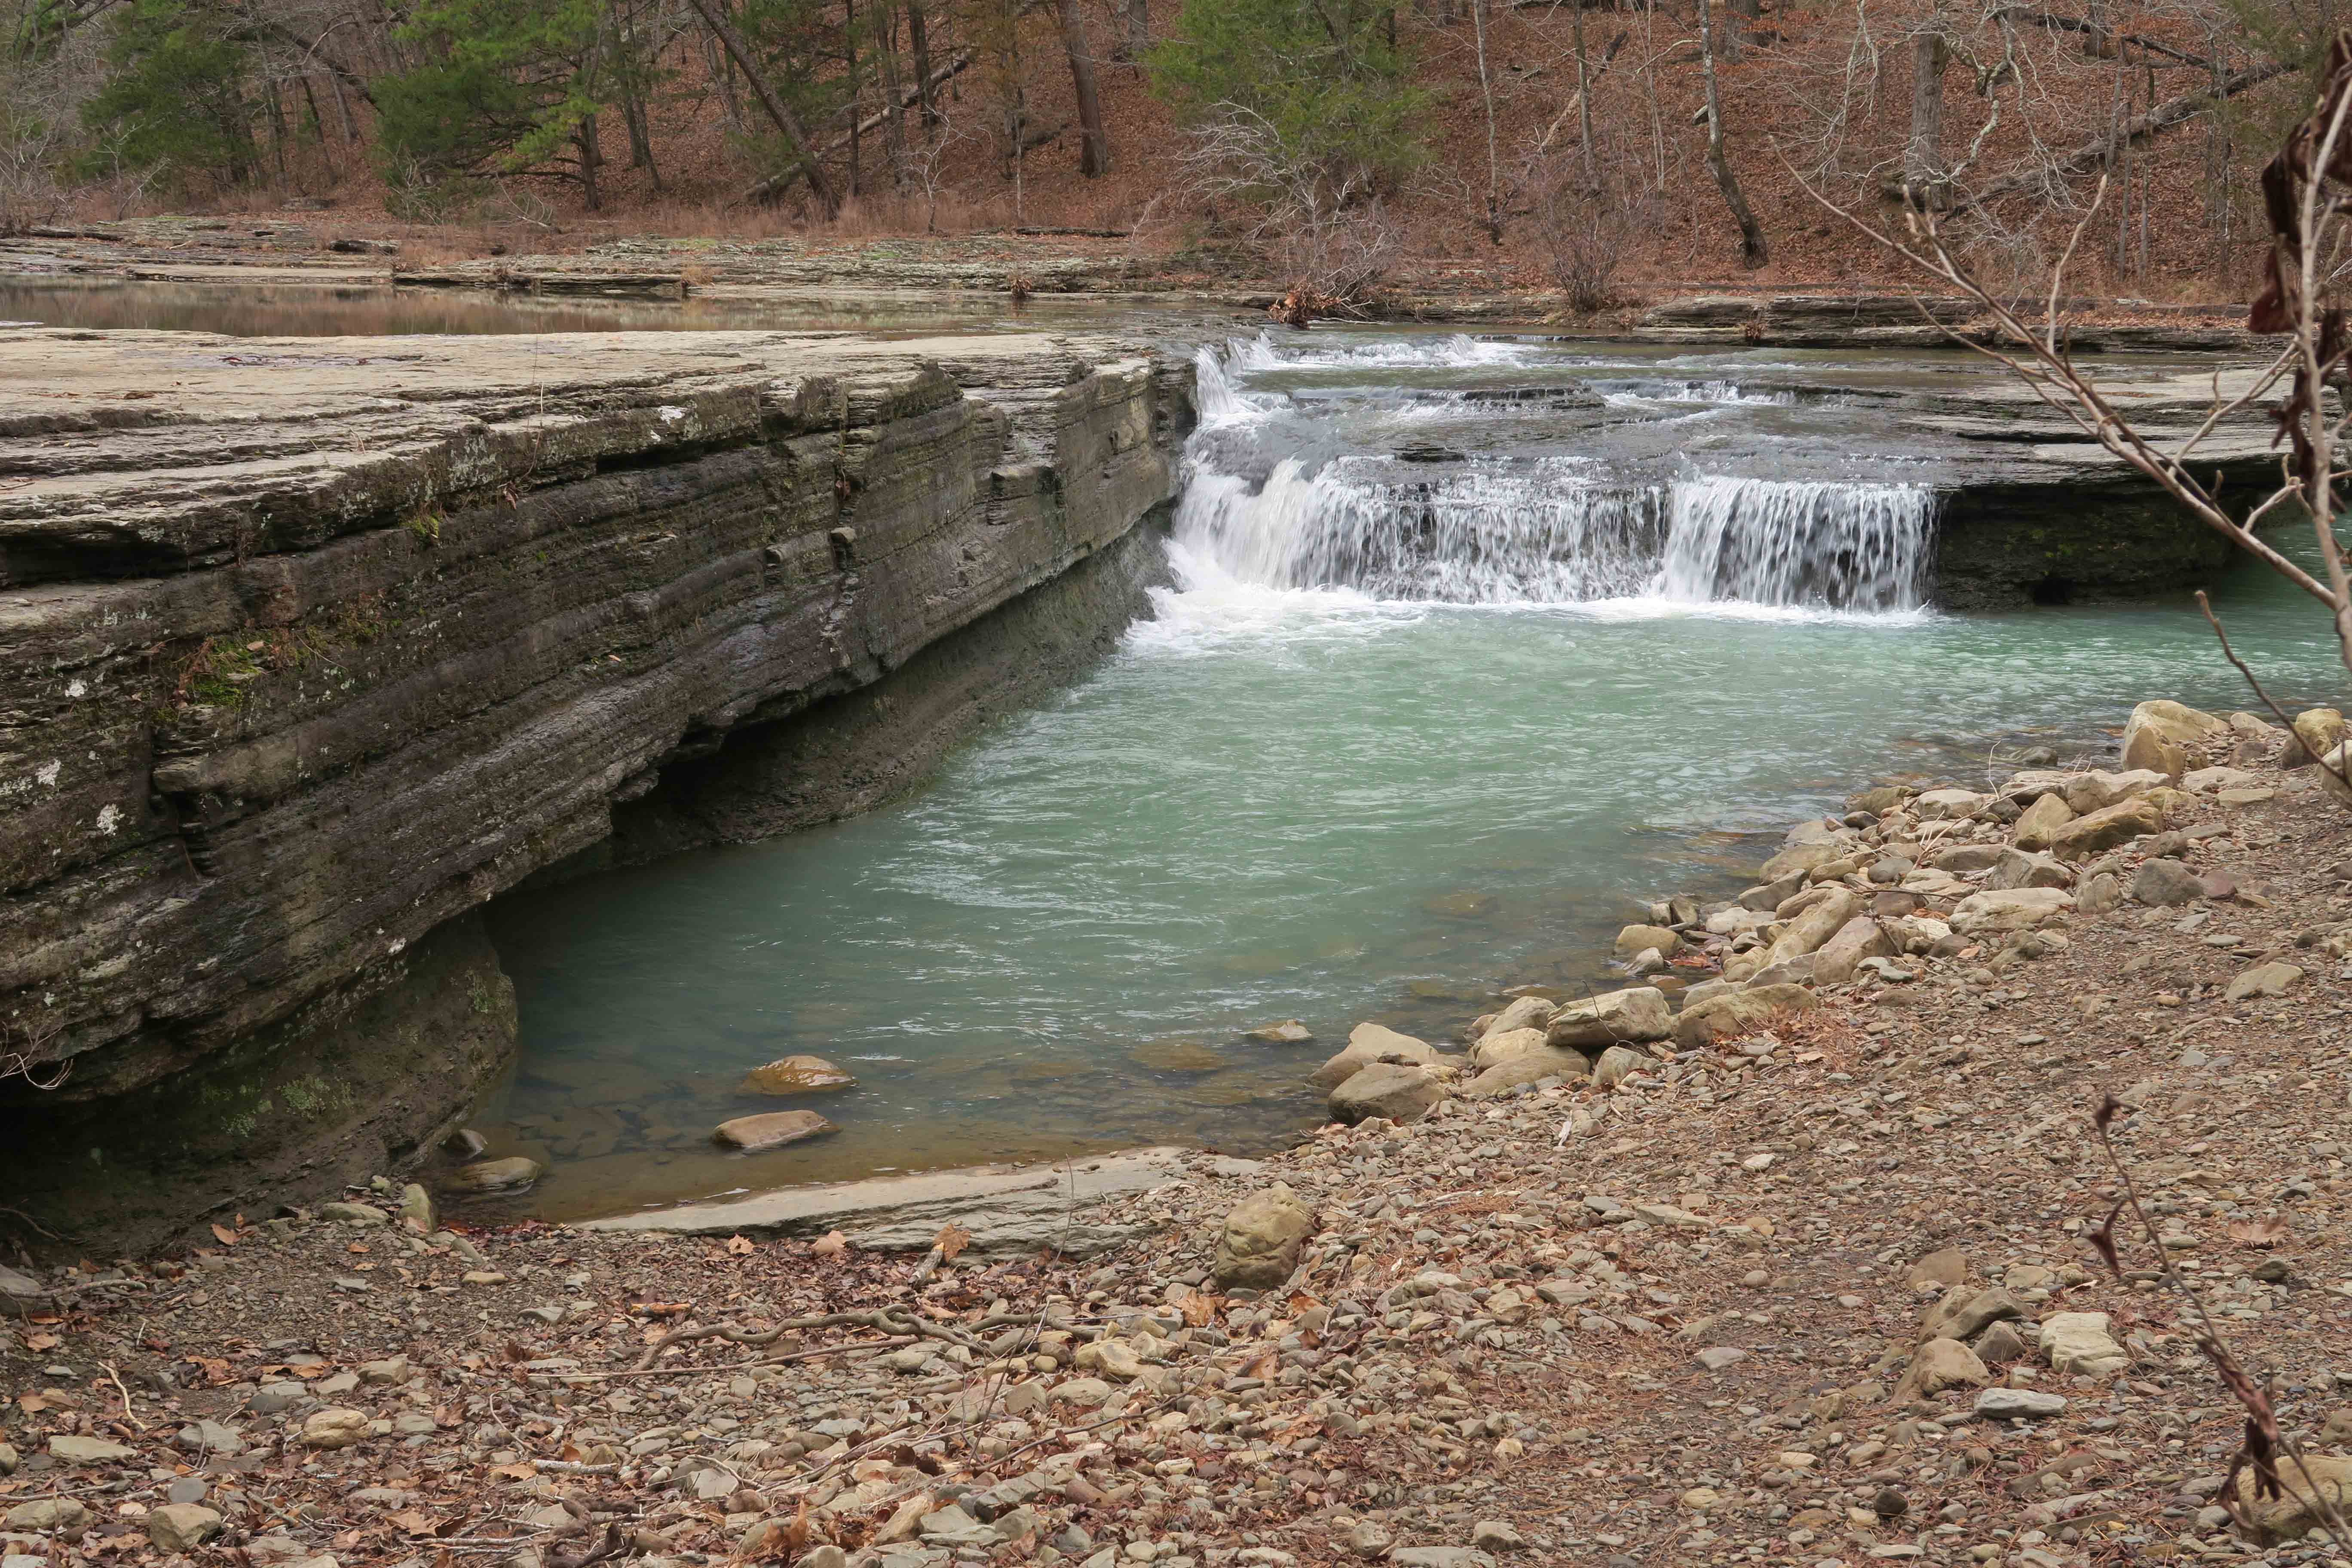
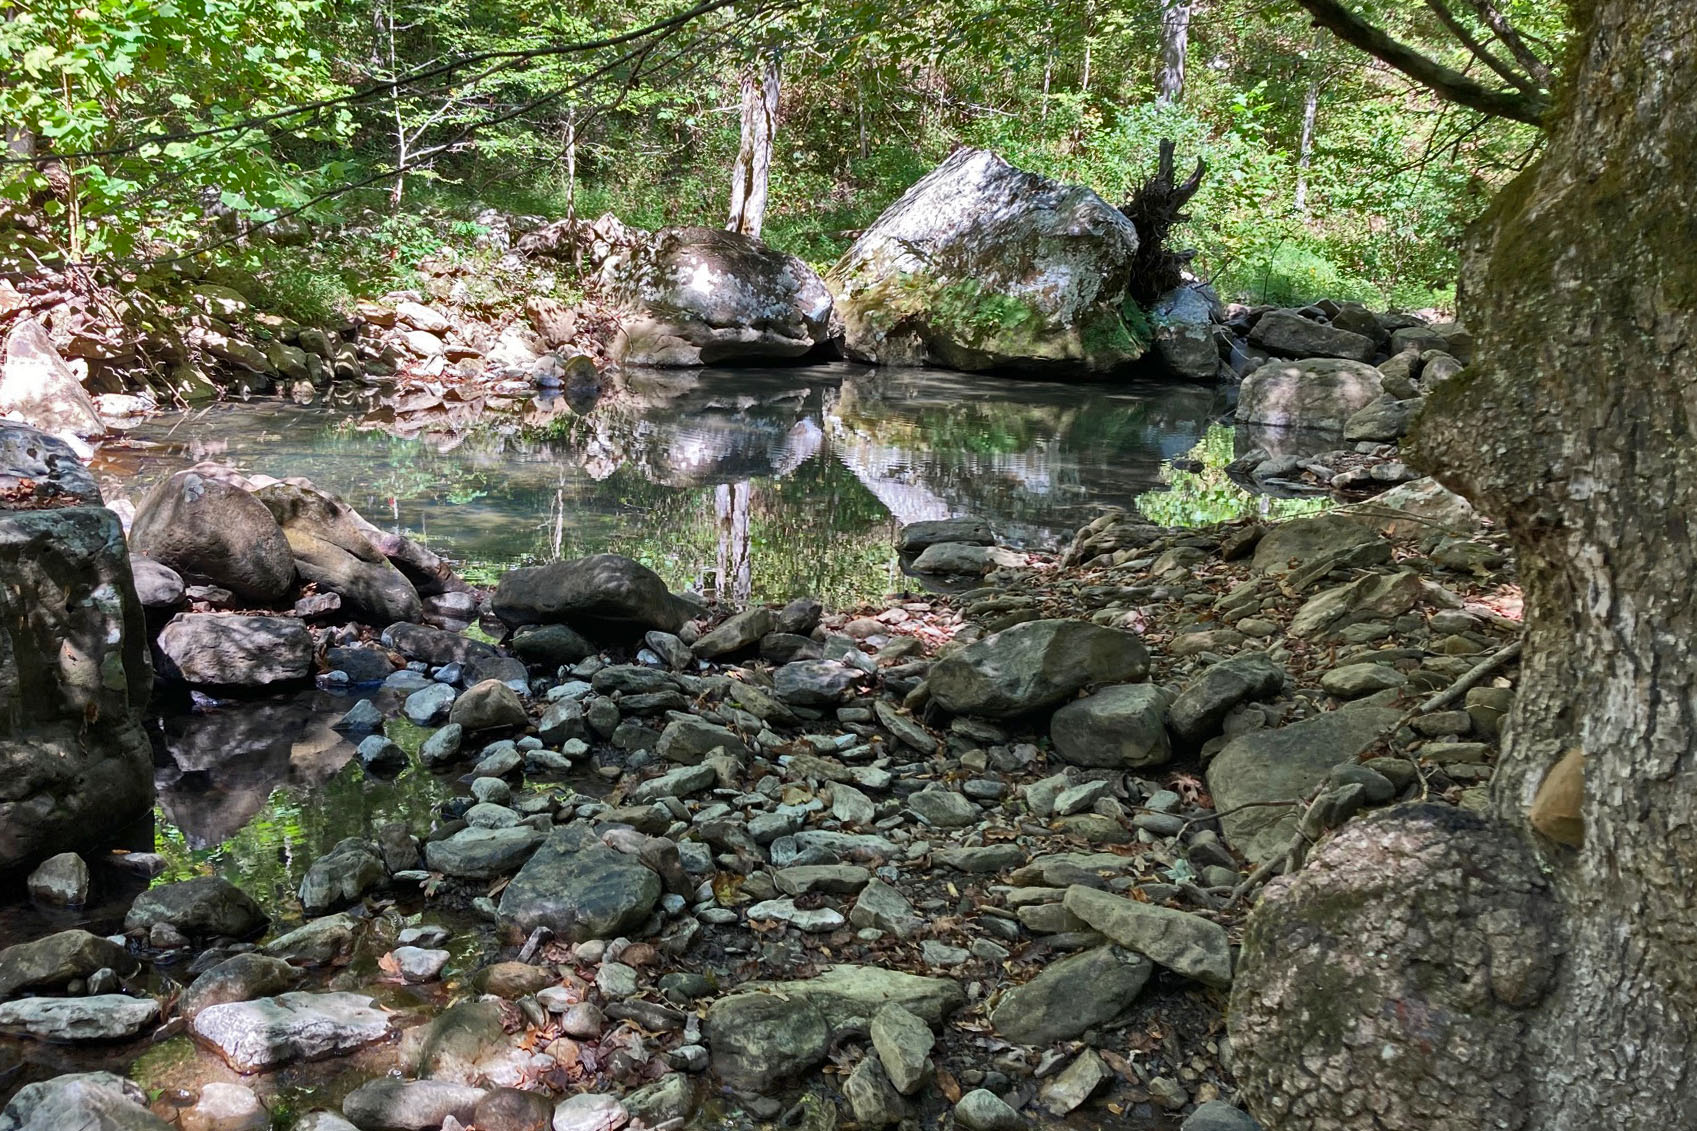
Morning sun on the Little Piney River Beaver Slide Falls (Slot Rock) is a nice side trip up Lick Creek Kerry and Bob signing in and glancing at the map. Bear Skull Falls There is spacious camping not far from the Cedar Creek pool
Haw Creek Falls is a nice stop along the trail. No one was using the Haw Creek Campground. This is a neat place with picnic tables and fire rings at each site. There are pit toilets too!
Our last day was about seven miles to the Fort Douglas Trailhead, passing through some beautiful country. I caught myself wanting to make the trail last longer by slowing down slightly toward the end.
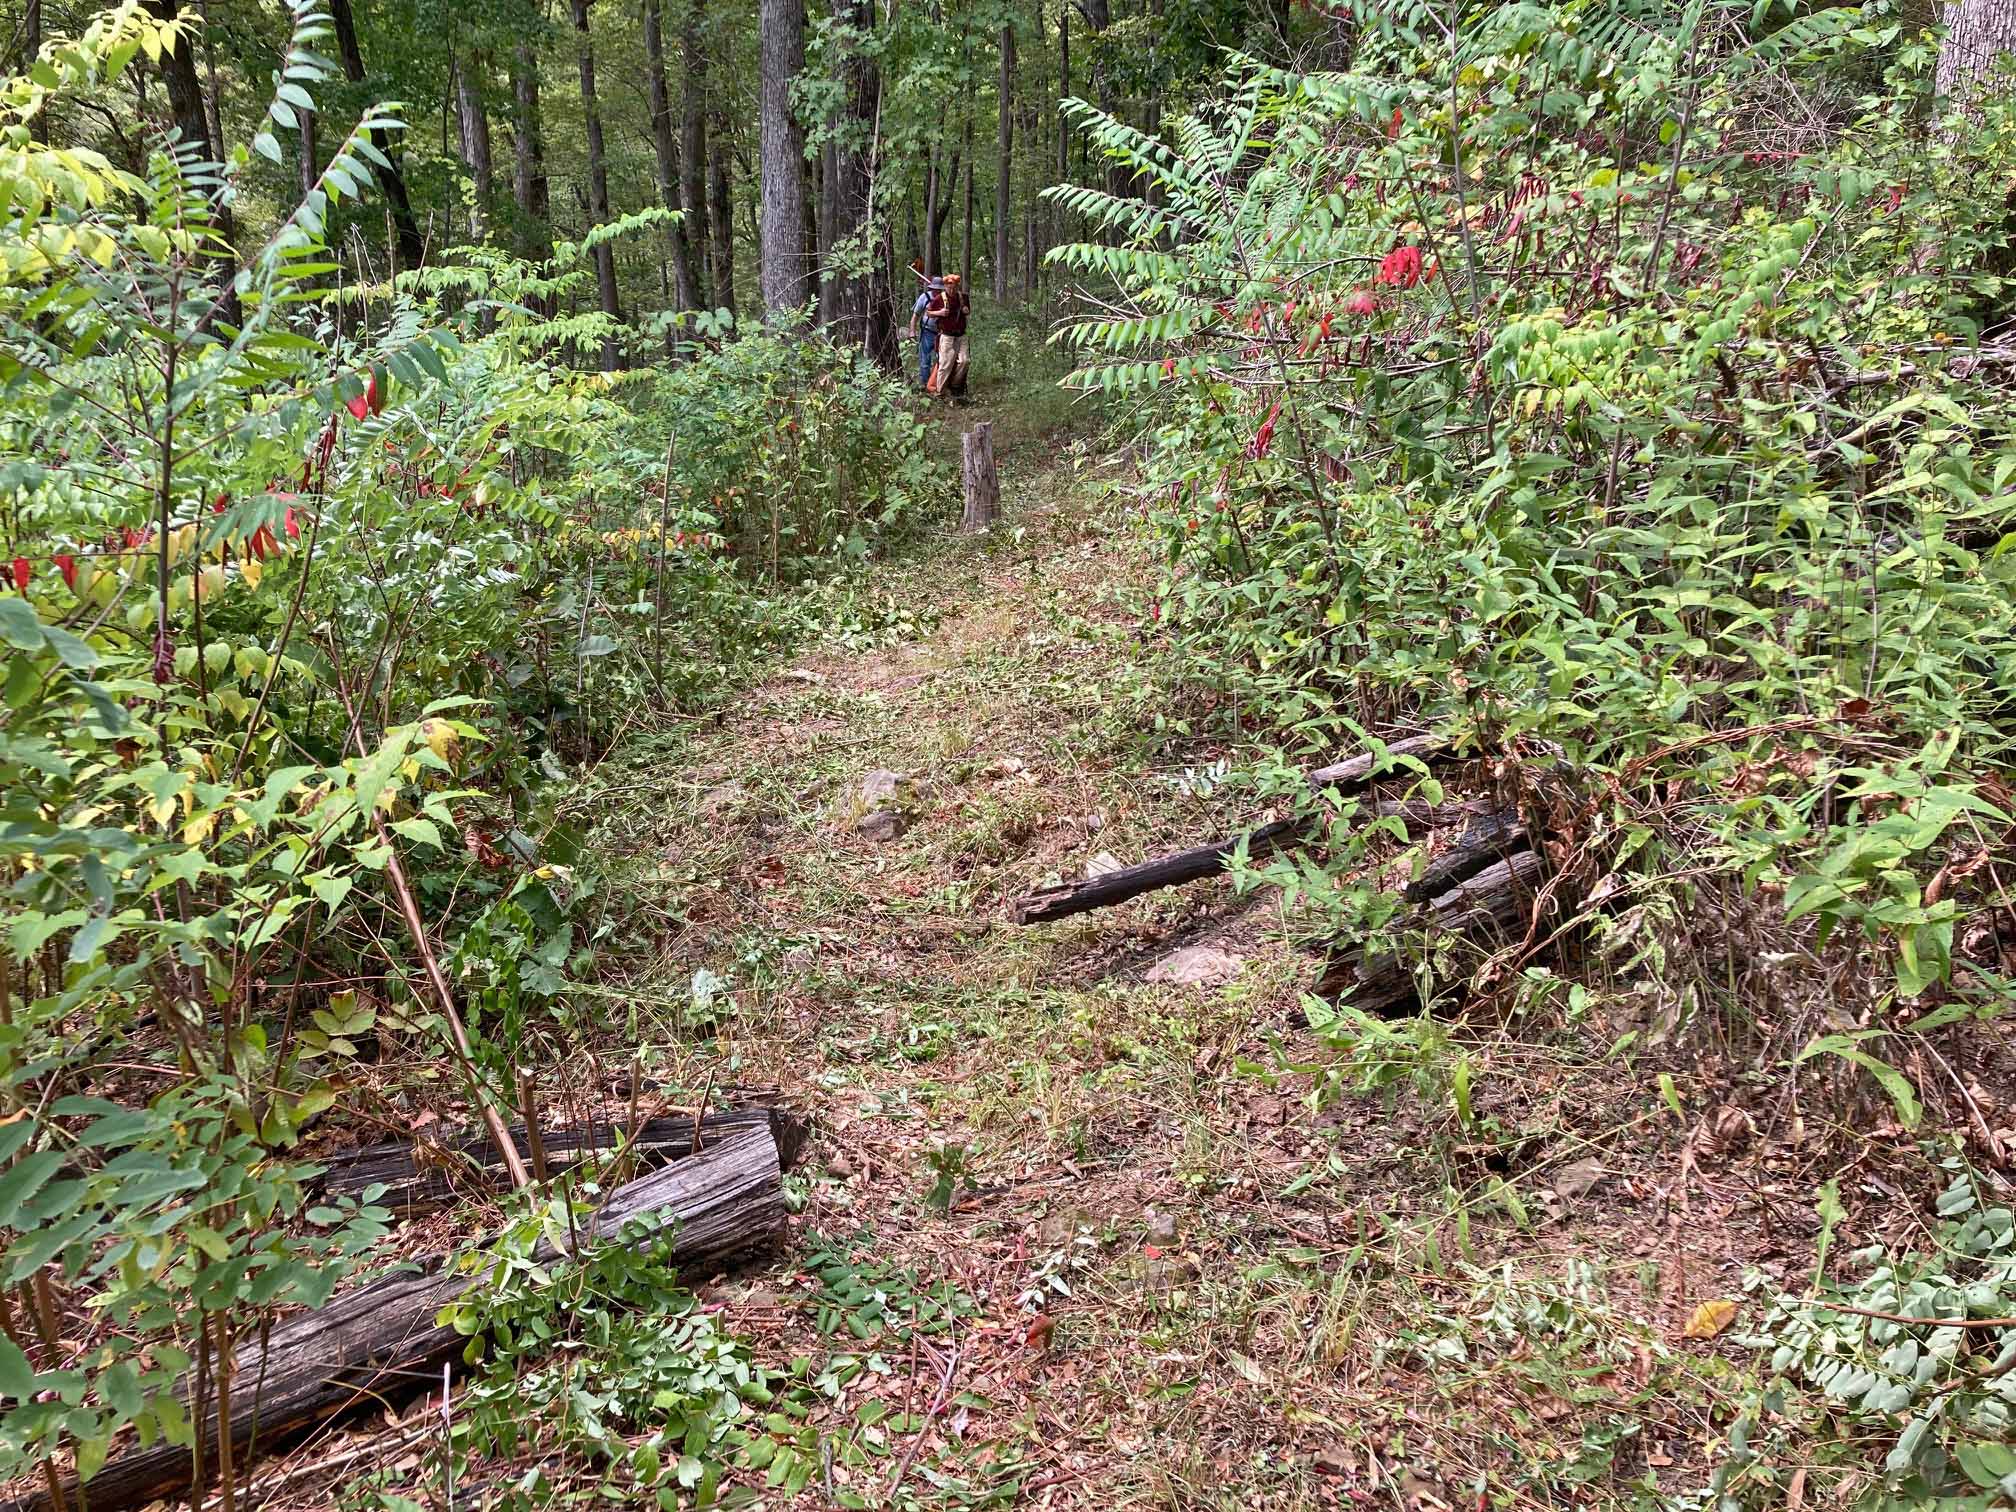
The last section after Haw Creek Campground is a beautiful walk.
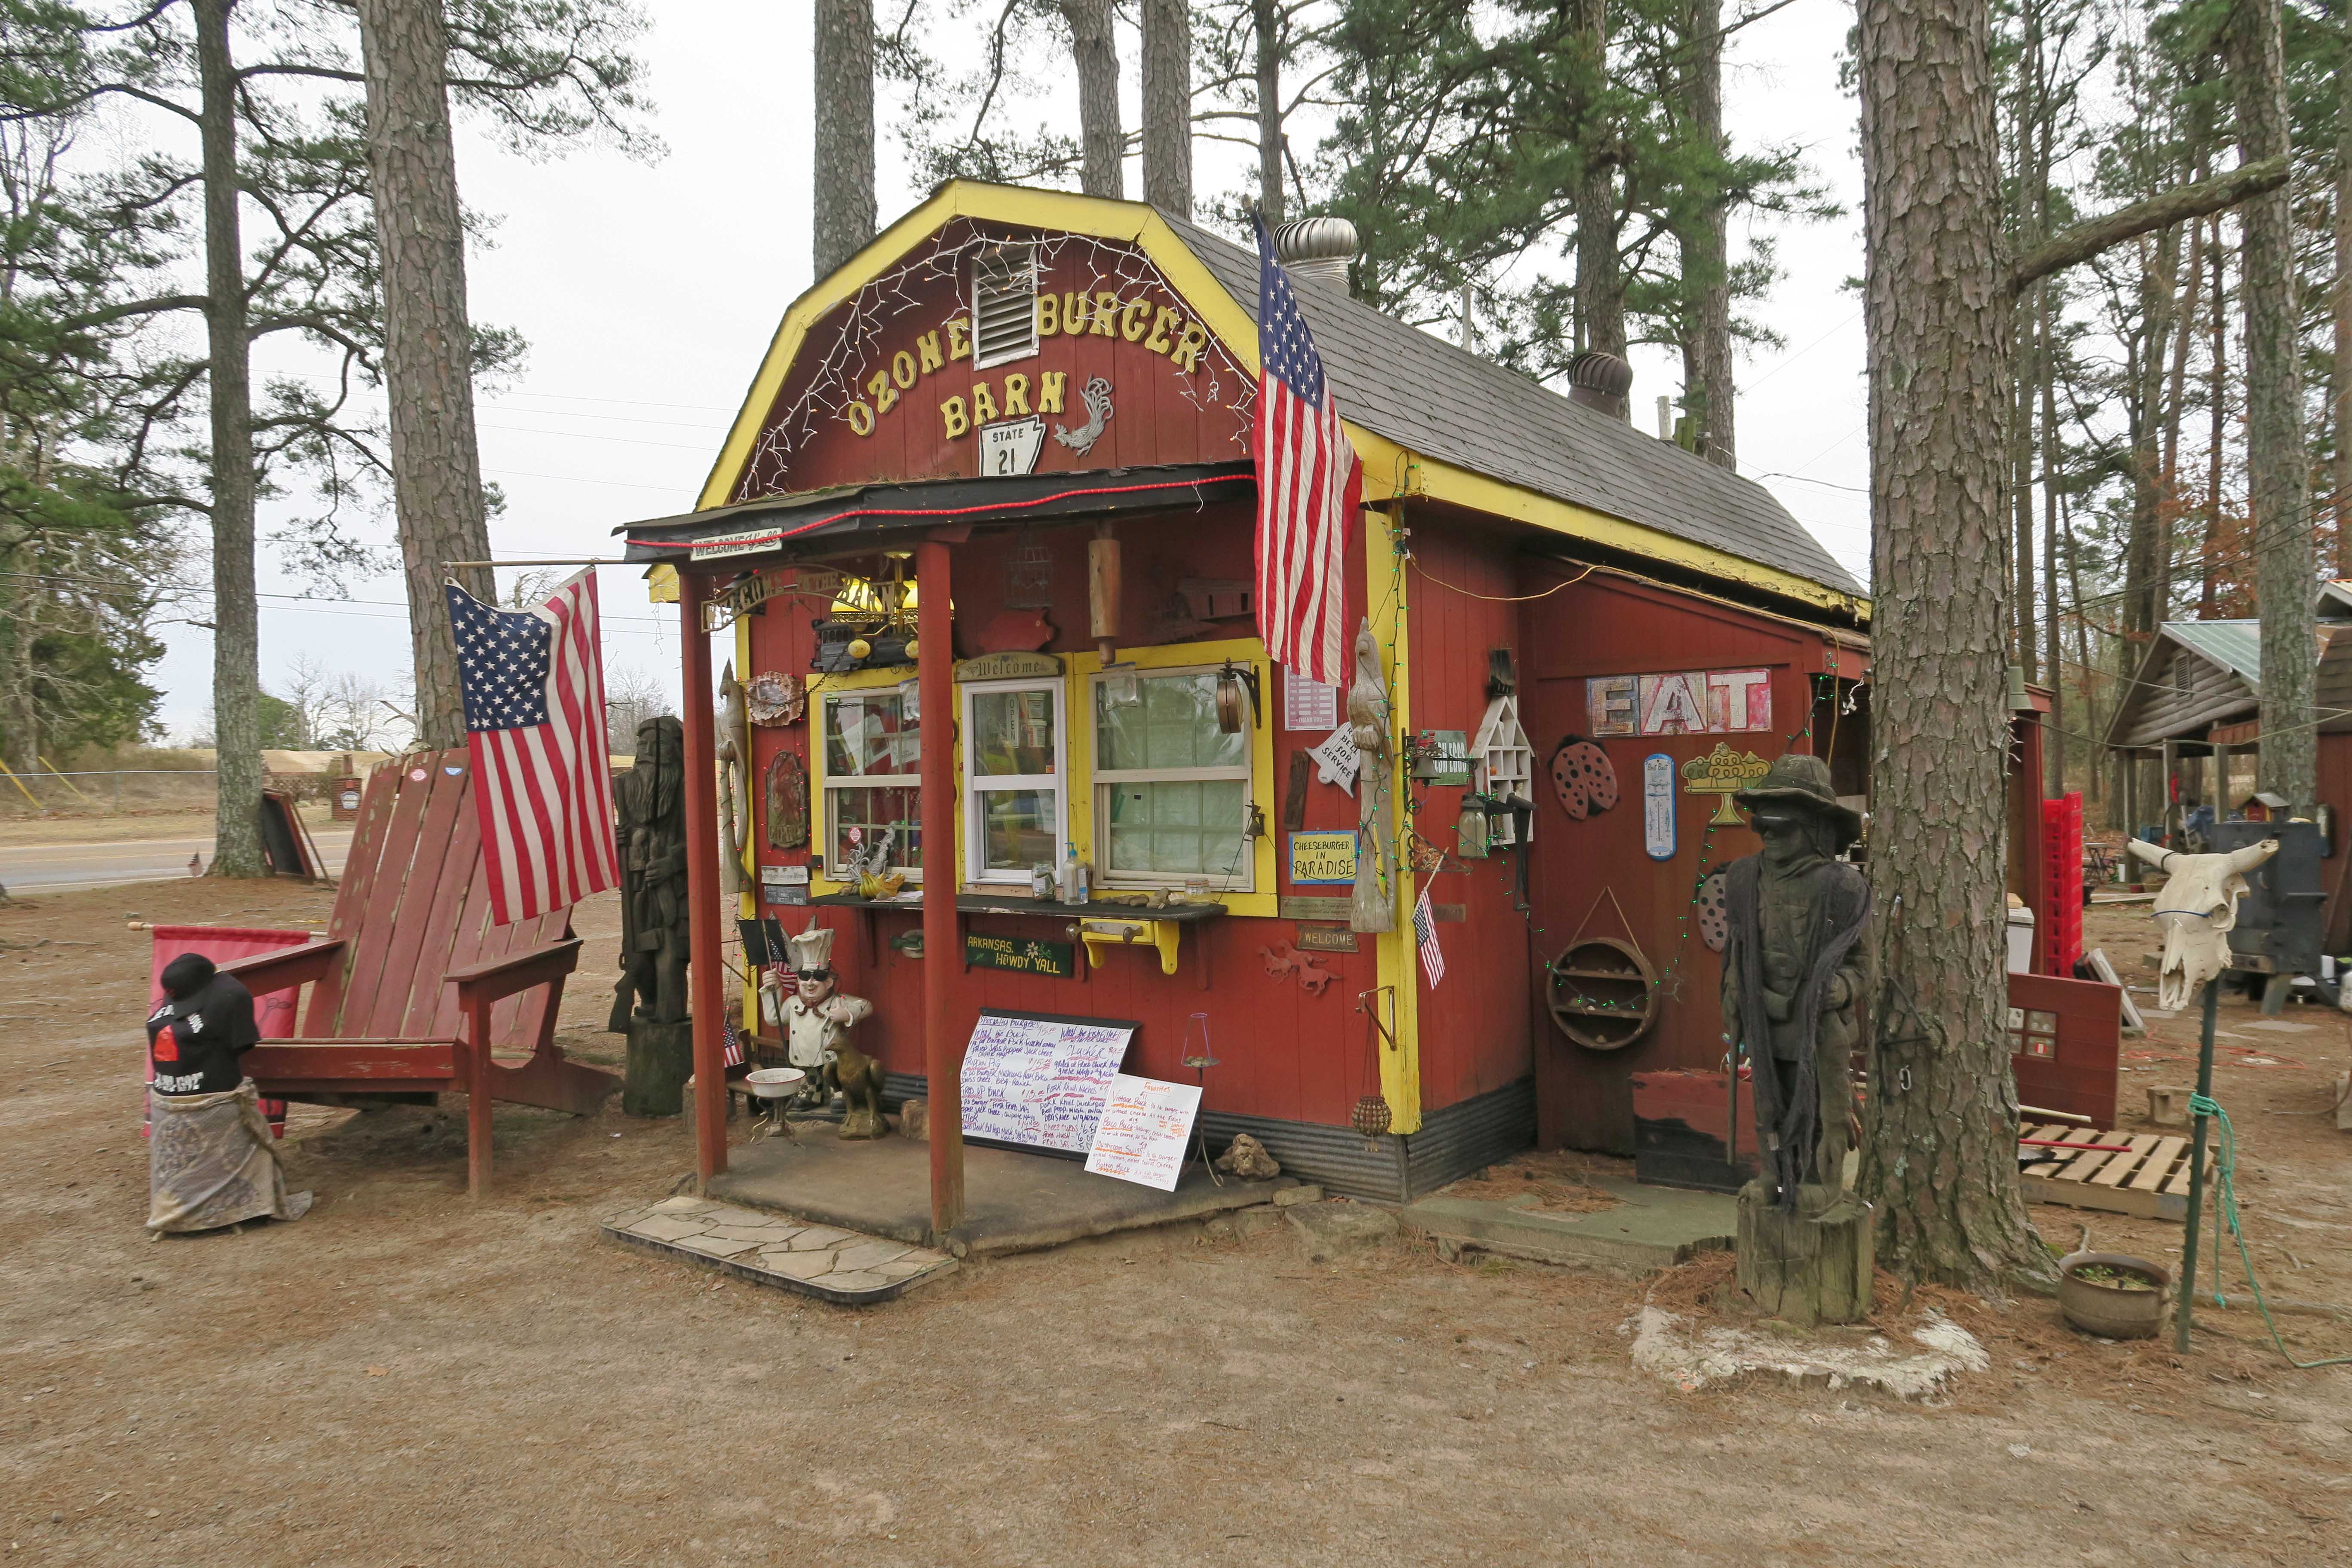
After the drive back to Ozone everyone headed home. It had been at least a couple of years since my last visit to the Ozone Burger Barn, so I stopped in and it was better than ever! I highly recommend the “Vintage Burger” with all the old fashioned toppings. They had a nice fire going outside which made waiting for food a pleasure.
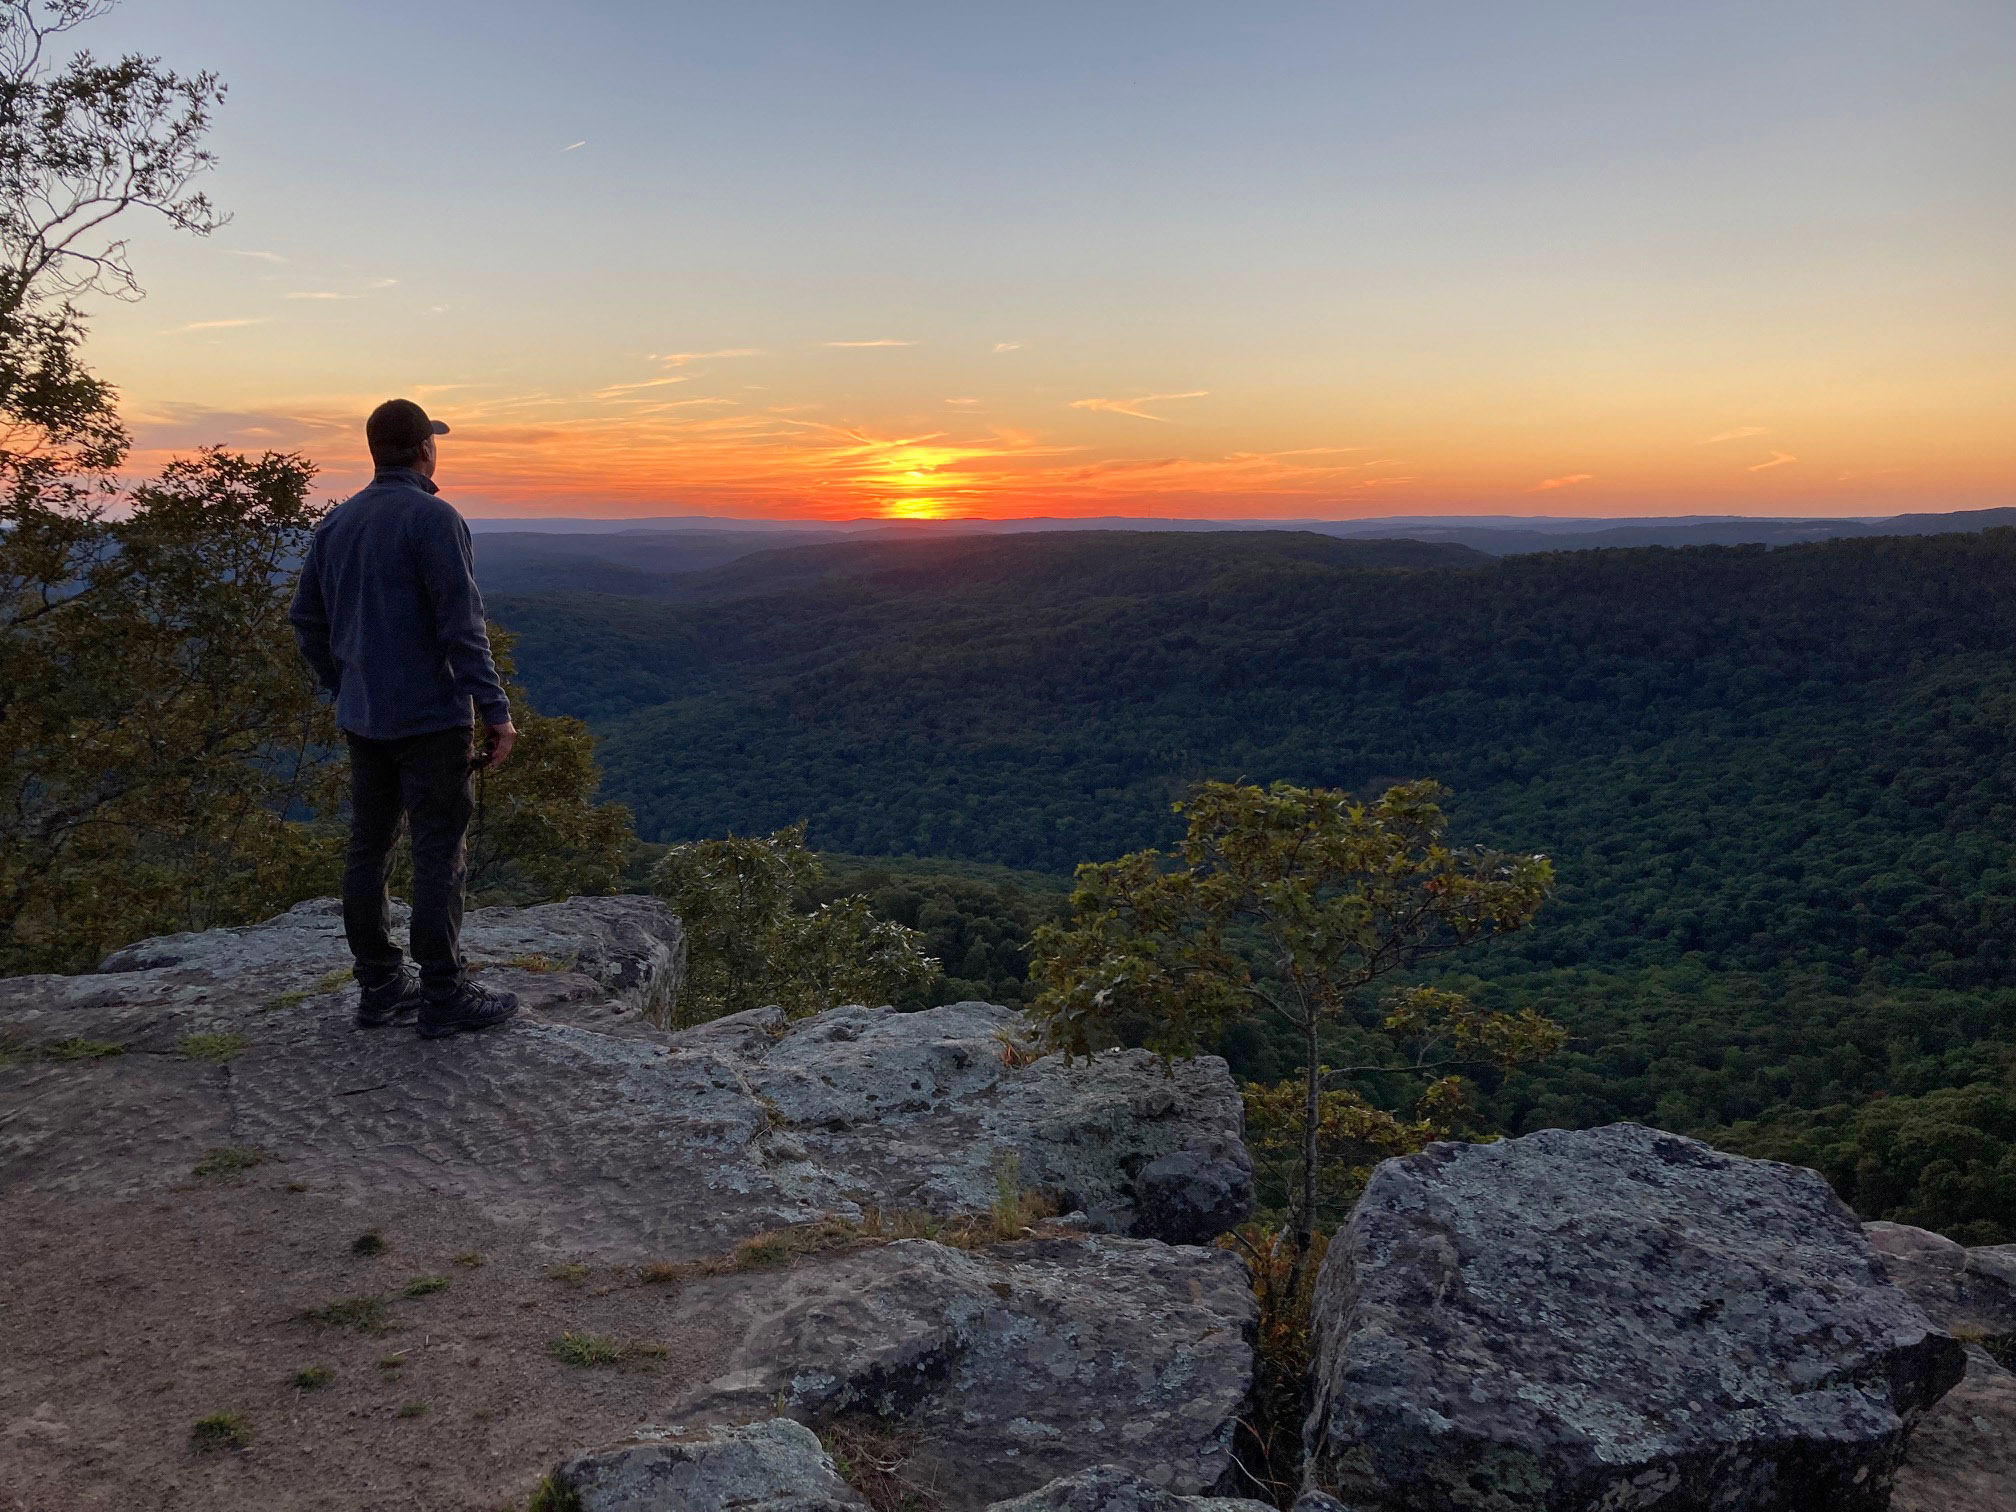
Chris enjoying the view along White Rock Mountain Loop
Trail maintenance in the Ozarks is difficult, especially after a wet summer. In September, volunteers begin clearing trails for hiking and backpacking season. The work is hard and often done in the heat. This post sings the praises of volunteers with the Ozark Highlands Trail Association. They view trail maintenance as part of backpacking preparation, and love of the Ozarks!
Small pool on White Rock Creek
Some maintainers carry water filters since, even when conditions are dry, pockets of water might be found in reliable creeks. White Rock Creek pictured above flows most of the year, but on this trip, water trickled between pools.
Lunch break
Here’s a video clip showing the work done with hedge trimmers and weed eaters.
Clearing vegetation with a hedge trimmer head on a weedeater.
Trail work is slow but satisfying.
Volunteers enjoy walking back to vehicles on newly opened trail.
The Shores Lake/White Rock Loop is one of the nation’s great backpacking loop trails and is open, so get out and enjoy fresh trail maintenance! While you’re out there, give the trail some love by leaving no trace of your passing. If you come across someone working on a trail, give them a word of thanks and consider joining them in the future. It will increase your appreciation for all the trails you walk.
Here in the Ozarks, most of us consider June, July, and August off-season for backpacking. We continue to do day hikes and check for ticks afterward, but sleeping in the woods doesn’t go well in heat and humidity. Officially, September 22 is the beginning of fall, so it’s time to get ready for backpacking season.
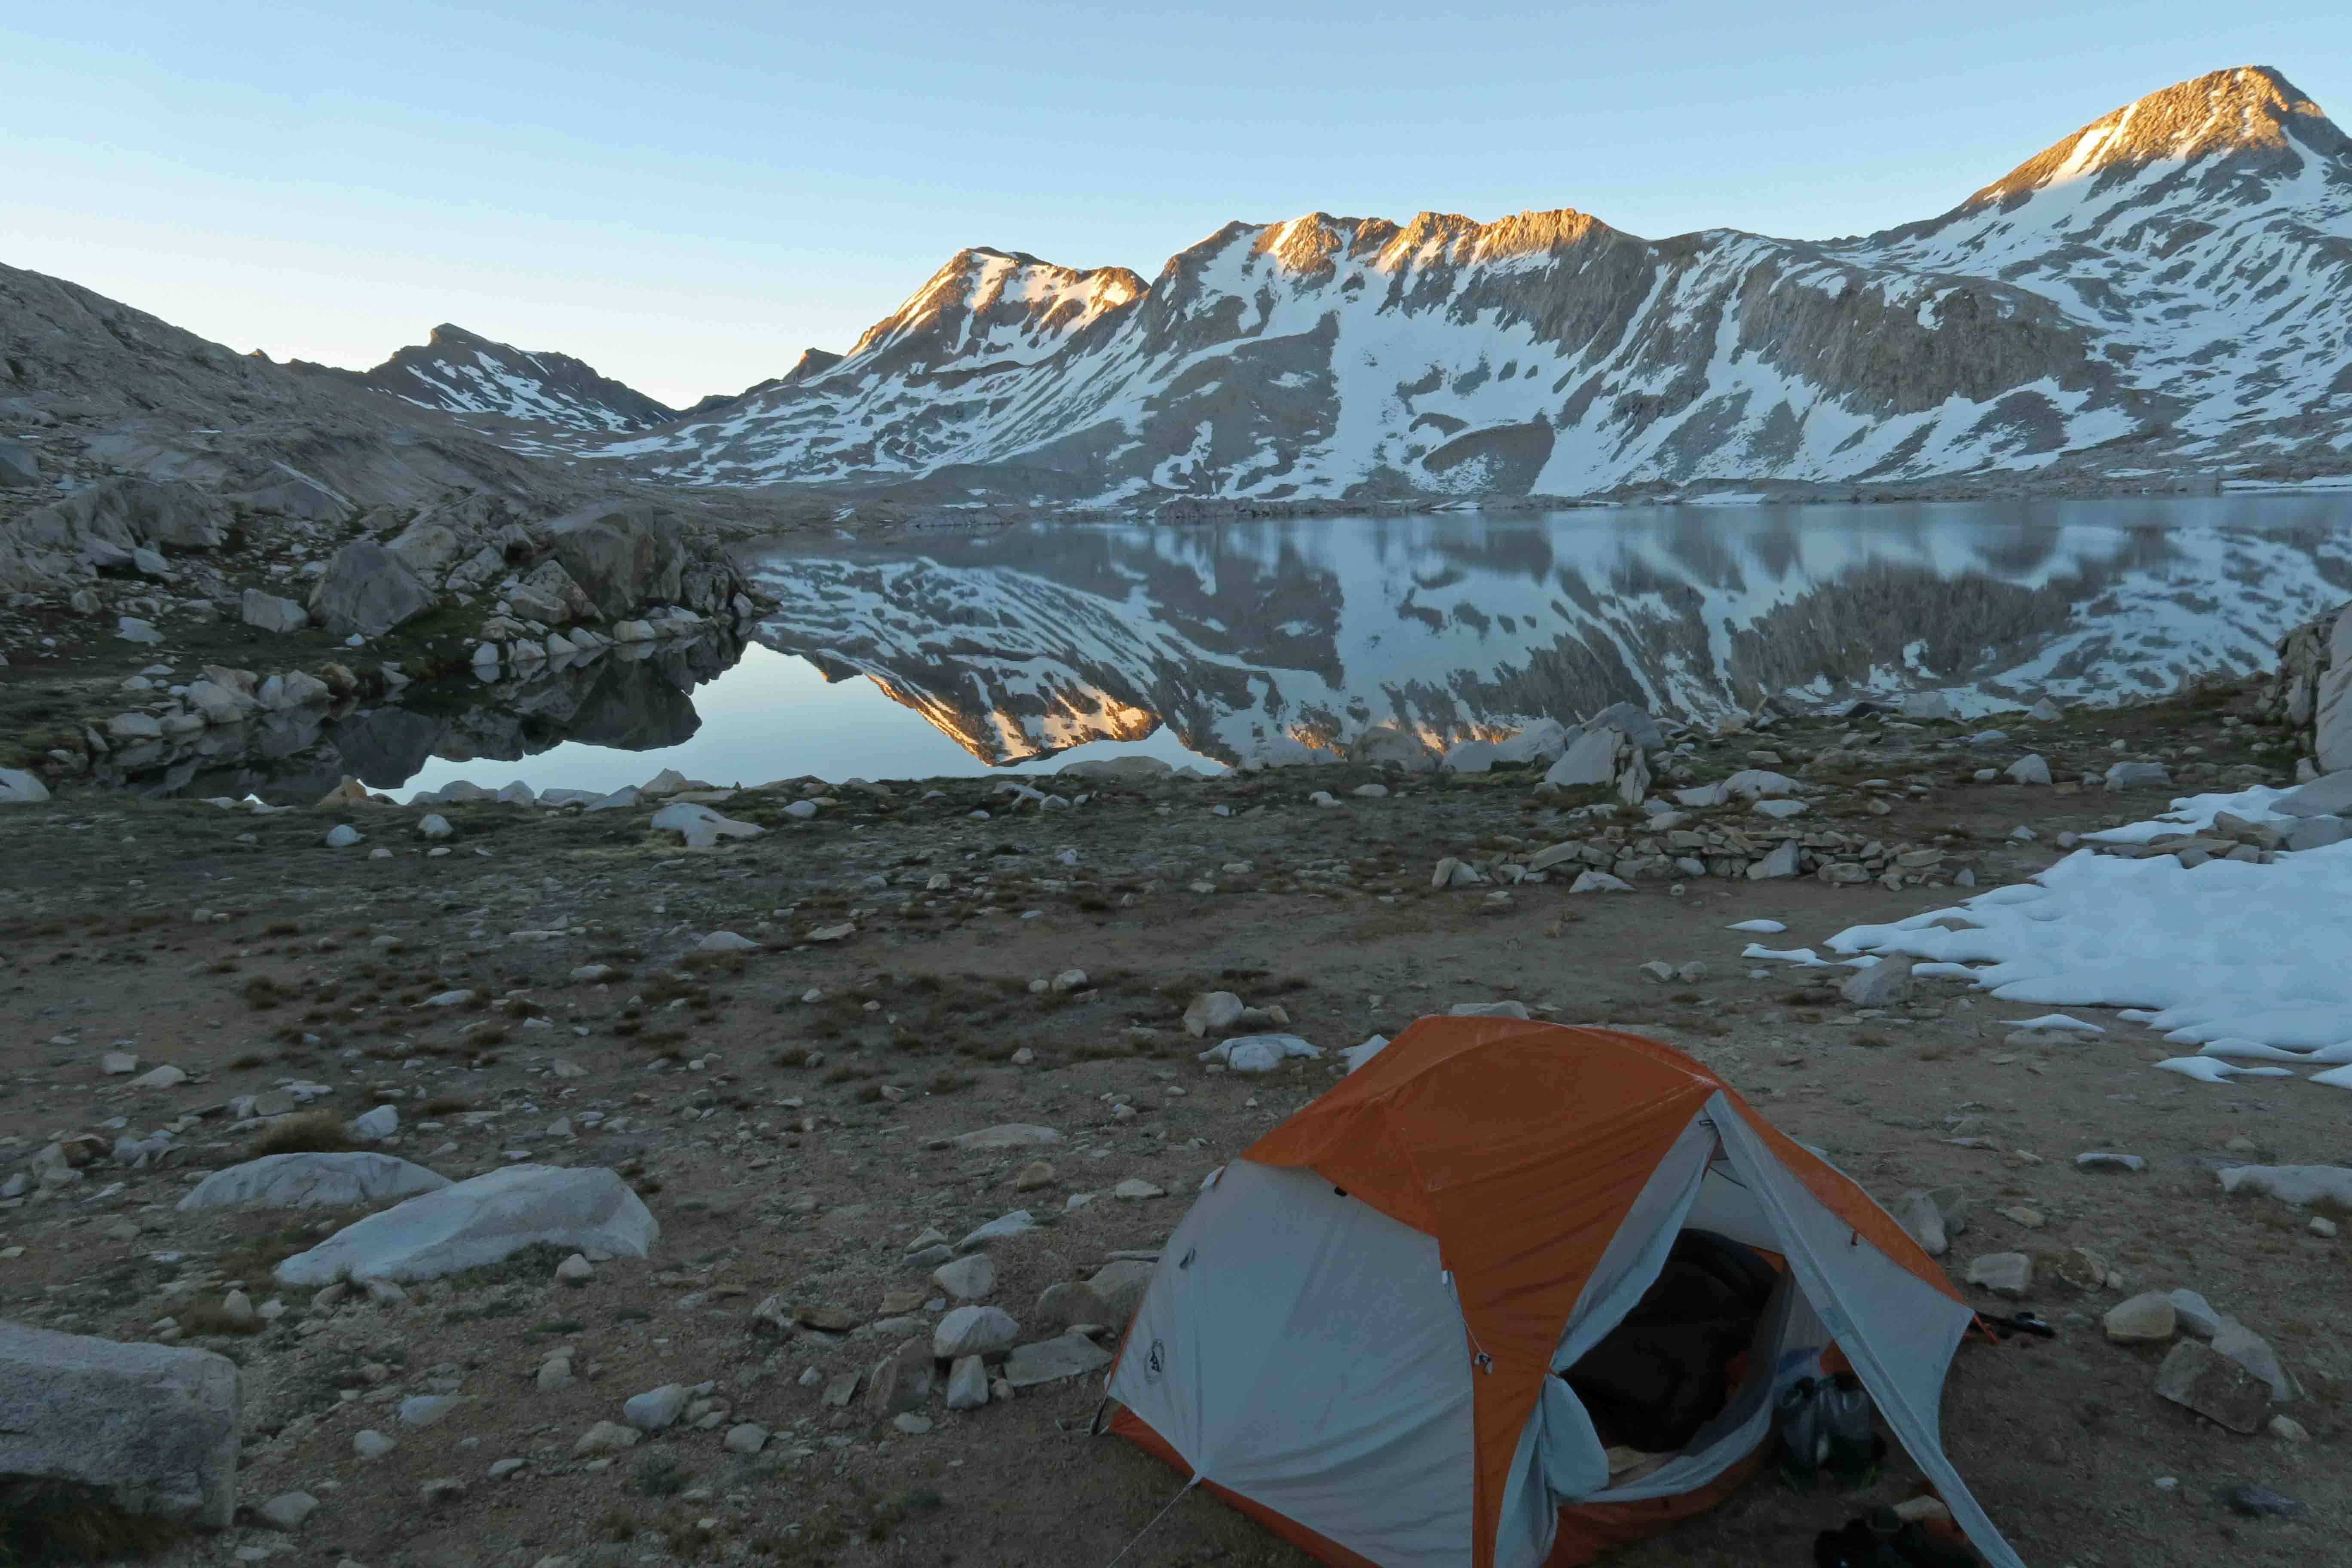
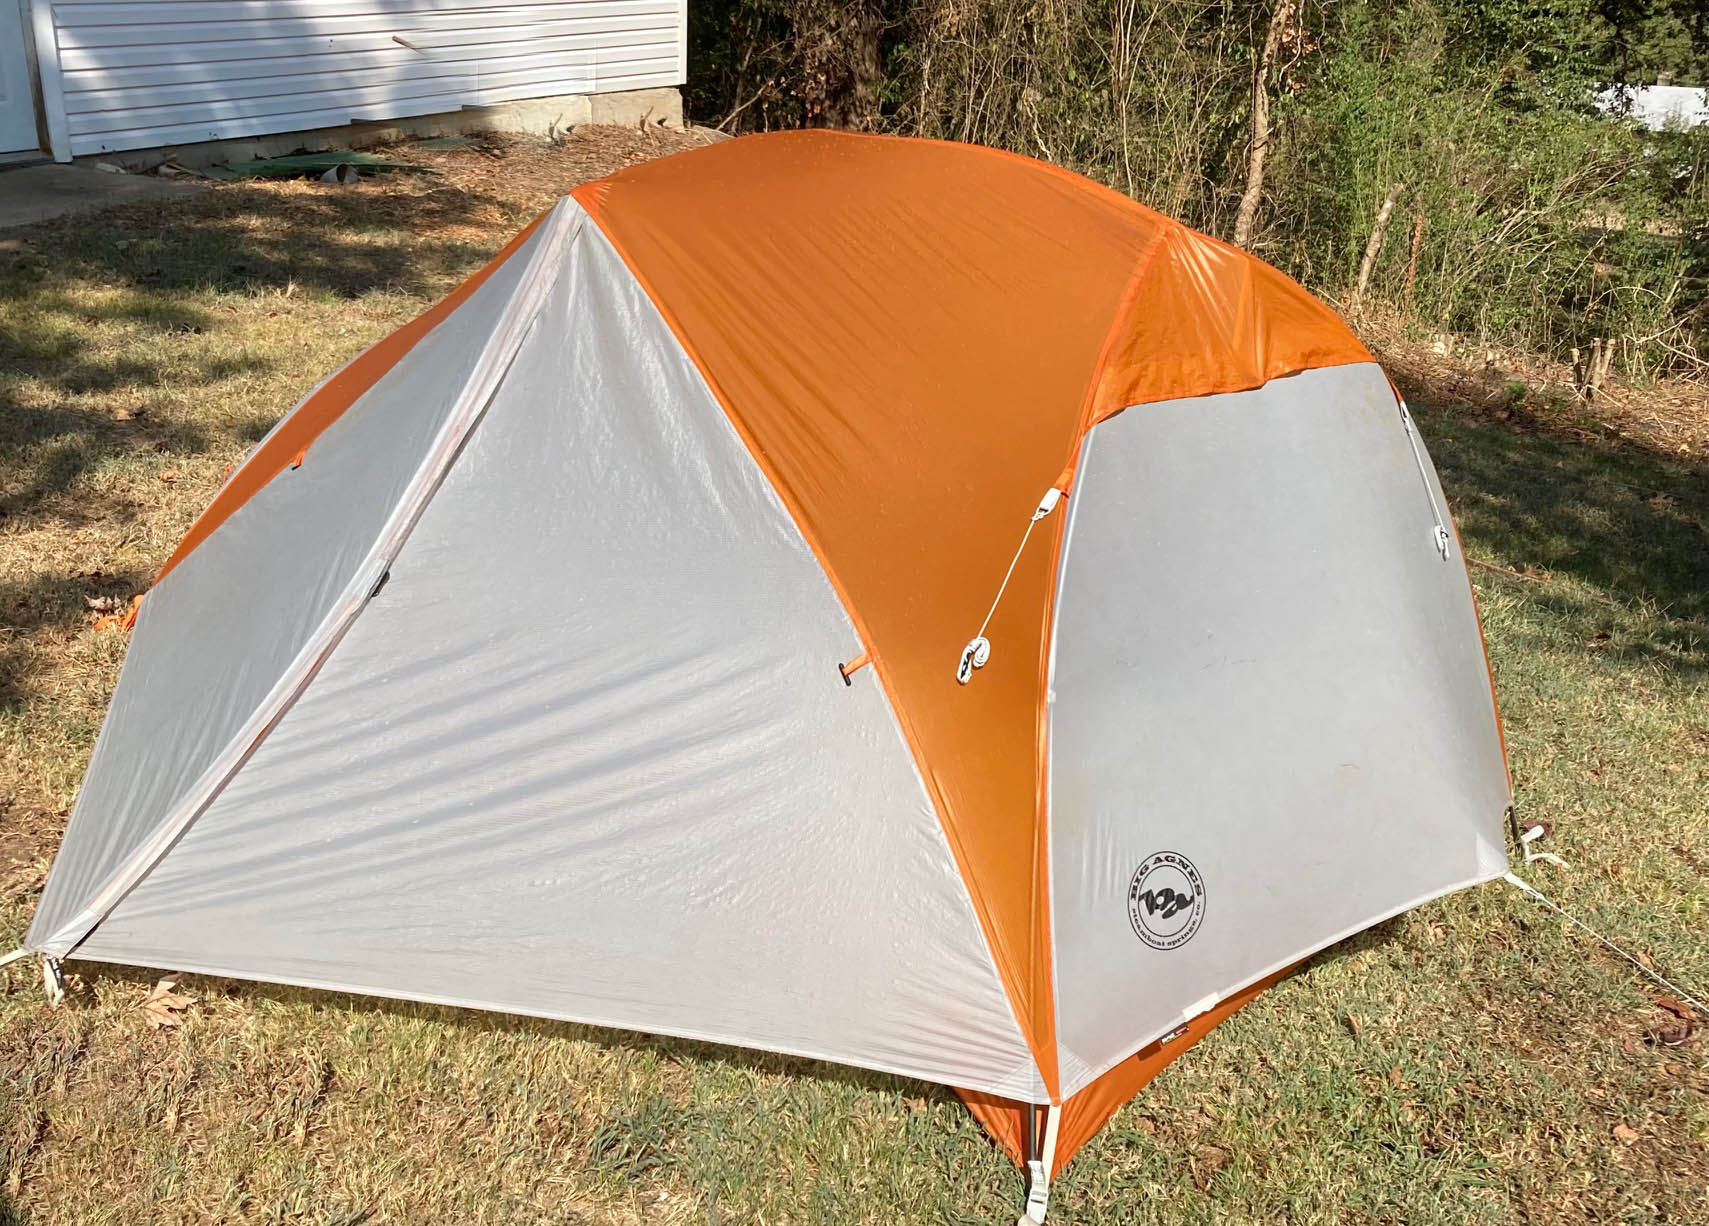
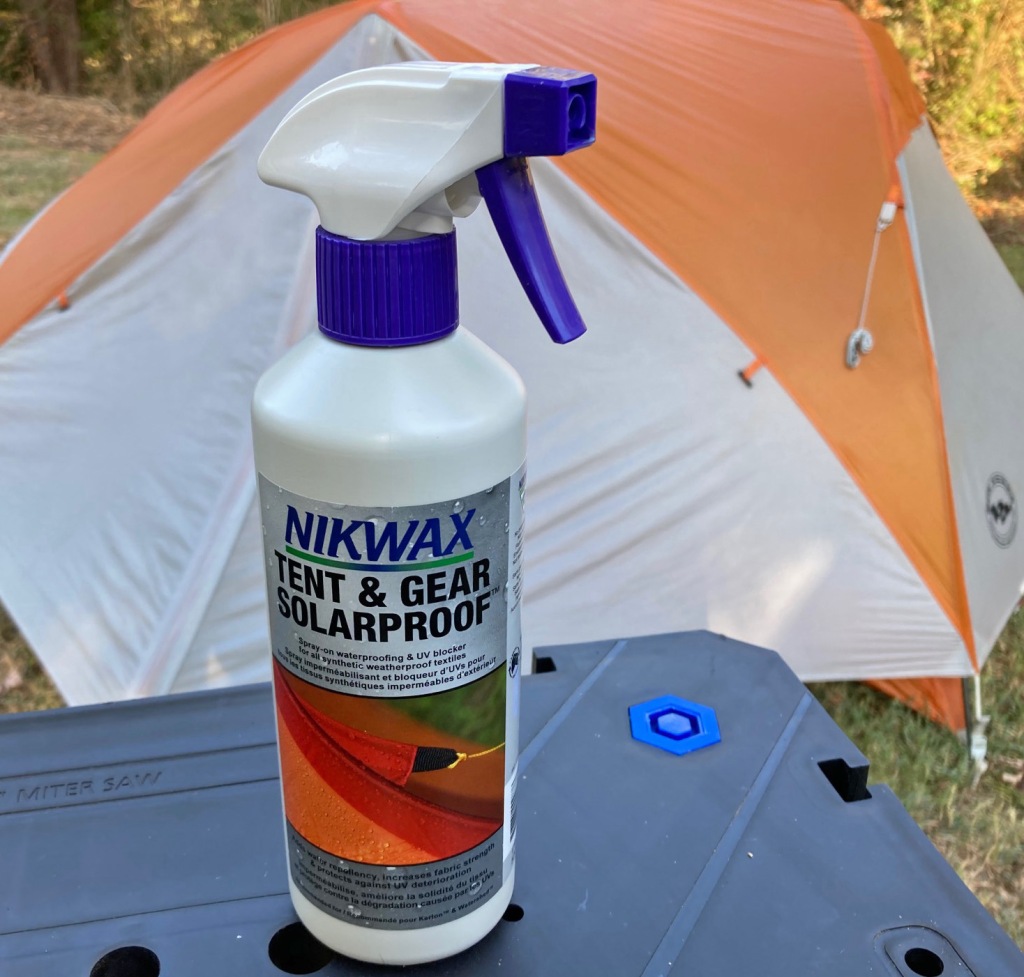
I’m the worst about wearing out a piece of equipment, then replacing it, but when you form an emotional attachment with a tent, you want it to last longer. Such was the case with my Big Agnes Copper Spur UL 2 that I purchased in 2016 for the John Muir trip. Since then, I’ve often used a tarp and will continue that depending on the situation, but sometimes having your own private space is best, and this lightweight tent fills that need.
I inspected the seams, which were still looking good with original tape in place, I remembered from my last time out that the rainfly, while still rainproof, didn’t bead water off as it did when new.
I’d never resealed a rainfly, but it was pretty easy. I set up the tent and washed the rainfly by hand with some mild soap. After a good rinsing, I applied NIKWAX Tent & Gear Solarproof. I don’t recommend products, but read reviews of others in deciding what to use.
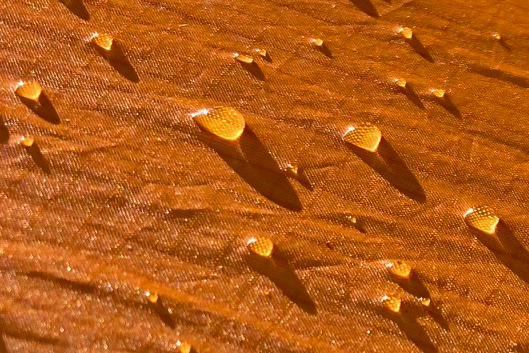
Closeup of rainfly surface
I let the tent dry in the sun and then sprayed it with the water hose. The water cascaded off and beaded on the surface as desired. As a bonus, the tent looked a lot better because of the light cleaning I did before applying the sealer. Now I’m excited about getting this tent out into the Ozarks on a rainy backpacking trip!
I still have some NIKWAX left and plan to use some on the bottom of my tent and my lightweight backpacking umbrella. I find it more comfortable to use an umbrella in rain rather than sweating inside of a raincoat.
December, 2021 update
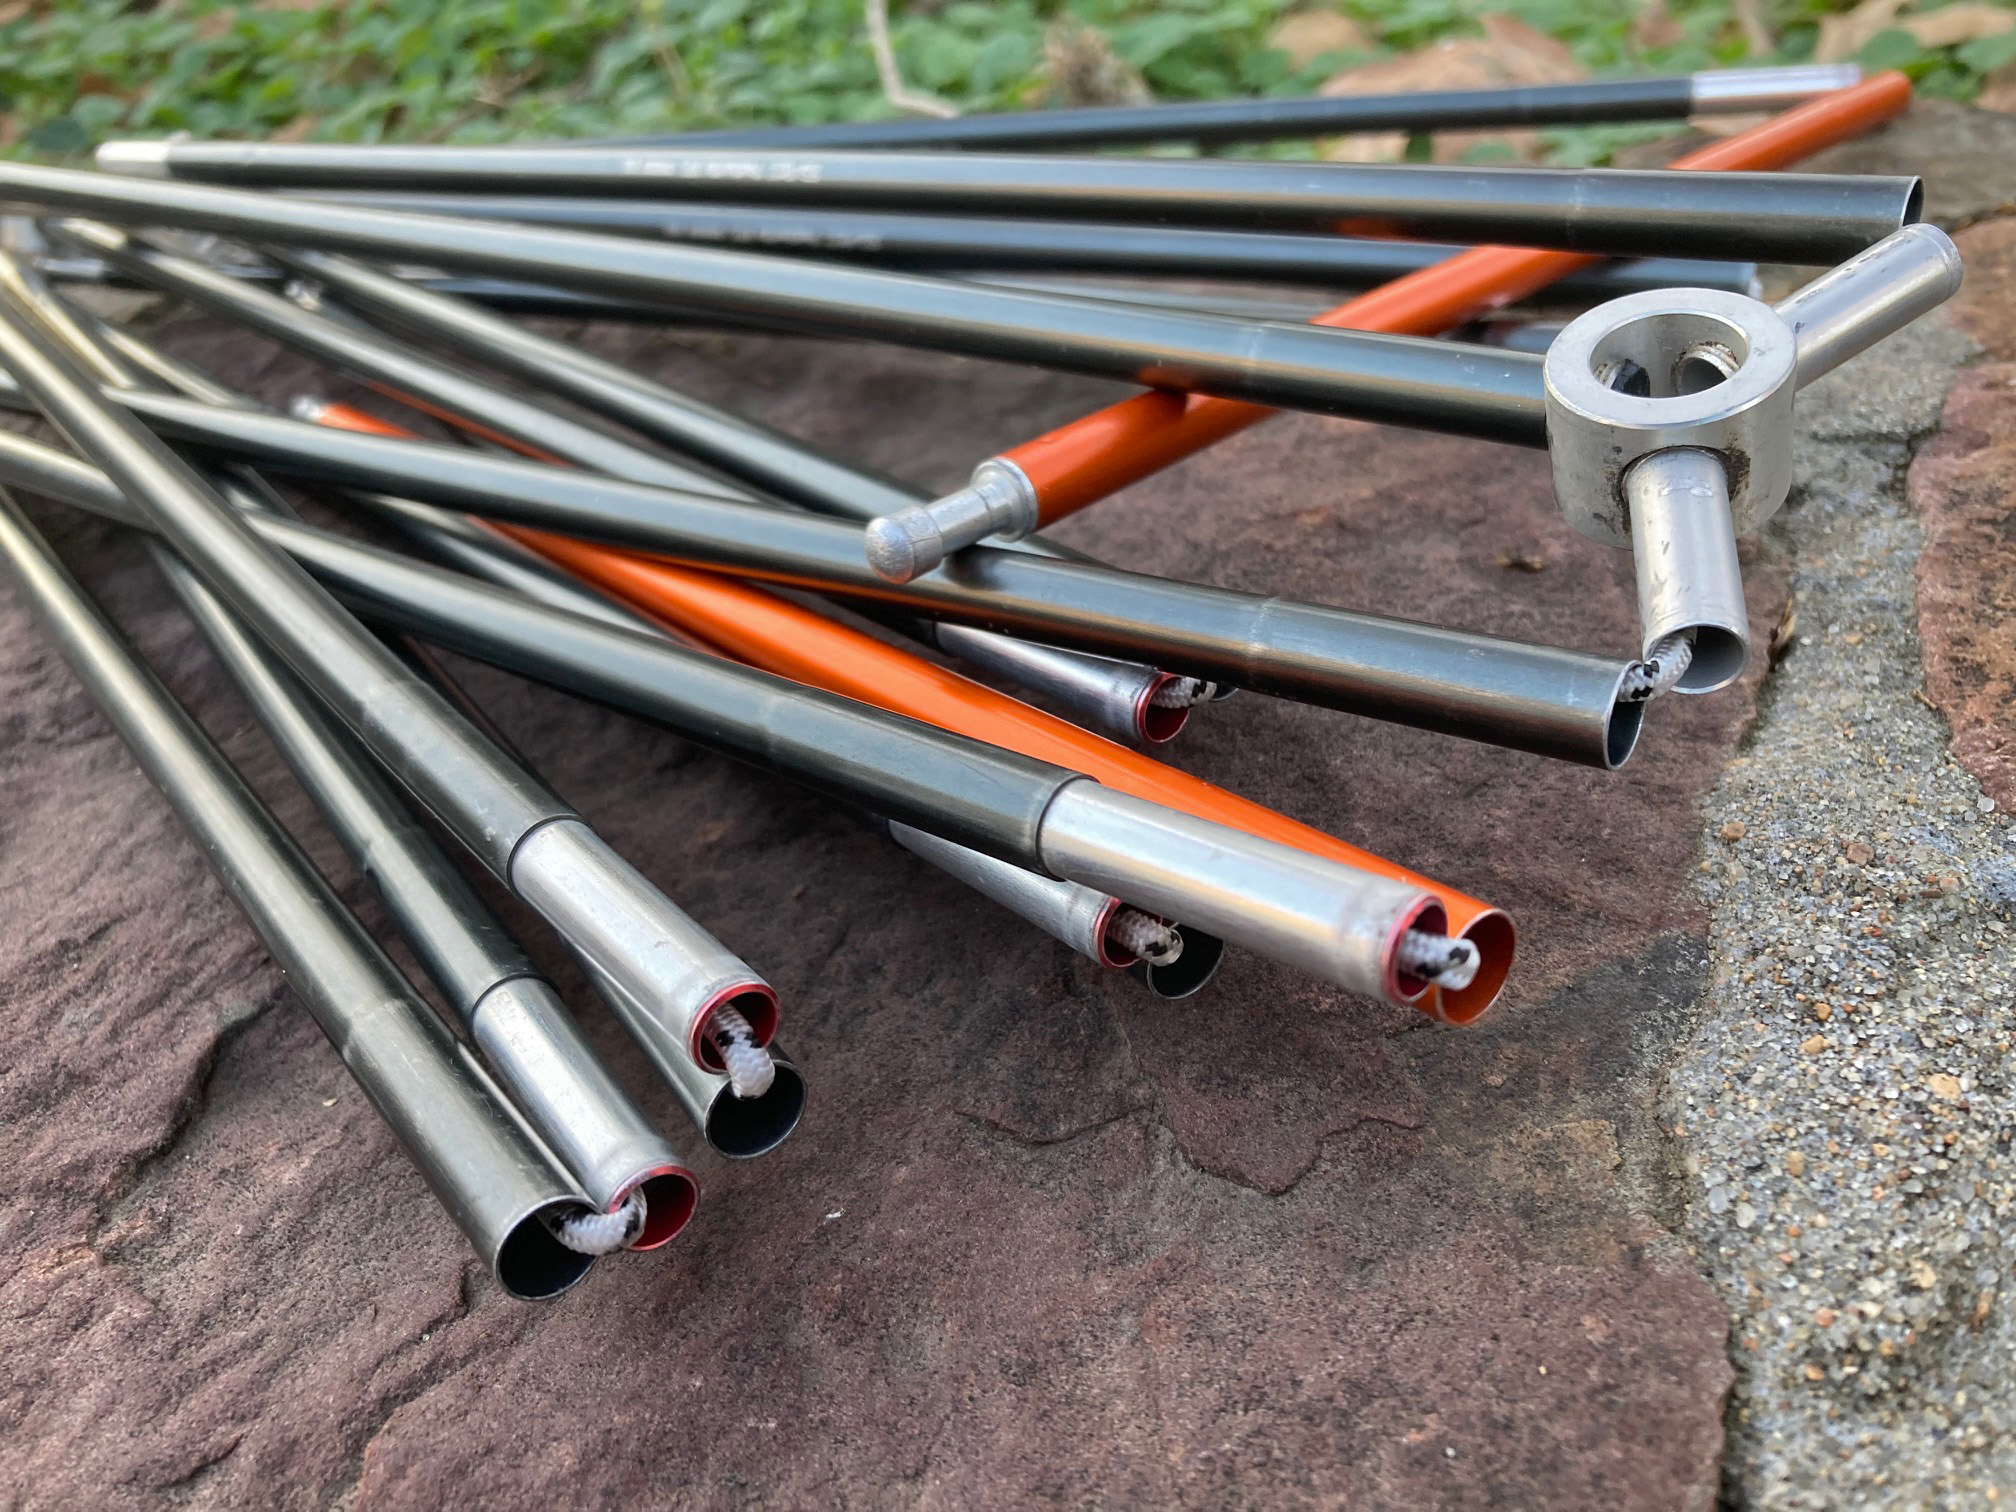
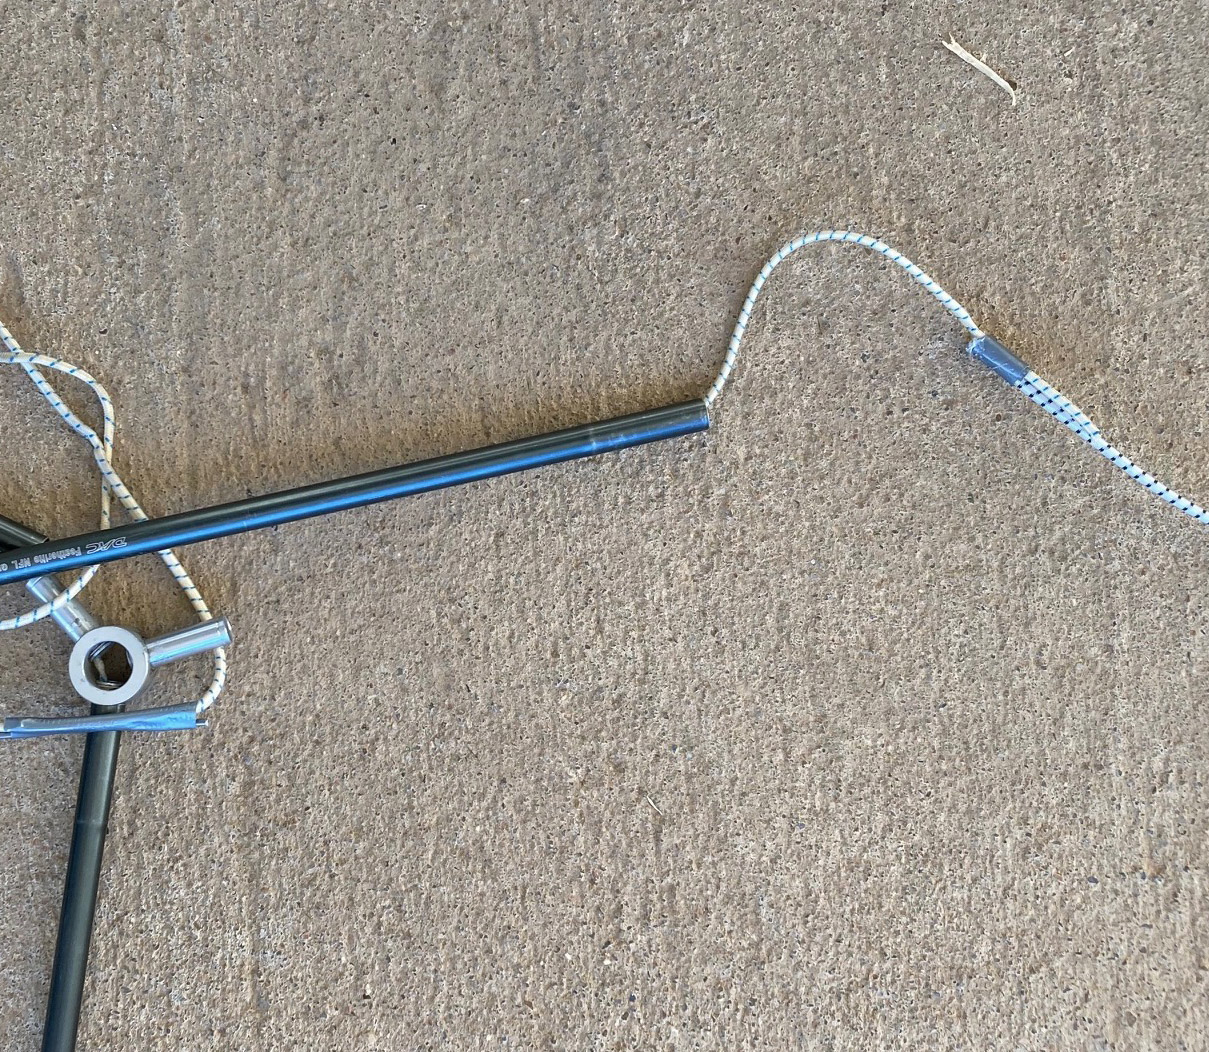
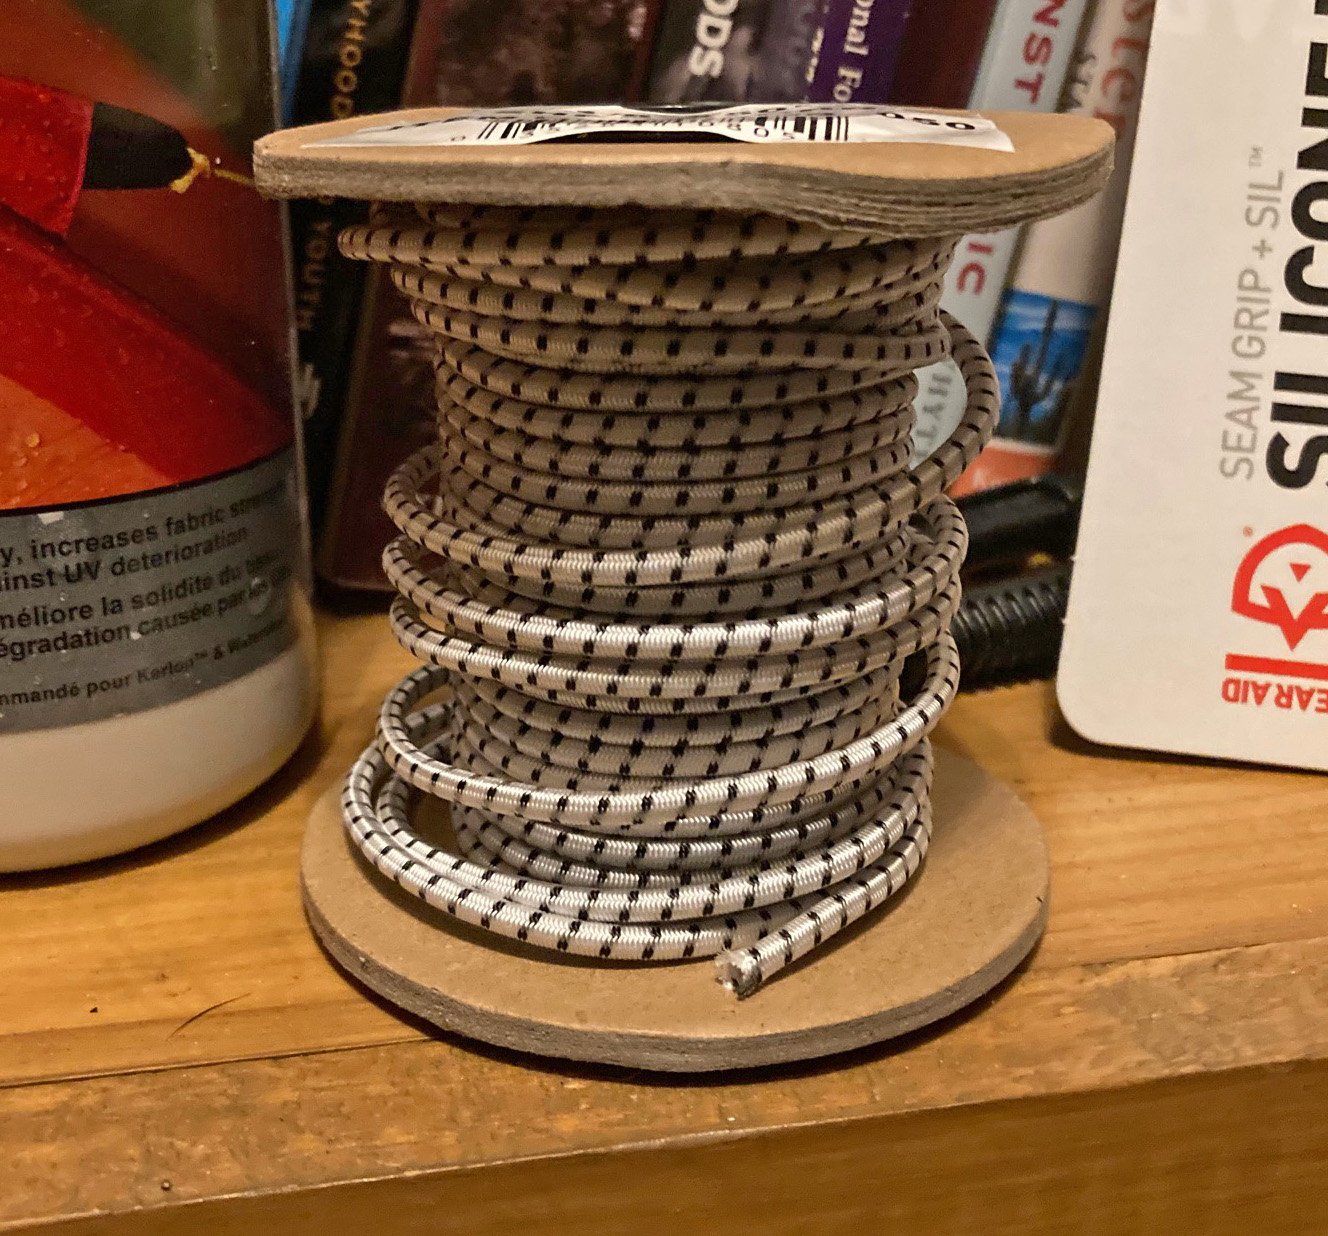
During recent backpacking trips, I realized the shock cord running through my tent poles had lost much its elasticity to the point that I was having to stuff cord back inside the poles when setting up my tent. I ordered new shock cord and used the original cord to string it through the poles. It took a little time since it was something new to me, but the results were worth it.
Poles with new shock cordFeeding new cord using old cordshock cord 50 feet
Recently, the sound and audiovisual equipment was stolen from our church’s Family Life Center, where worship services are being held while the sanctuary is remodeled. The nice Roland electronic drum set we use in worship services was taken. When I learned of the theft, I felt disappointed, but not feel the sense of loss I expected.
I realized it would have been a hurtful loss if I lost my 1967 Ludwig snare, mid-70s Slingerland set, or any acoustic drum set because an attachment to the instrument grows when you play it. For me, that same attachment to the instrument doesn’t seem to form when playing electronic drums.
Sometimes strong feelings come because of an emotional attachment or story connected to the instrument, as is true with our upright piano, a wedding gift from me to my wife. It’s also true for the guitar I play every day, a gift from my mother. An acoustic instrument is a piece of the physical world but unique because it holds the potential for music.
Playing an acoustic drum adds vibration to the space and is very satisfying. Sometimes it even resonates in your chest. The sounds and responses for each drum and cymbal seem endless depending on where your stick contacts the instrument and the emotional content delivered by the physical touch.
I think of electronic drums as triggers more than instruments. The woven striking surfaces (drum heads) are fun to play, and electronic drums are convenient tools in some settings, but I can easily play softer or louder than the triggers recognize which can be frustrating.
I’m not opposed to electronic instruments, but I feel a sense of thankfulness when I play instruments with strings, stretched batter heads, and hollow resonating spaces where sounds are born.
Shane checking out a waterfall on the Pig Trail Loop
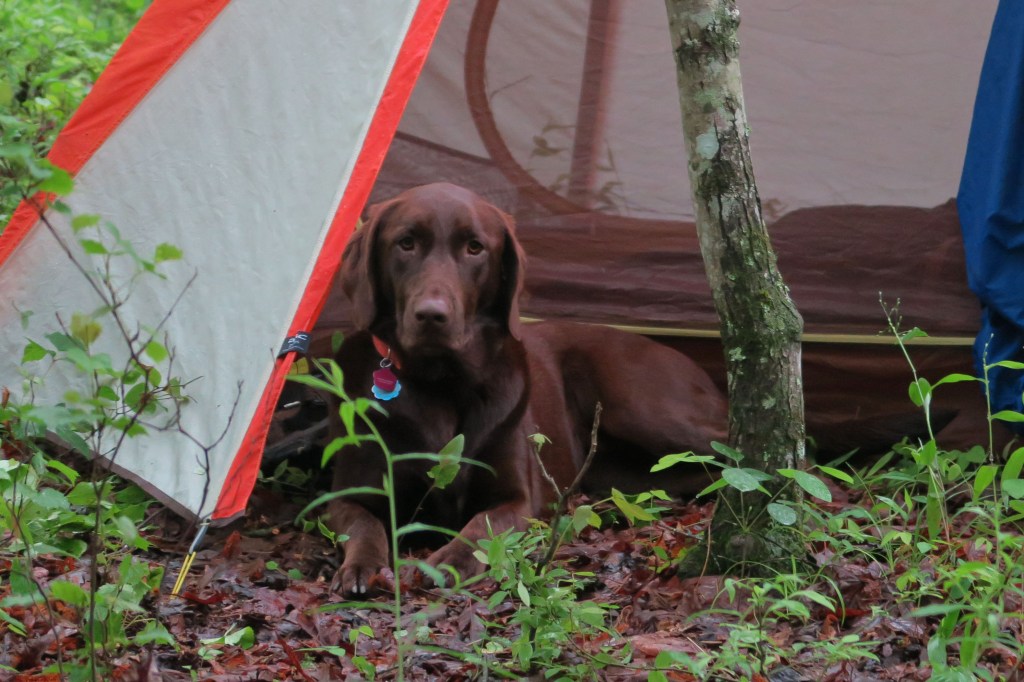
As summer approaches, backpackers look for that last bit of cool weather in the Ozarks. Selfishly, I wanted to see a piece of the bushwhack route that is the Pig Trail Loop. This route was created by Steven Parker. Some of us who accompanied him on a few of his scouting trips call it the “COVID Route” because it gave us good hiking opportunities last spring when many things were shut down.
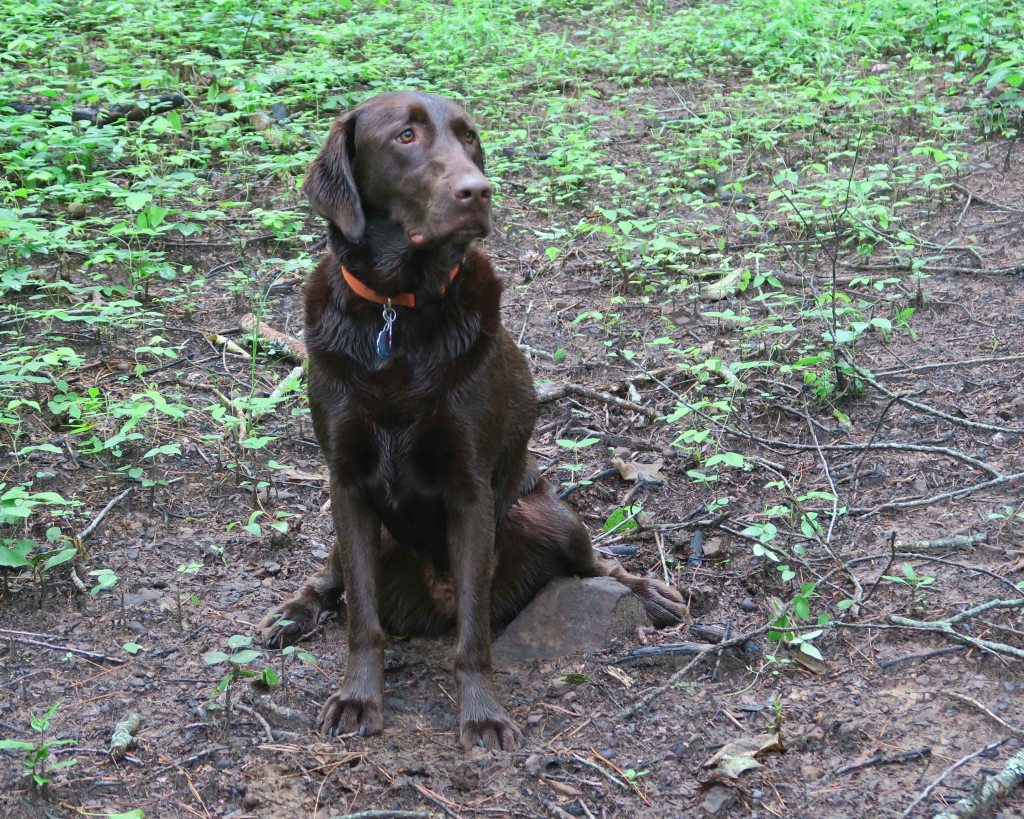
Steven’s dog, O.D. (for Only Dog) is a 2-year old who had not been on an overnight trip. We enjoyed her enthusiasm, and she was a well-behaved hiking partner. My Hiker-dog took this trip off, which involved me sneaking out of the house in plain clothes and then changing into hiking clothing in-route to the trail. If she had seen me leaving with a backpack and hiking shoes on, she’d have been very unhappy. I’ve been doing some lower mileage hikes with her to help heal her aging joints. I like to tell folks we have the same hitch in our step, and we’re both taking Glucosamine. I’m seeing some improvement in her gate, and she still loves hiking!
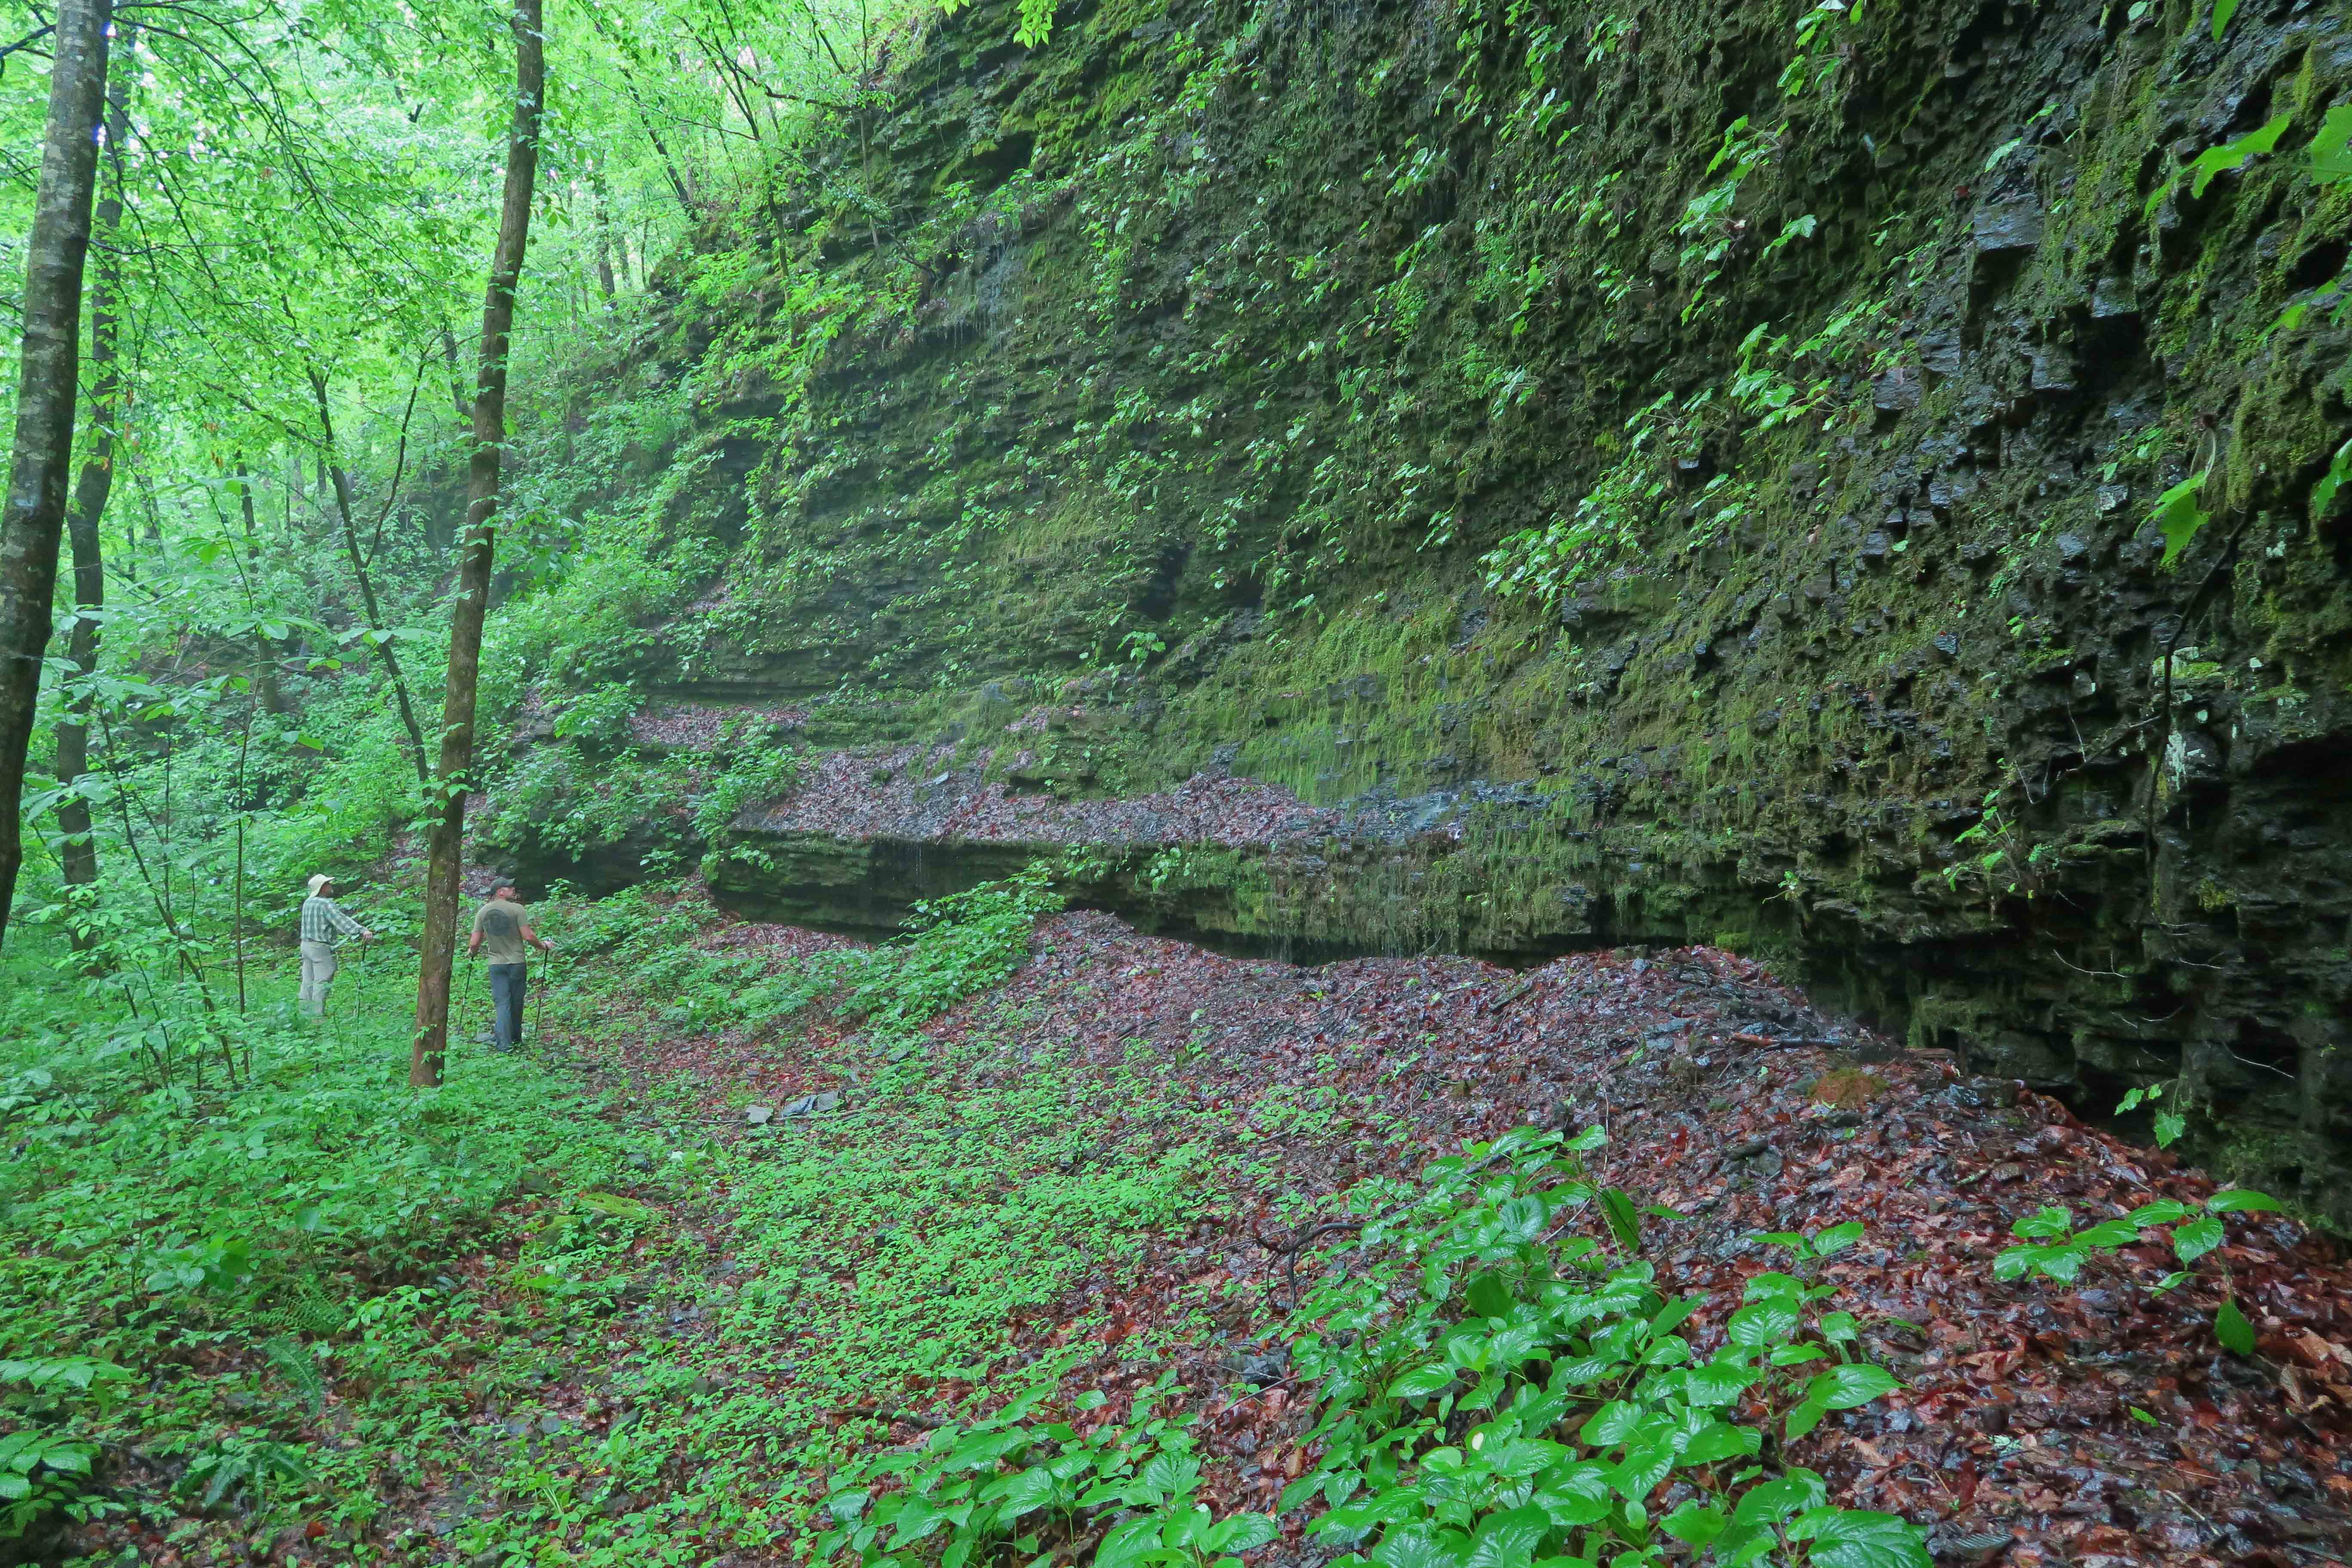
Steven and Shane pausing at the largest bluff along the side of Bowden Hollow
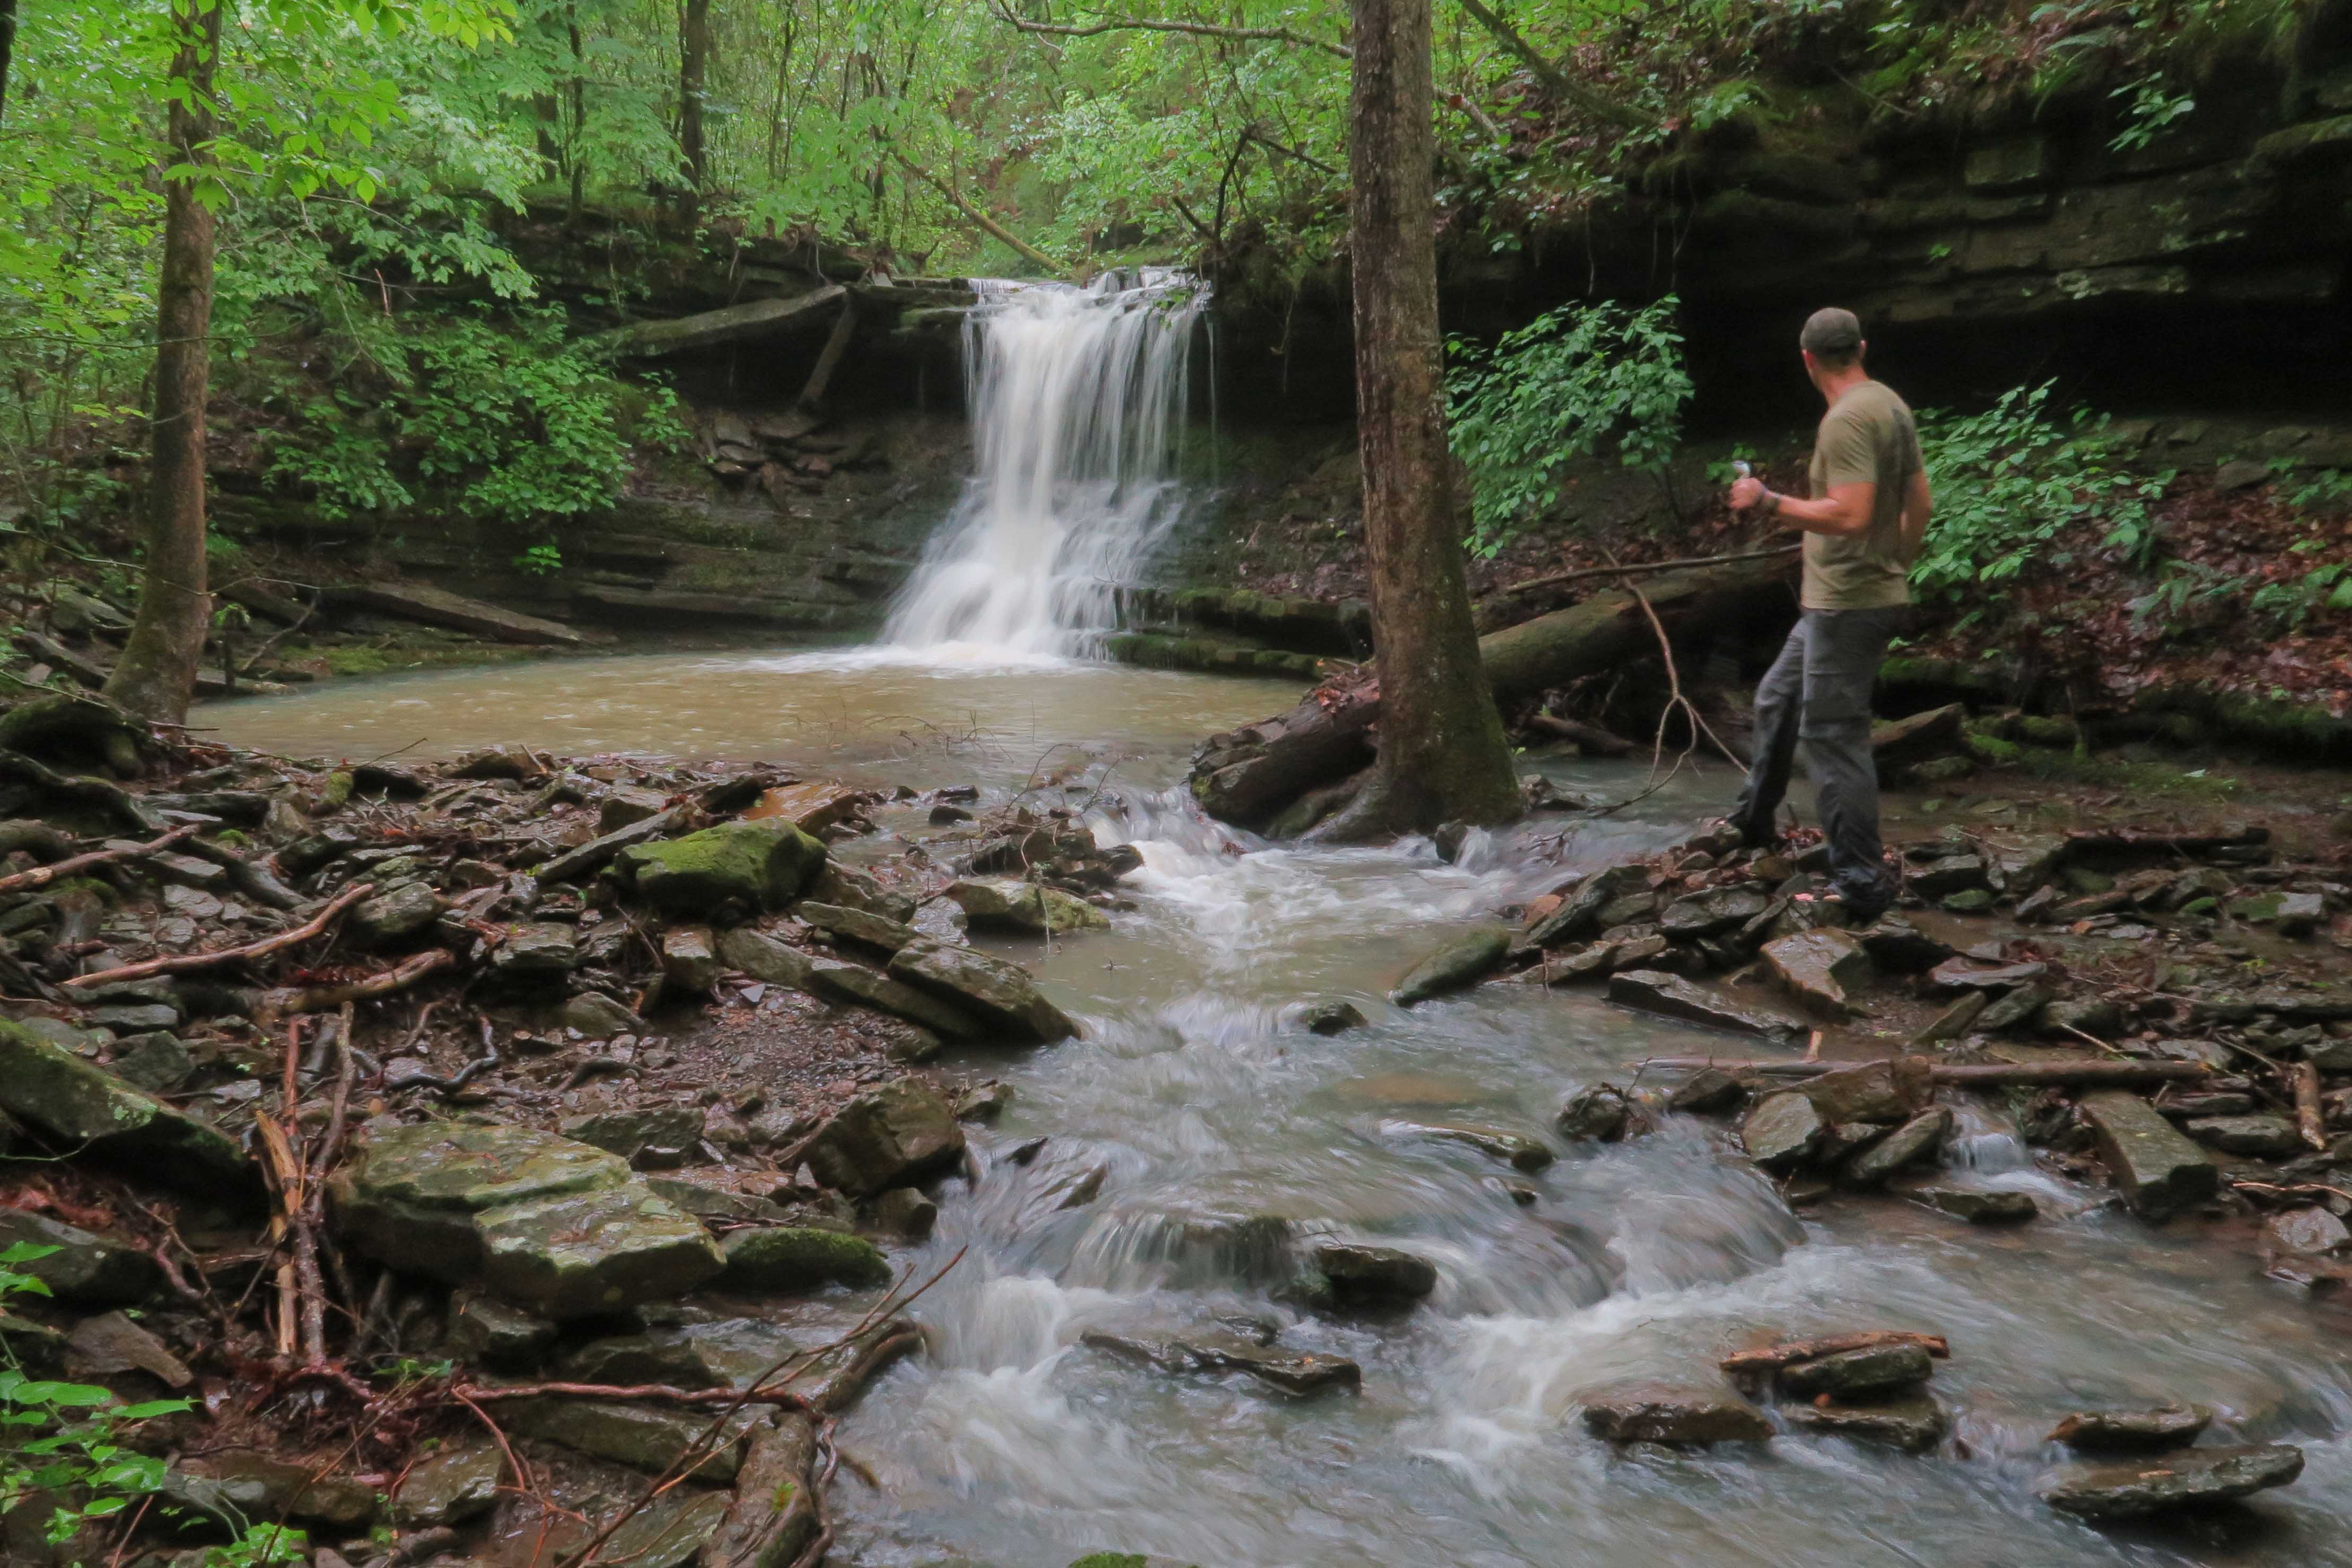
Early in the hike, we went off-trail to see a portion of the Pig Trail Loop. We zigzagged up the creek in Bowden Hollow past a couple of bluffs toward the waterfall. Rain was on and off but not as heavy as we’d expected. It was warm enough that we didn’t worry about getting wet.
O.D. loved the wet conditions, taking dips in every puddle we passed.
Over-nighters are good times to try something new since the pain doesn’t last long if things don’t go well. I don’t normally do freeze-dried meals but tried Peak Refuel Beef Pasta Marinara. It was a hit! I’ll insert a few of these in multi-day trips in the future to add variety to evening meals. I also tried a new nutrition bar for use while walking. The ProBar Meal On-The-Go worked well. It has healthier contents than most bars I’ve seen. I don’t have stock in these products but would like to see them succeed since they work well.
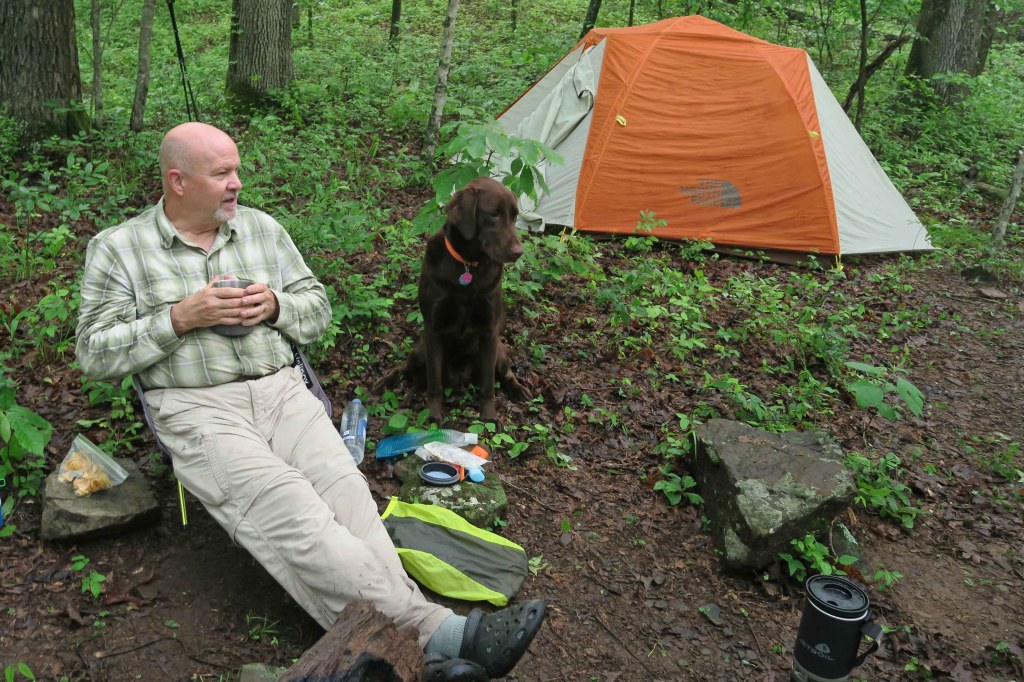
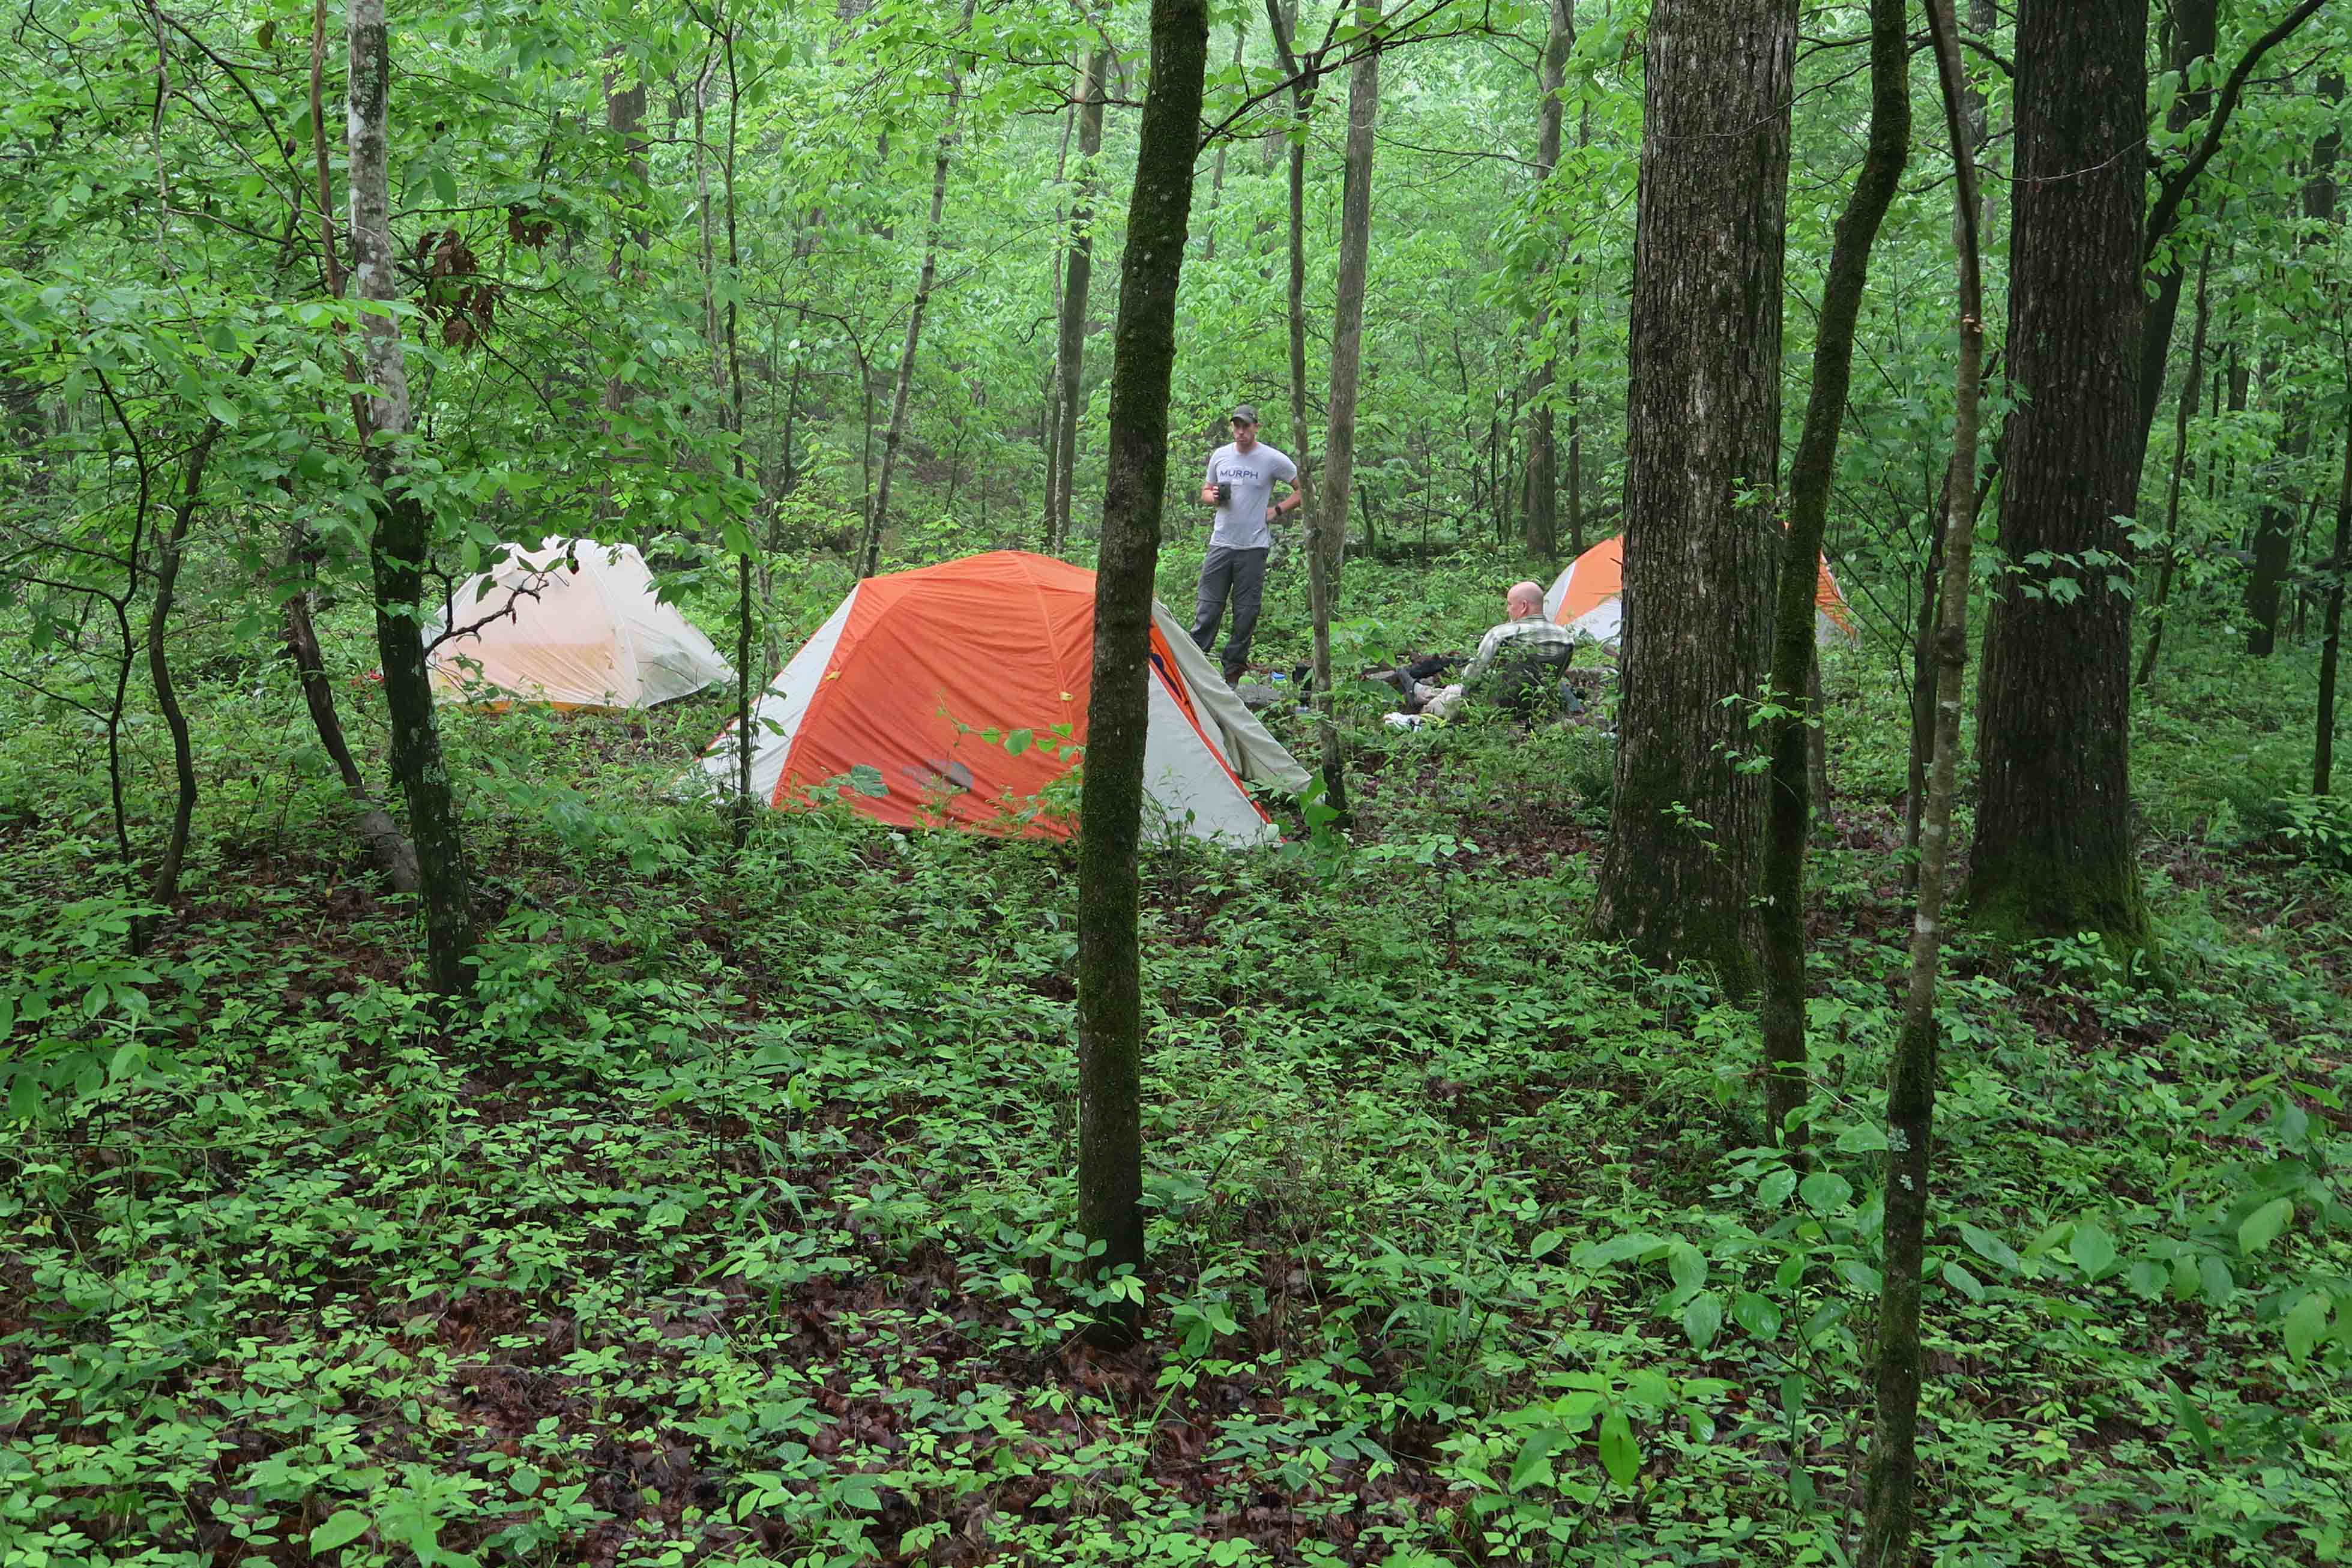
After rejoining Redding Loop, we took the spur to the Ozark Highlands Trail heading east and found a nice campsite in time for an afternoon nap. The occasional drizzling rain lulled me to sleep. When I woke, I worried that I might not sleep well that night because of the nap, but my concerns were unfounded. I slept well after a good dinner and cup of hot tea.
Before preparing the evening meal, I went for water at a clear drain we’d passed earlier on the trail. Down the path came Jessie, a thru-hiker from New Orleans. She would be the only other hiker we’d see over the two days. She’d already hiked from Ozone east to Woolum and was returning to Lake Fort Smith. When we met her, she was on mile 23 for the day. Impressive distances!
After breakfast, we backtracked on the OHT and the spur back to Redding Loop. Then, it was an easy, mostly downhill hike past two foliage-covered waterfalls to the trailhead. Walking Redding Loop is like getting a foot massage. Some of the pine needle-covered sections seem to soothe the feet as you walk along.
O.D., Steven, and Shane on the last section of Redding Loop
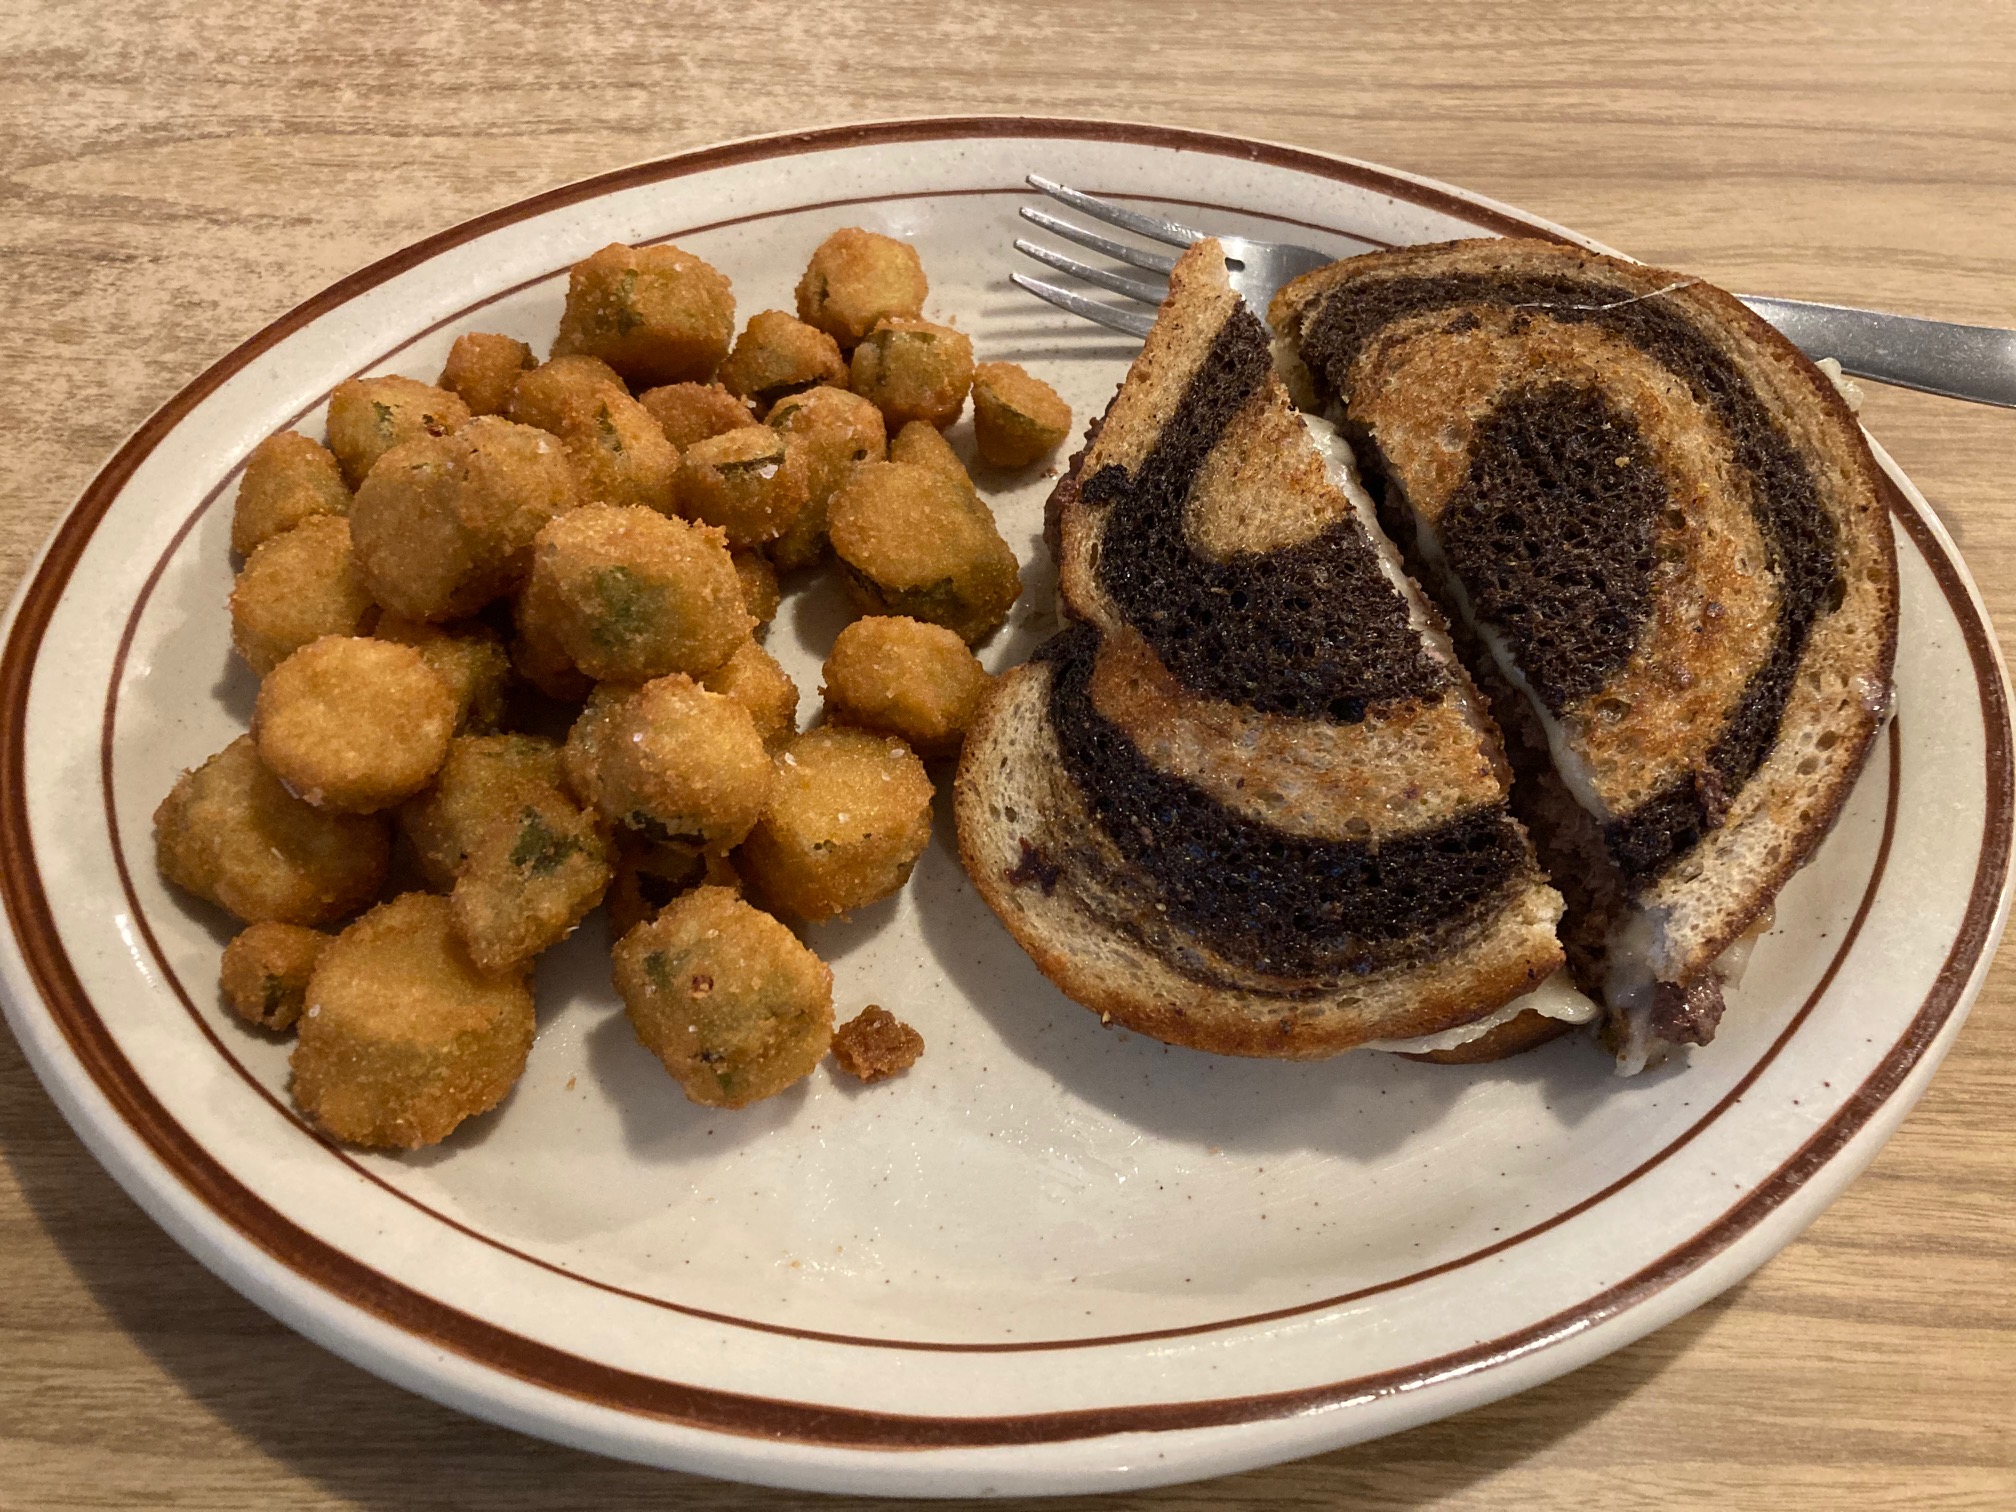
Catalpa Cafe provided the perfect ending to this over-nighter. The PattyMelt Burger and okra followed by key lime pie were perfect. If you haven’t sampled Randy’s backwoods gourmet cooking, take the three-mile drive east of Oark and have a great meal where the pavement ends.
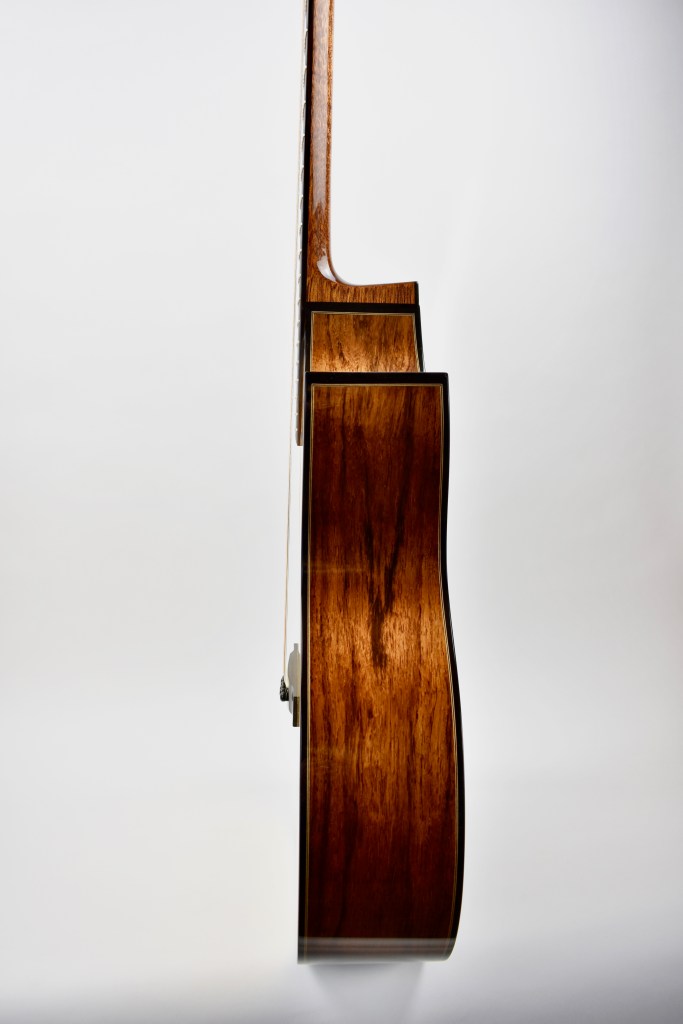
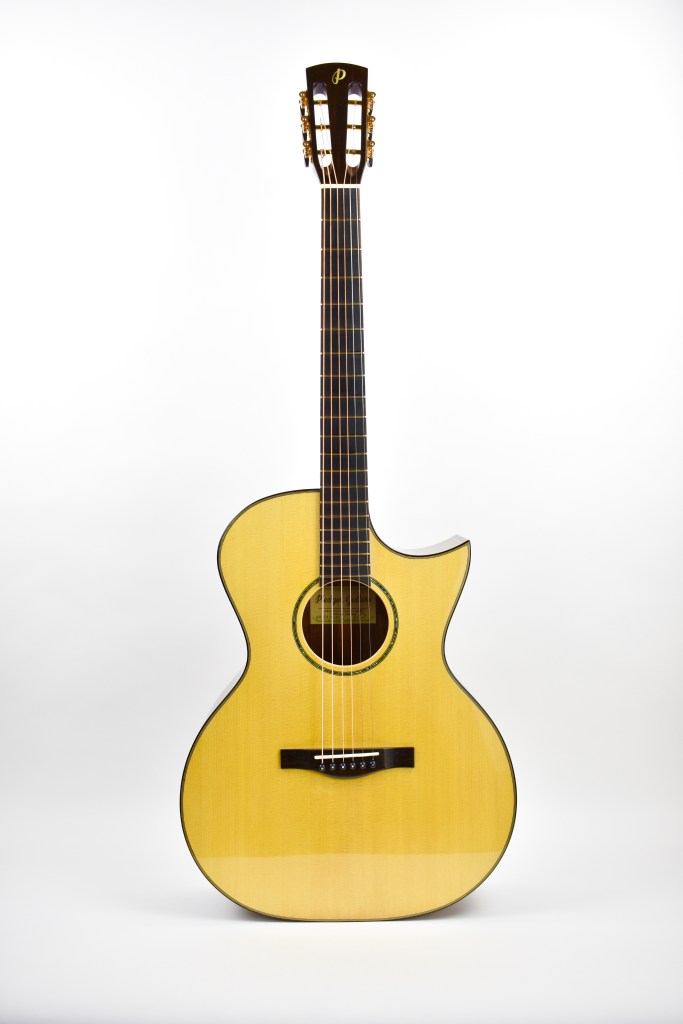
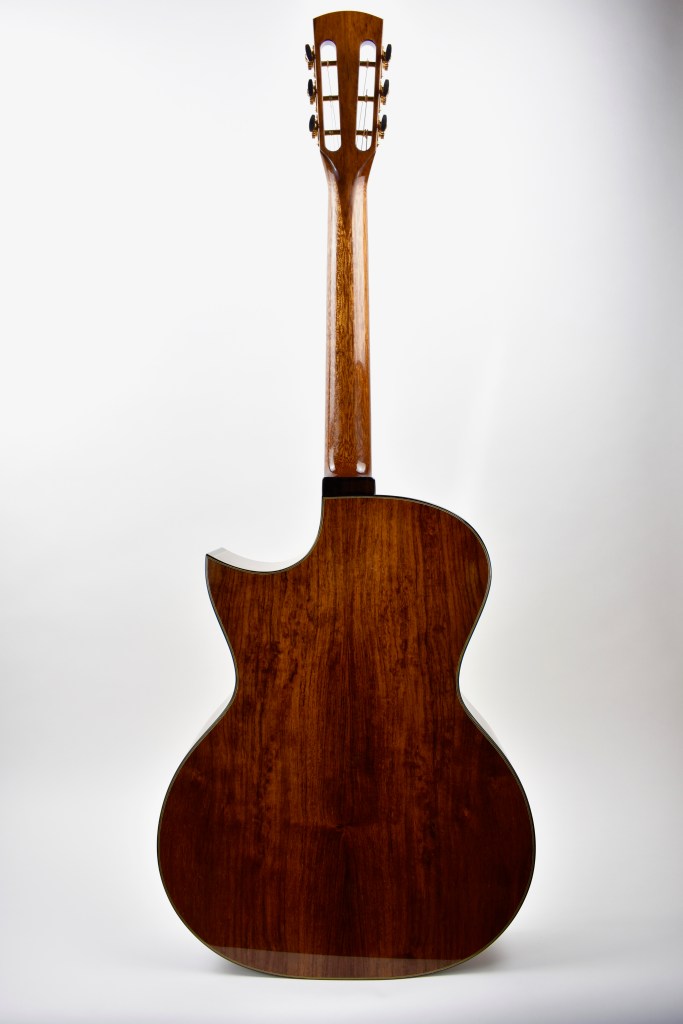
This is the last of five posts about the building of a guitar as a keepsake from my mother who died in February of 2020. My father died the year before in 2019. My continuing task is to try to become worthy of this beautiful instrument built by Clayton Pledger.
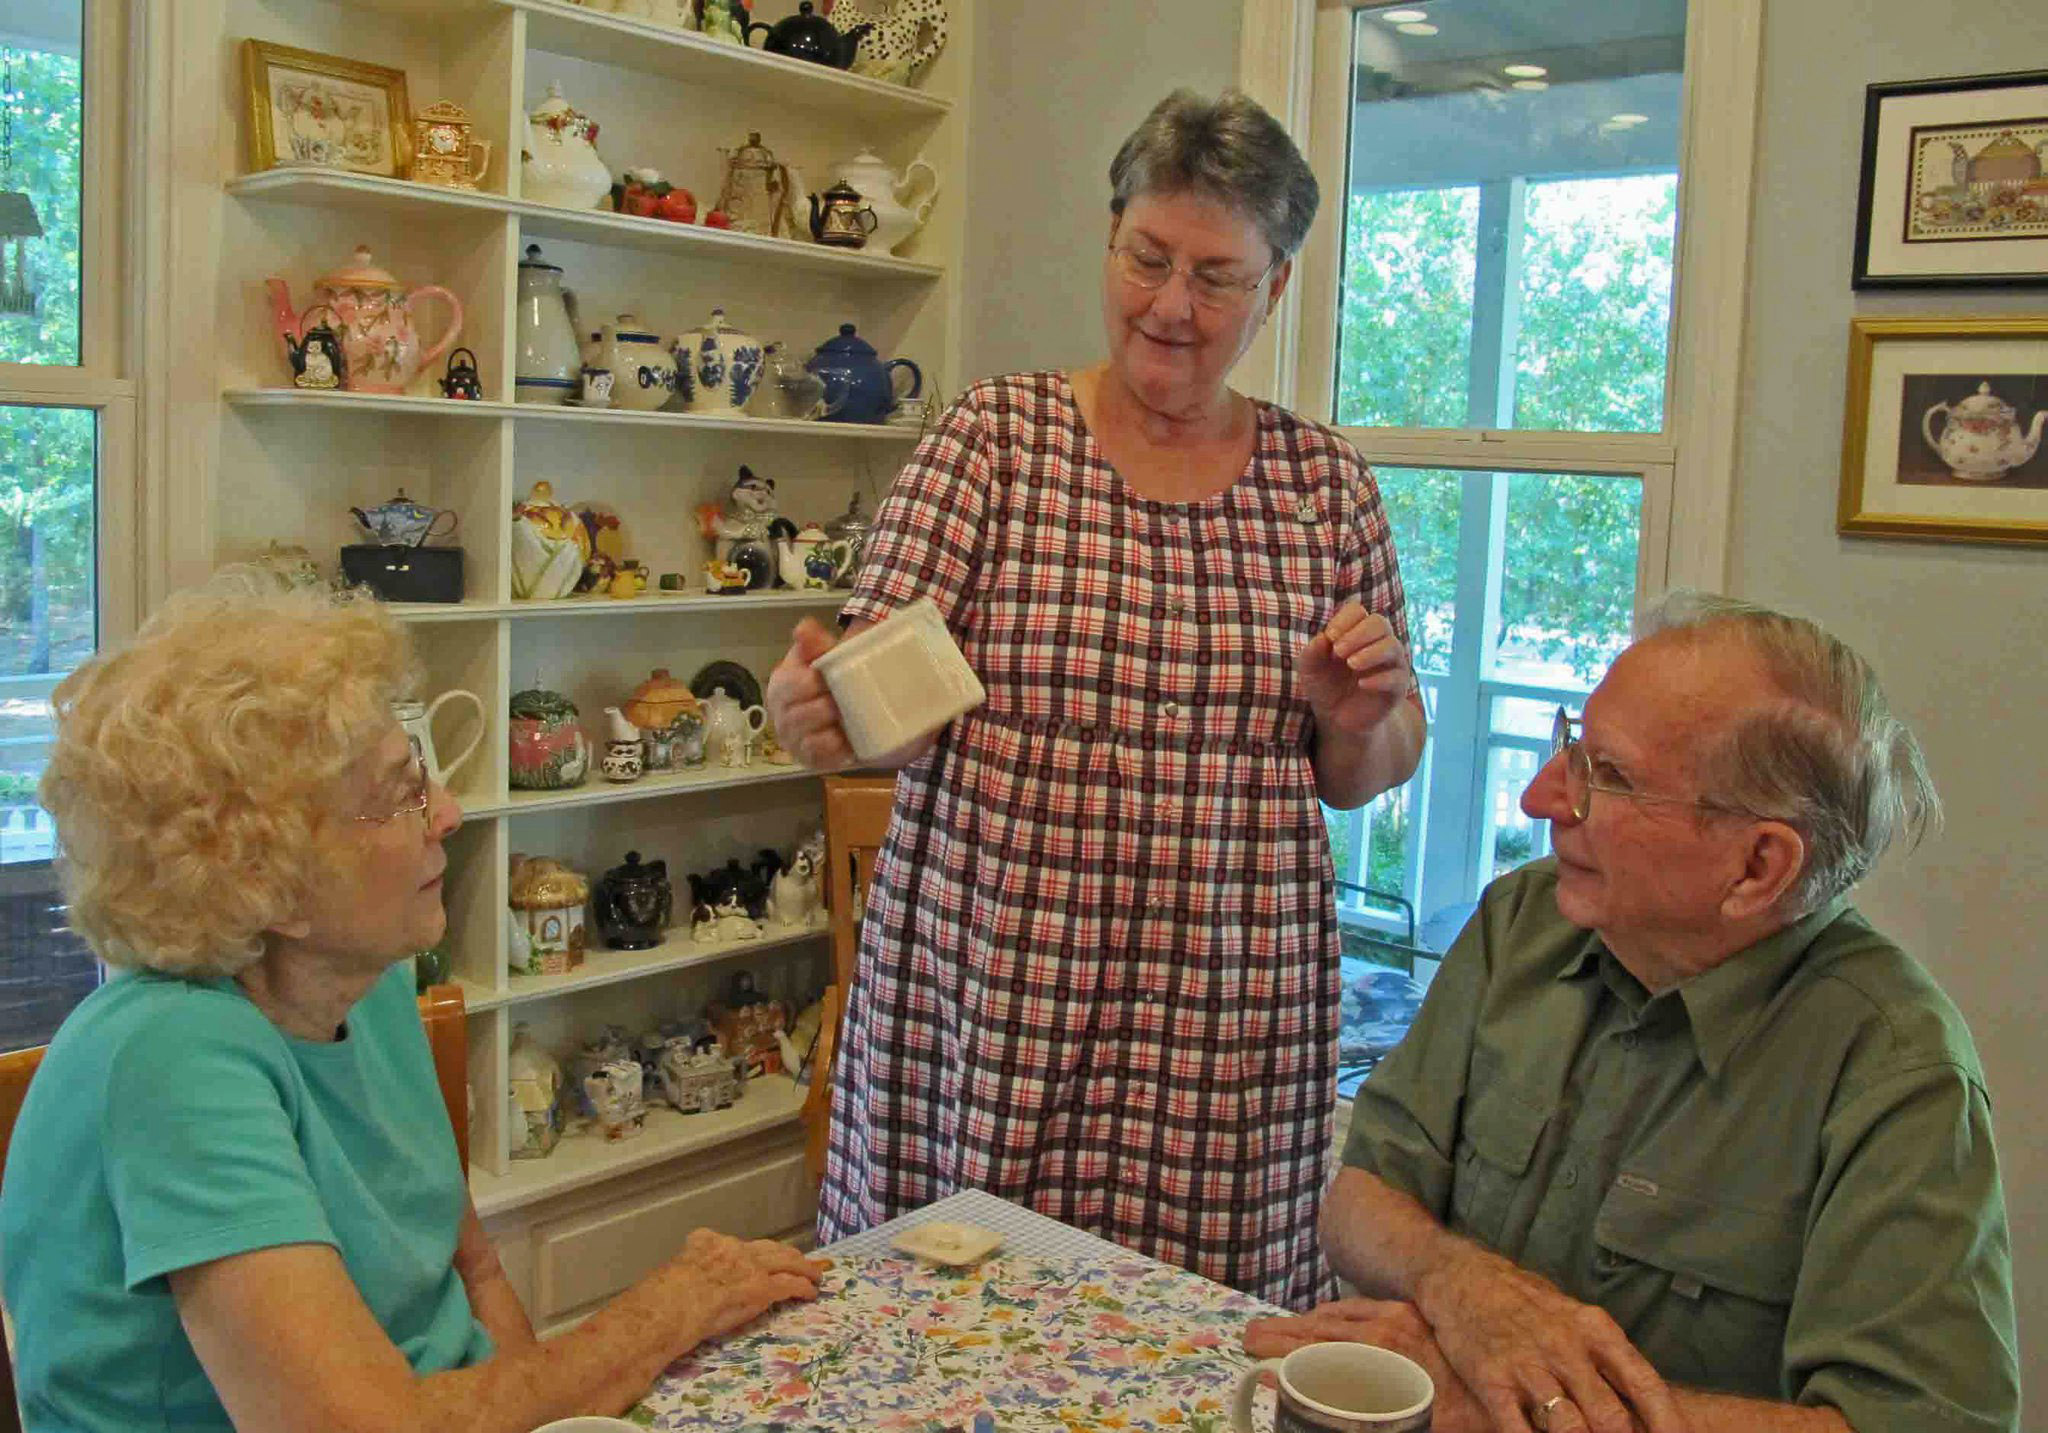
On a recent visit to Mountain Thyme B&B, I enjoyed playing before breakfast at the same table where we enjoyed fellowship with my parents a few years ago. I asked Rhonda and Mike to continue making breakfast preparations in hopes that clanging pans might cover wrong notes.
Rhonda visiting with my parents a few years ago at Mountain Thyme B&B
Having something tangible to remind me of my parents has been more special than I expected. It is a joy to practice on this guitar. I think of my parents’ love and commitment every time I touch it. I appreciate Randy Soller’s patient instruction as he teaches a drummer to play guitar.
Below are links that show how the idea of having a guitar built came about and Clayton Pledger’s work in making this beautiful instrument.
It’s nice to find a new song or poem to think on while hiking. Recently I learned about Scott Cook‘s music, and what a joy it has been. “Pass It Along” was the first song I heard and it immediately became one of my trail-walking hits as he moves from passing down an instrument to passing down this world we occupy.
Pass it along, pass it along May it land in careful hands when we’re gone You carry it for a moment But time won’t loan it to you for long You don’t own it, pass it along
I like having tangible objects that hold someone’s songs and rarely purchase sound files, preferring a CD with liner notes. I download the artist’s recording onto my player for walking and listening but treasure having the physical CD in my home. Scott Cook adds richness to the liner notes experience by packaging CDs in a book, a nice book…a well-written book!
I’m looking forward to walking many miles with Scott Cook‘s music singing in my head, and I appreciate his words for edification and meditation.
I was excited to get out on my adopted section of the Ozark Highlands Trail (OHT), which runs from Dockery’s Gap west toward Lake Fort Smith (miles 5-9). It was a sunny, cool day, and I was ready to release a little stress while getting some exercise and checking my section for trail maintenance issues. We only saw two backpackers heading east, hoping to complete a thru-hike.
Hiker-dog was glad to hit the OHT. We’ve been working out on the Lake Alma Trail, which never gets old, but new scenery and the longer hills of this section were a welcome change.
Hiker-dog enjoyed the many water breaks on this section of the trail.
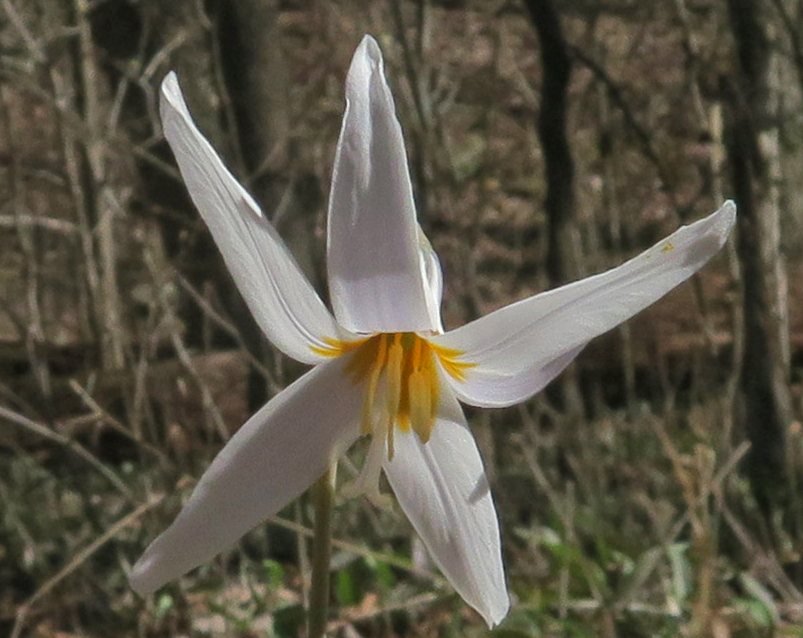
I consider trout lilies the official ushers of spring in the Ozarks. Their unique bloom is fun to see along side the trail. I like getting down low to have a look at their beauty.
Sometimes I stop to scribble notes. Today it was a little poem early in our walk. It’s nothing close to being a Nimblewill poem, but I thought of him as these couplets quickly came while standing in the middle of the trail.
Dr. Dockery doesn’t prescribe any pills, But what she gives will cure your ills. Take a sunny day and flowing streams Add eight good miles to fill your dreams A rest for weary mind and eyes Wind through oaks will hypnotize My heart pounds a “thank you,” and lungs pant praise We walk this peaceful trail today
As a teenager, I found a guitar at Bill’s Pawn Shop in El Dorado, Arkansas. I strummed a few chords while in high school and figured out the introduction to Fire and Rain by James Taylor. Drumming became my focus, so guitar fell by the wayside.
Years later, while teaching elementary music, I picked up the guitar again and strummed some chords while the kids sang, but never got out of the first position on the fretboard.
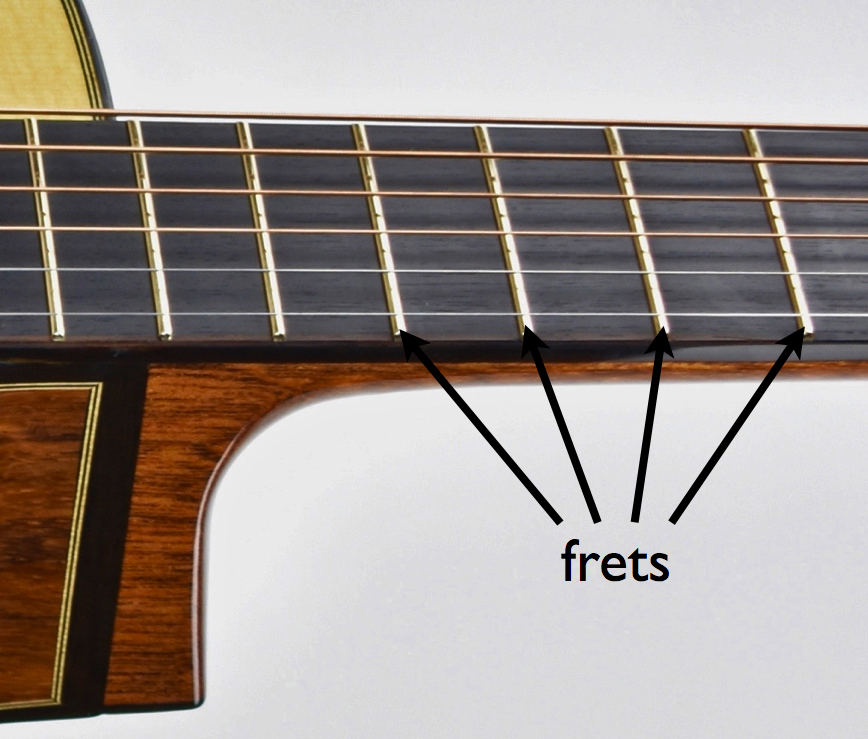
While looking at the neck of his guitar, John Prine said, “Most of this is virgin territory.” I could relate. It seems appropriate that another definition for the word fret is “to cause or suffer emotional strain” because the frets of a guitar can be intimidating.
When I retired from education, I decided it was time to grab my 1991 Yamaha guitar and try again. I found a great teacher, Randy Soller in Fayetteville, and we do distance lessons using Facetime. His degree was music and guitar, so he’s helping me explore all that virgin territory up the guitar’s neck while relating it to what I know about music and past keyboard percussion experience. Frets continue to be a challenging precess, but I’m encouraged with progress, and the fun increases as skills grow.
Watching my Pledger Guitar take shape has been fascinating, but nothing excited me quite like seeing the fretboard construction, knowing I’ll spend the rest of my life exploring that challenging landscape. When I pass this instrument down to a grandson someday, he or another family member can take on the fretboard challenge.
Mother set the example as a lifelong learner. I think she’d be pleased to see her gift motivating me to continue my musical learning.
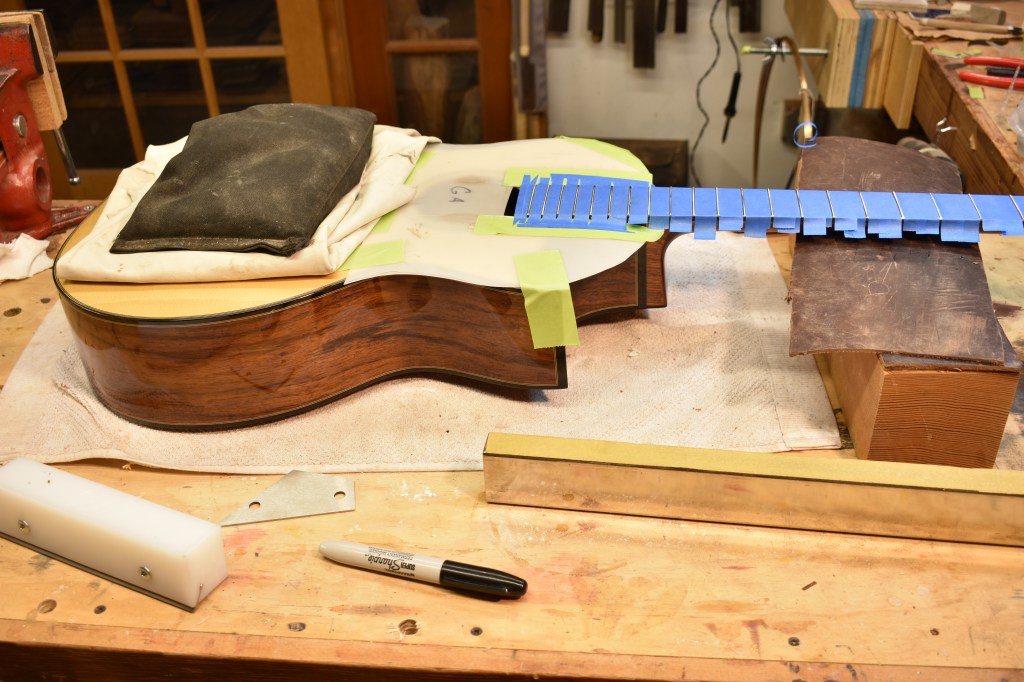
Frets being installed on the fretboard
In February, with frets firmly installed, Clayton Pledger tuned the guitar and let it “settle in” for a while as he checked the function and tone of the instrument. He sent the following photos showing the instrument essentially complete and almost ready to ship to Arkansas.
This is the fourth post about this instrument. Earlier posts can be found at the following links.
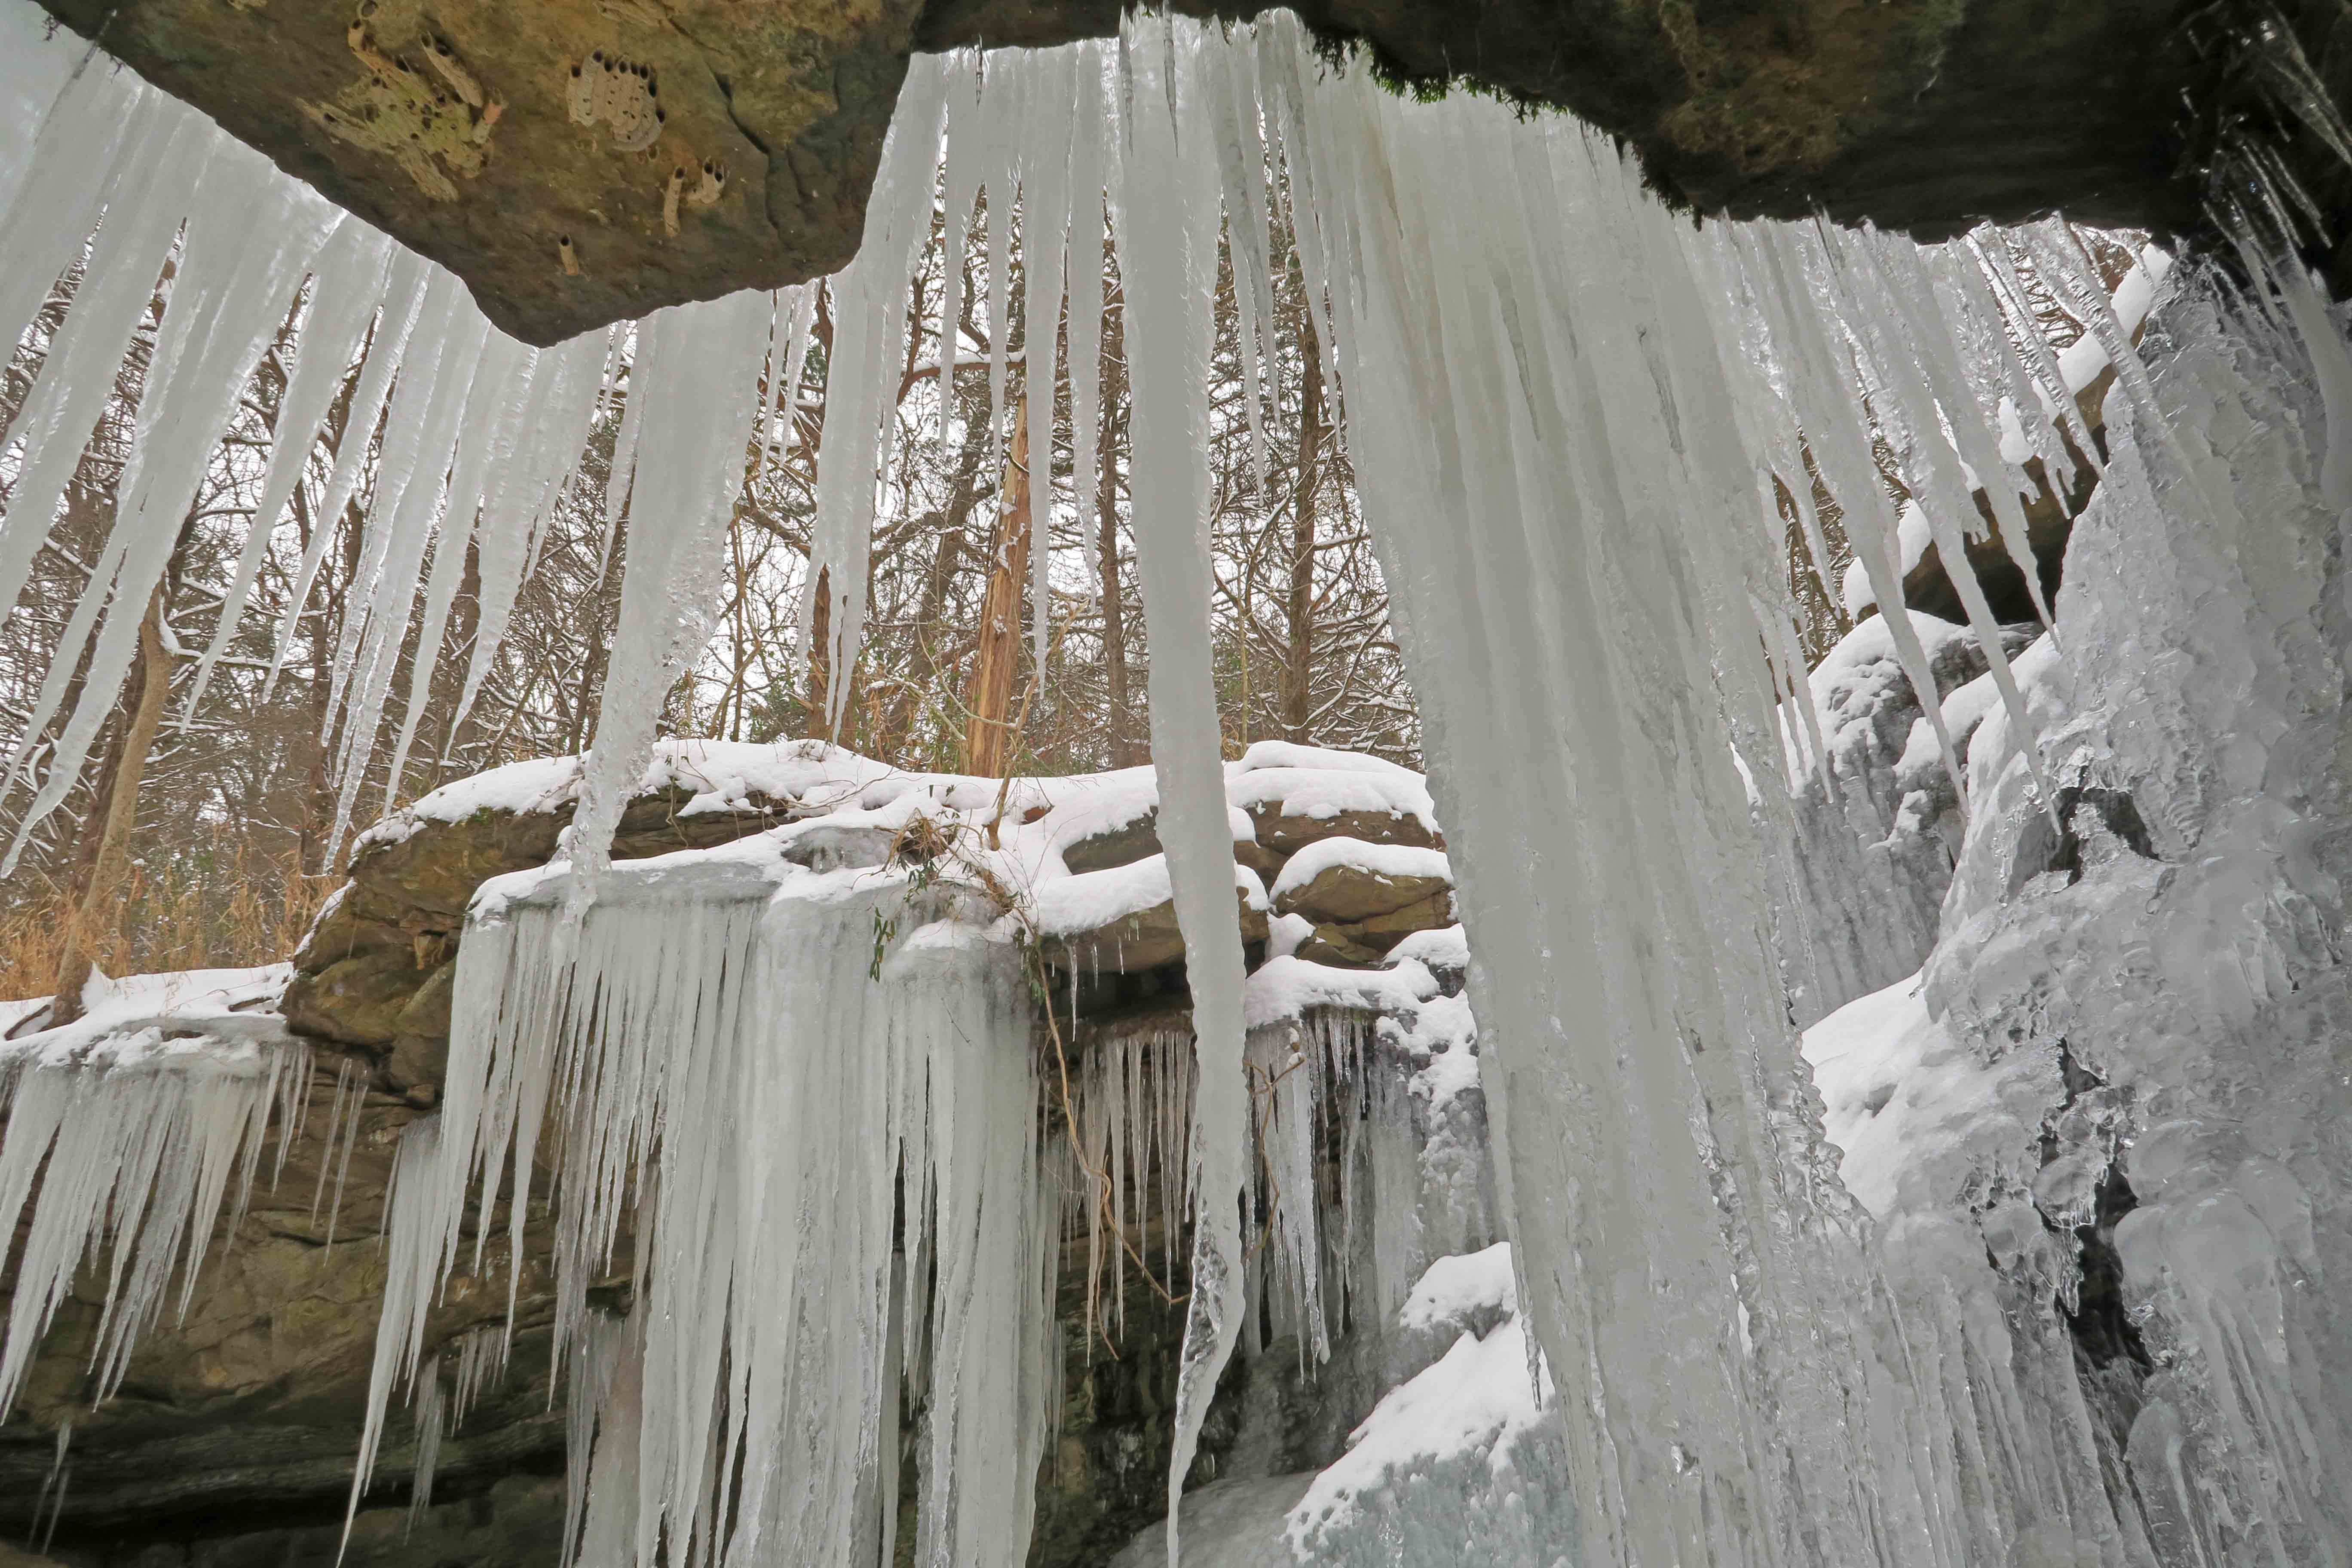
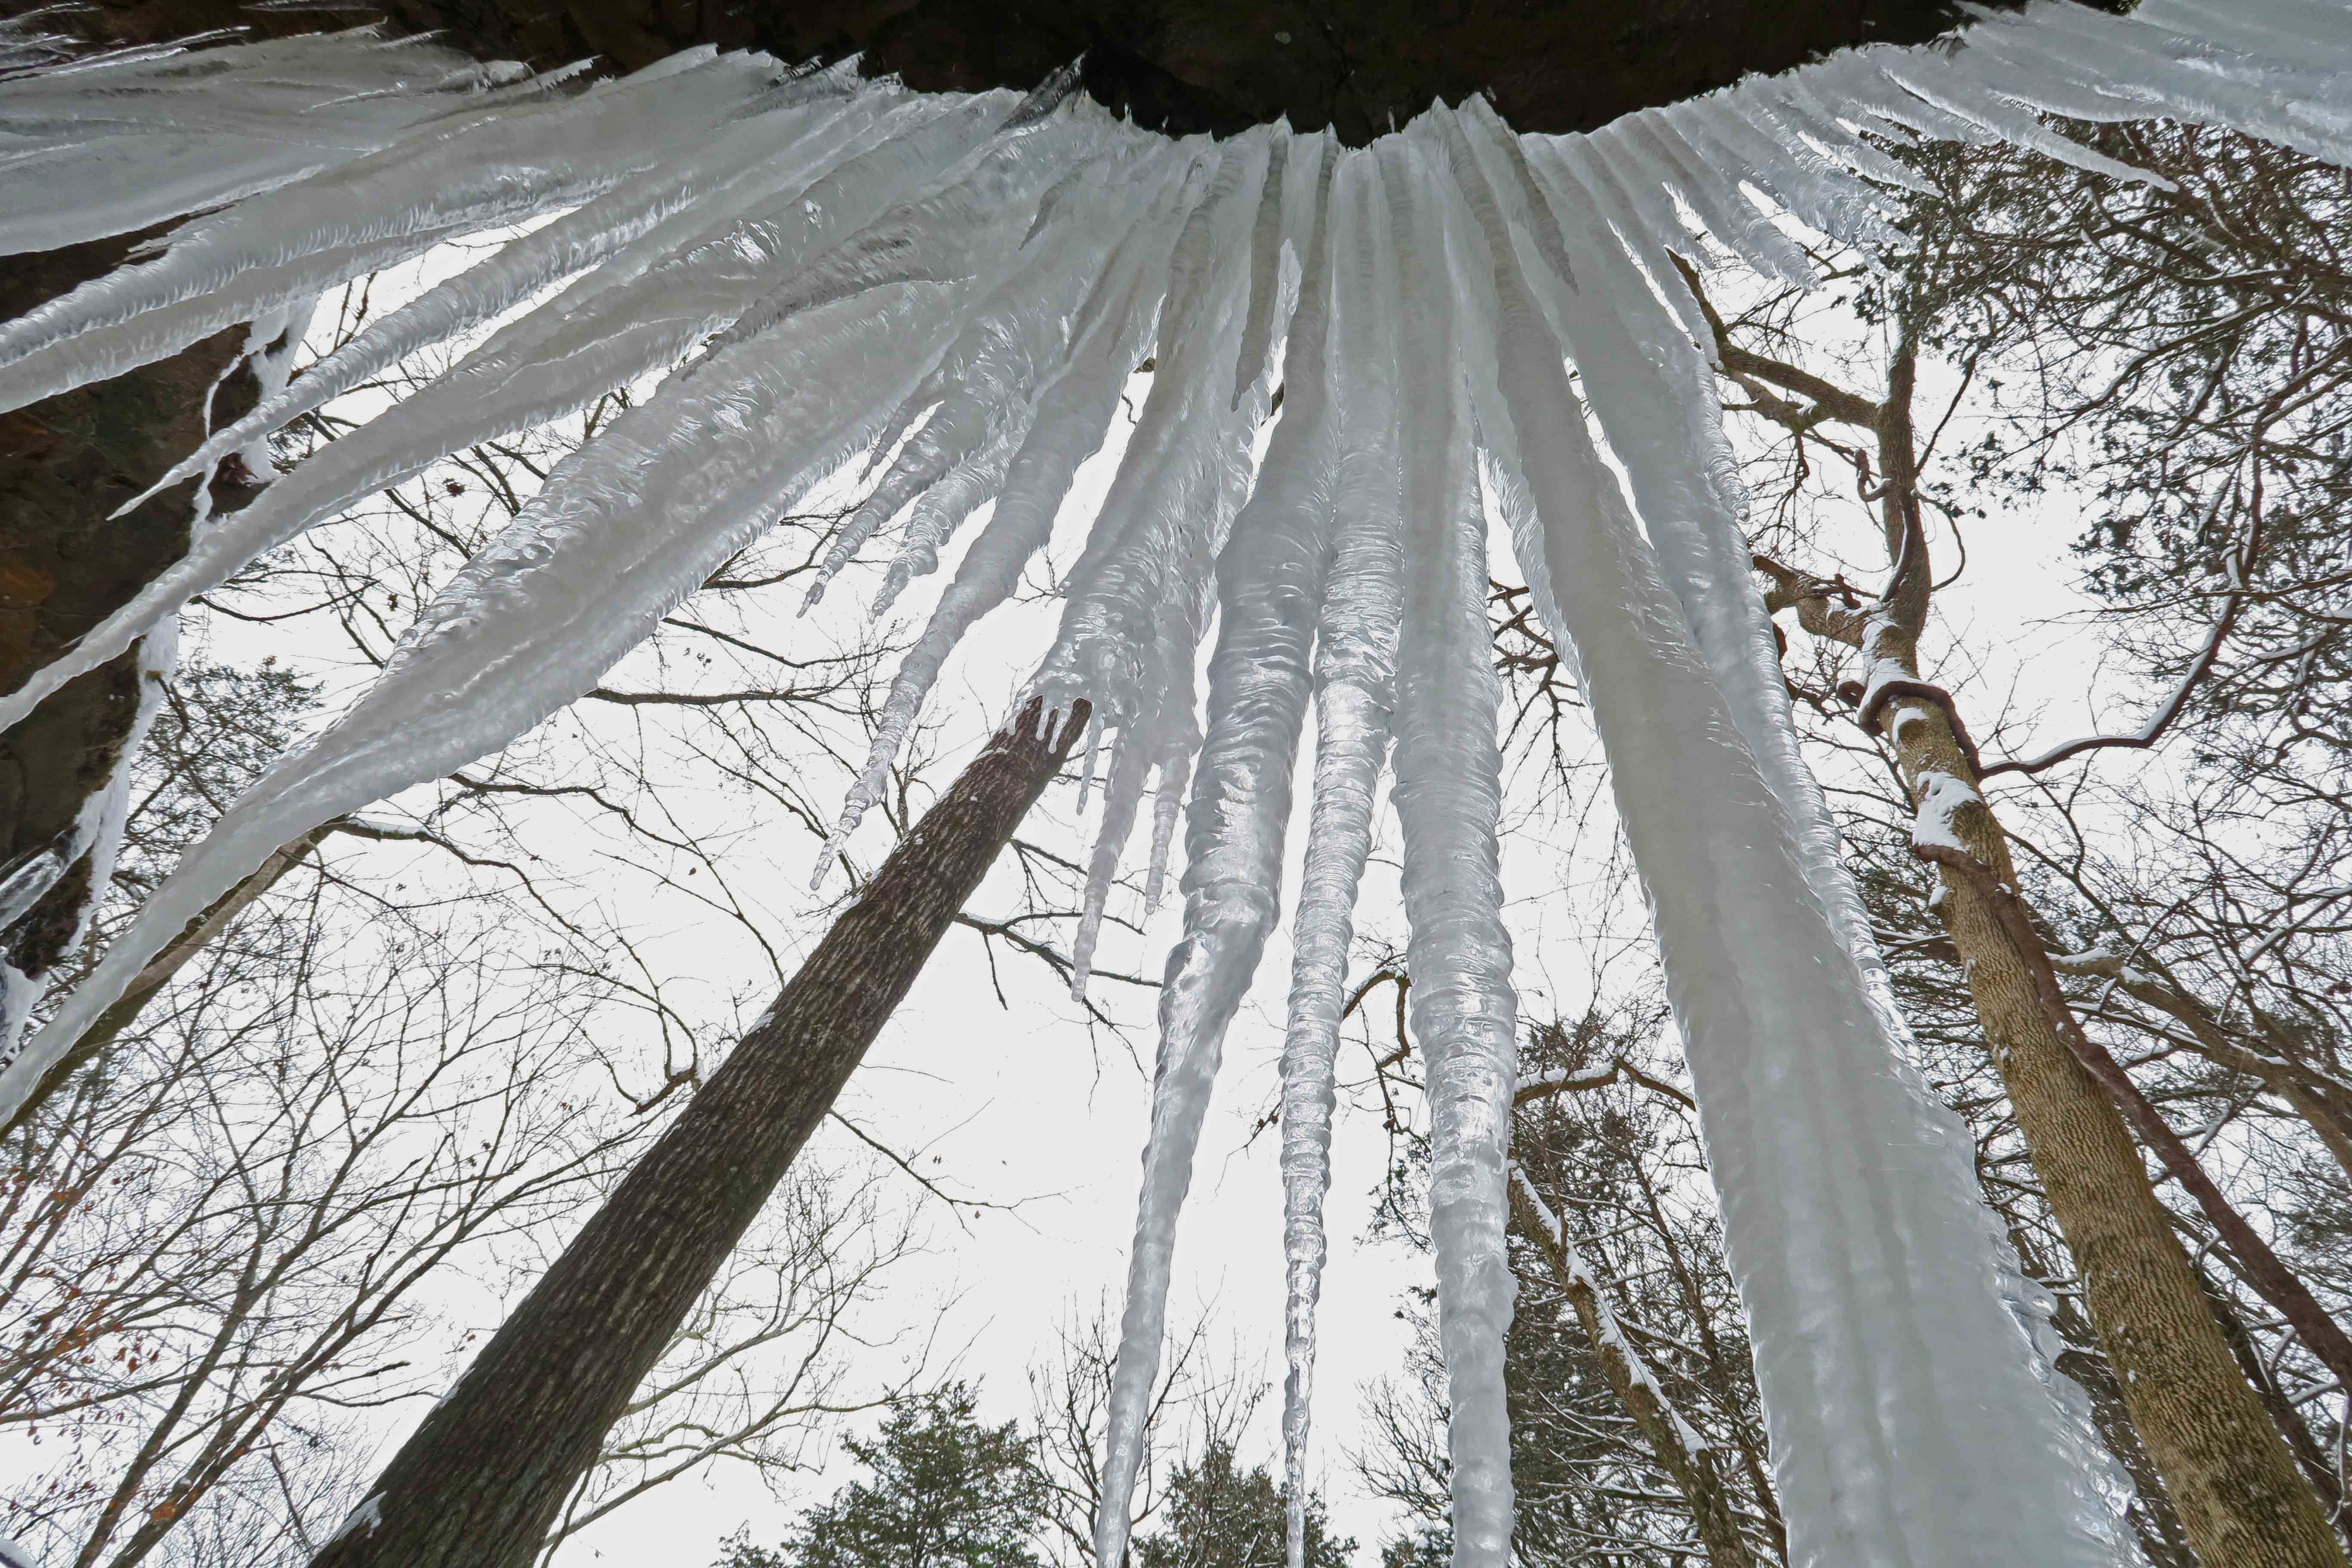
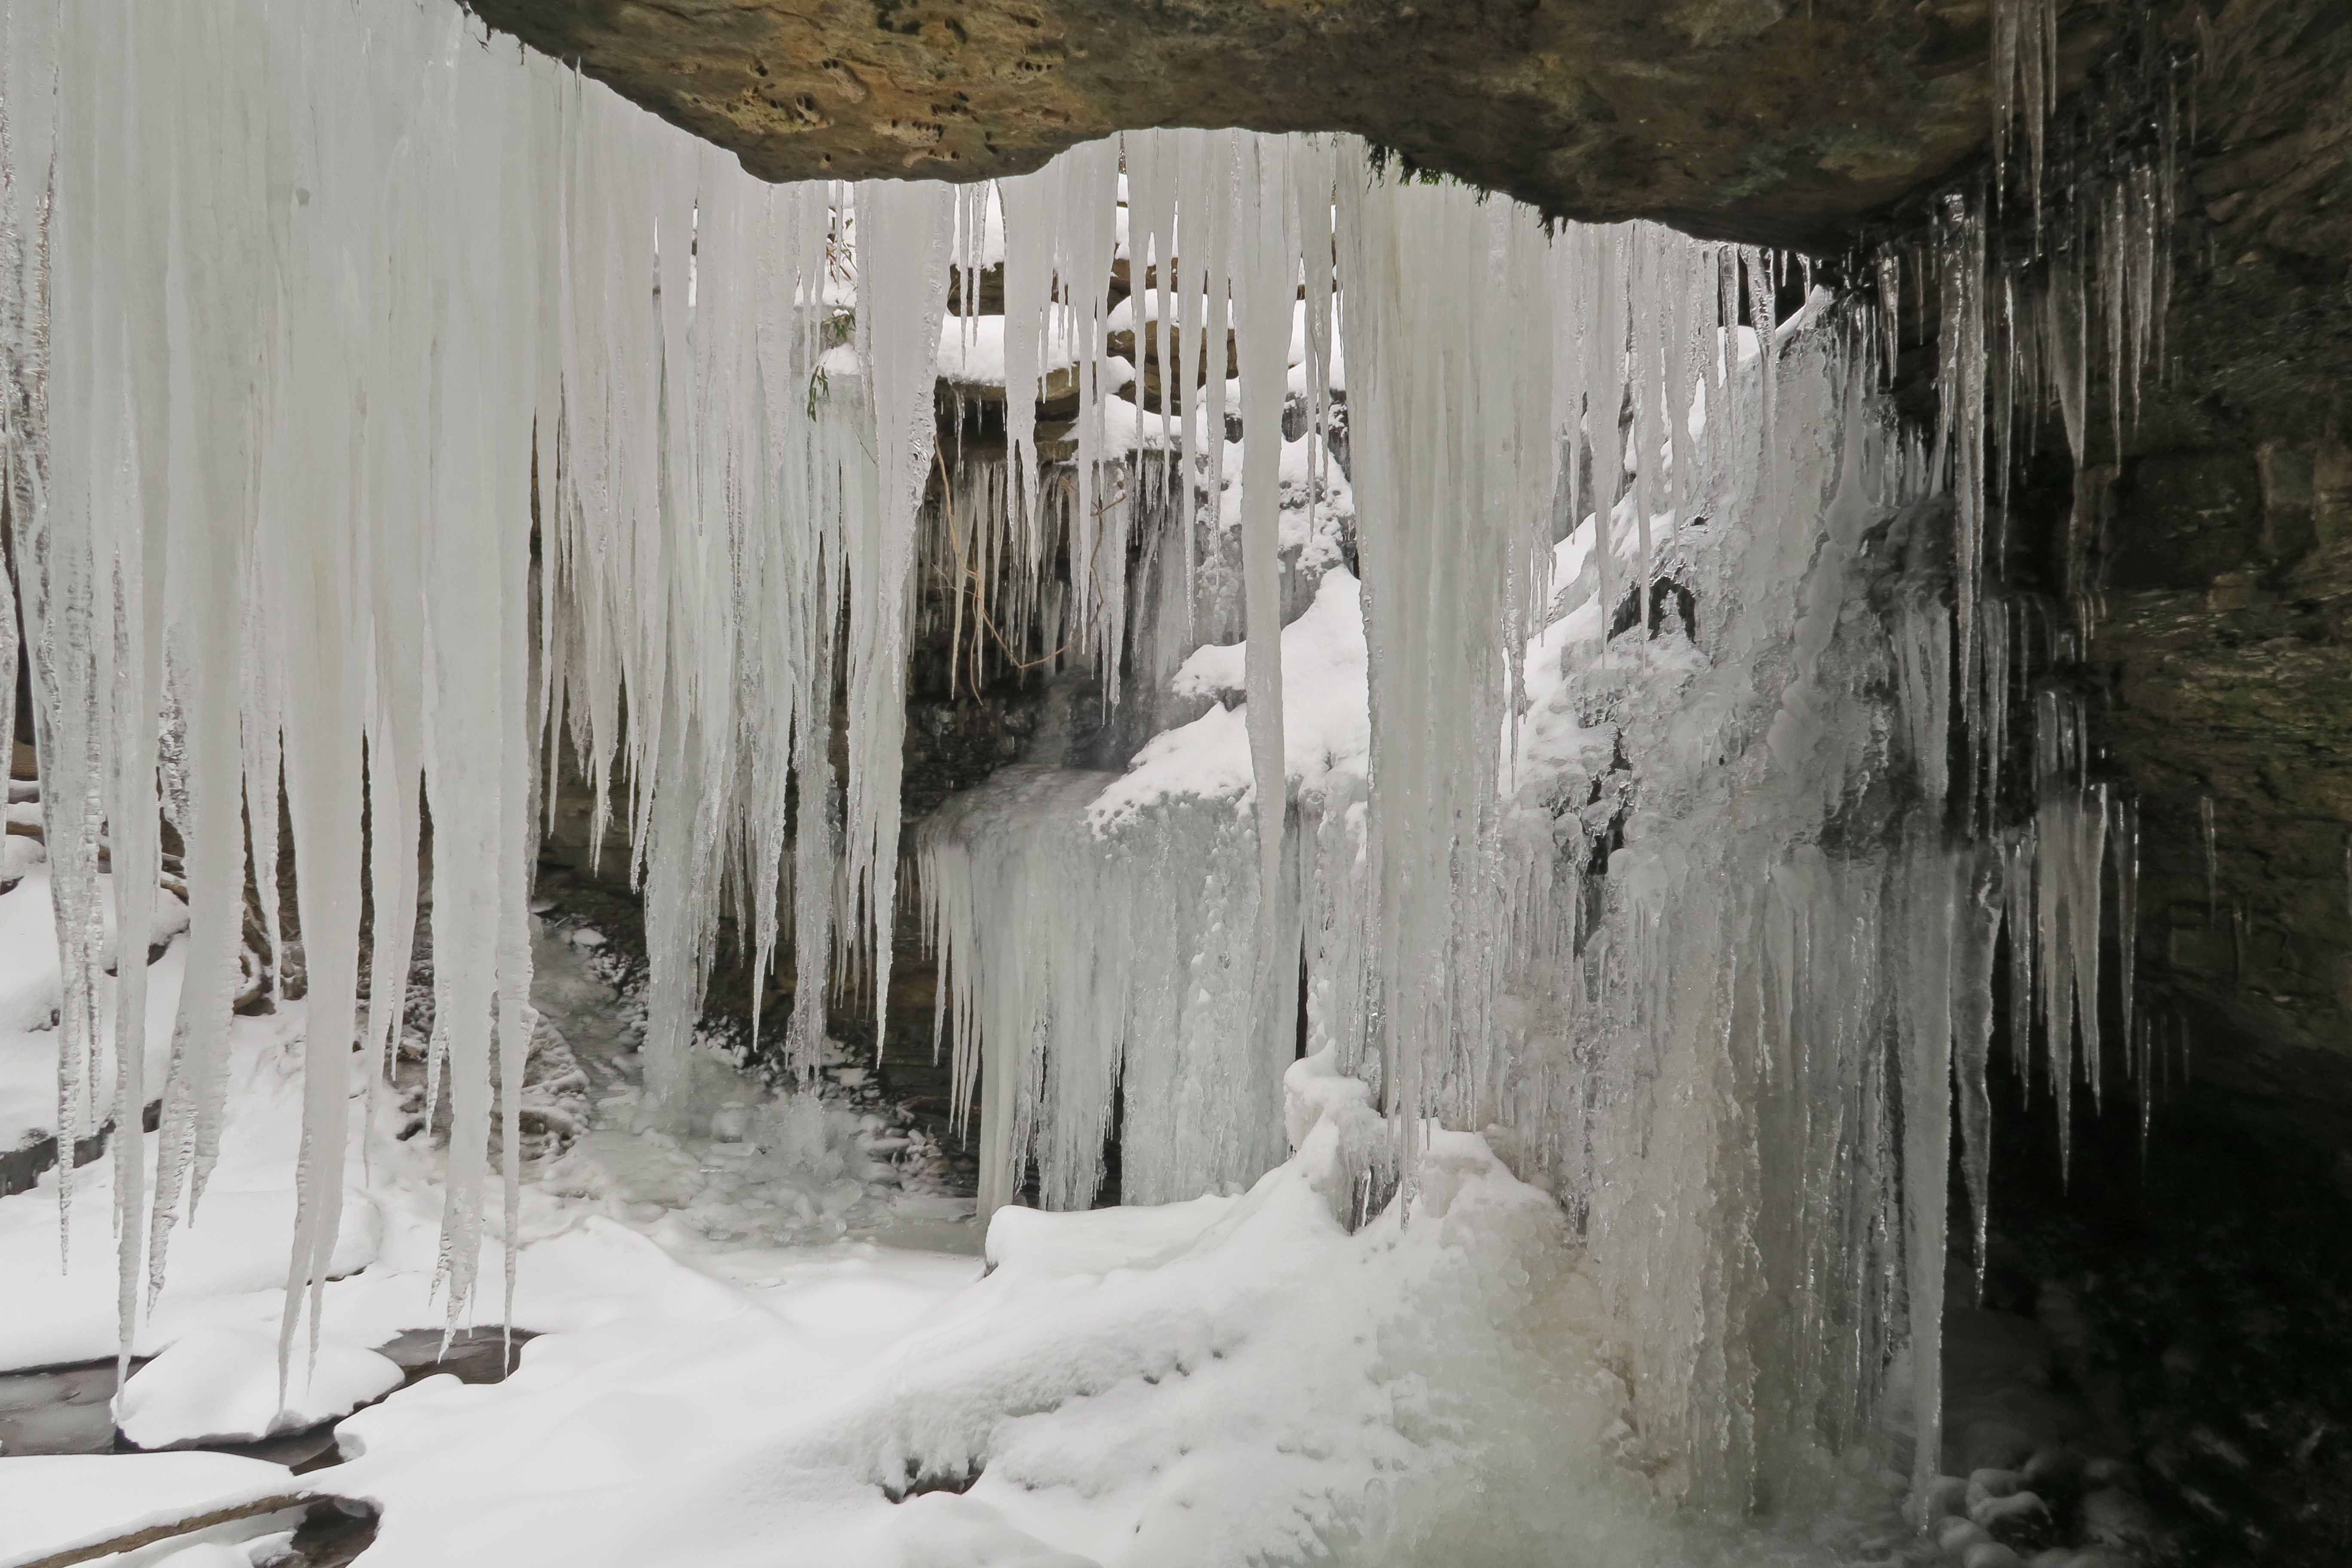
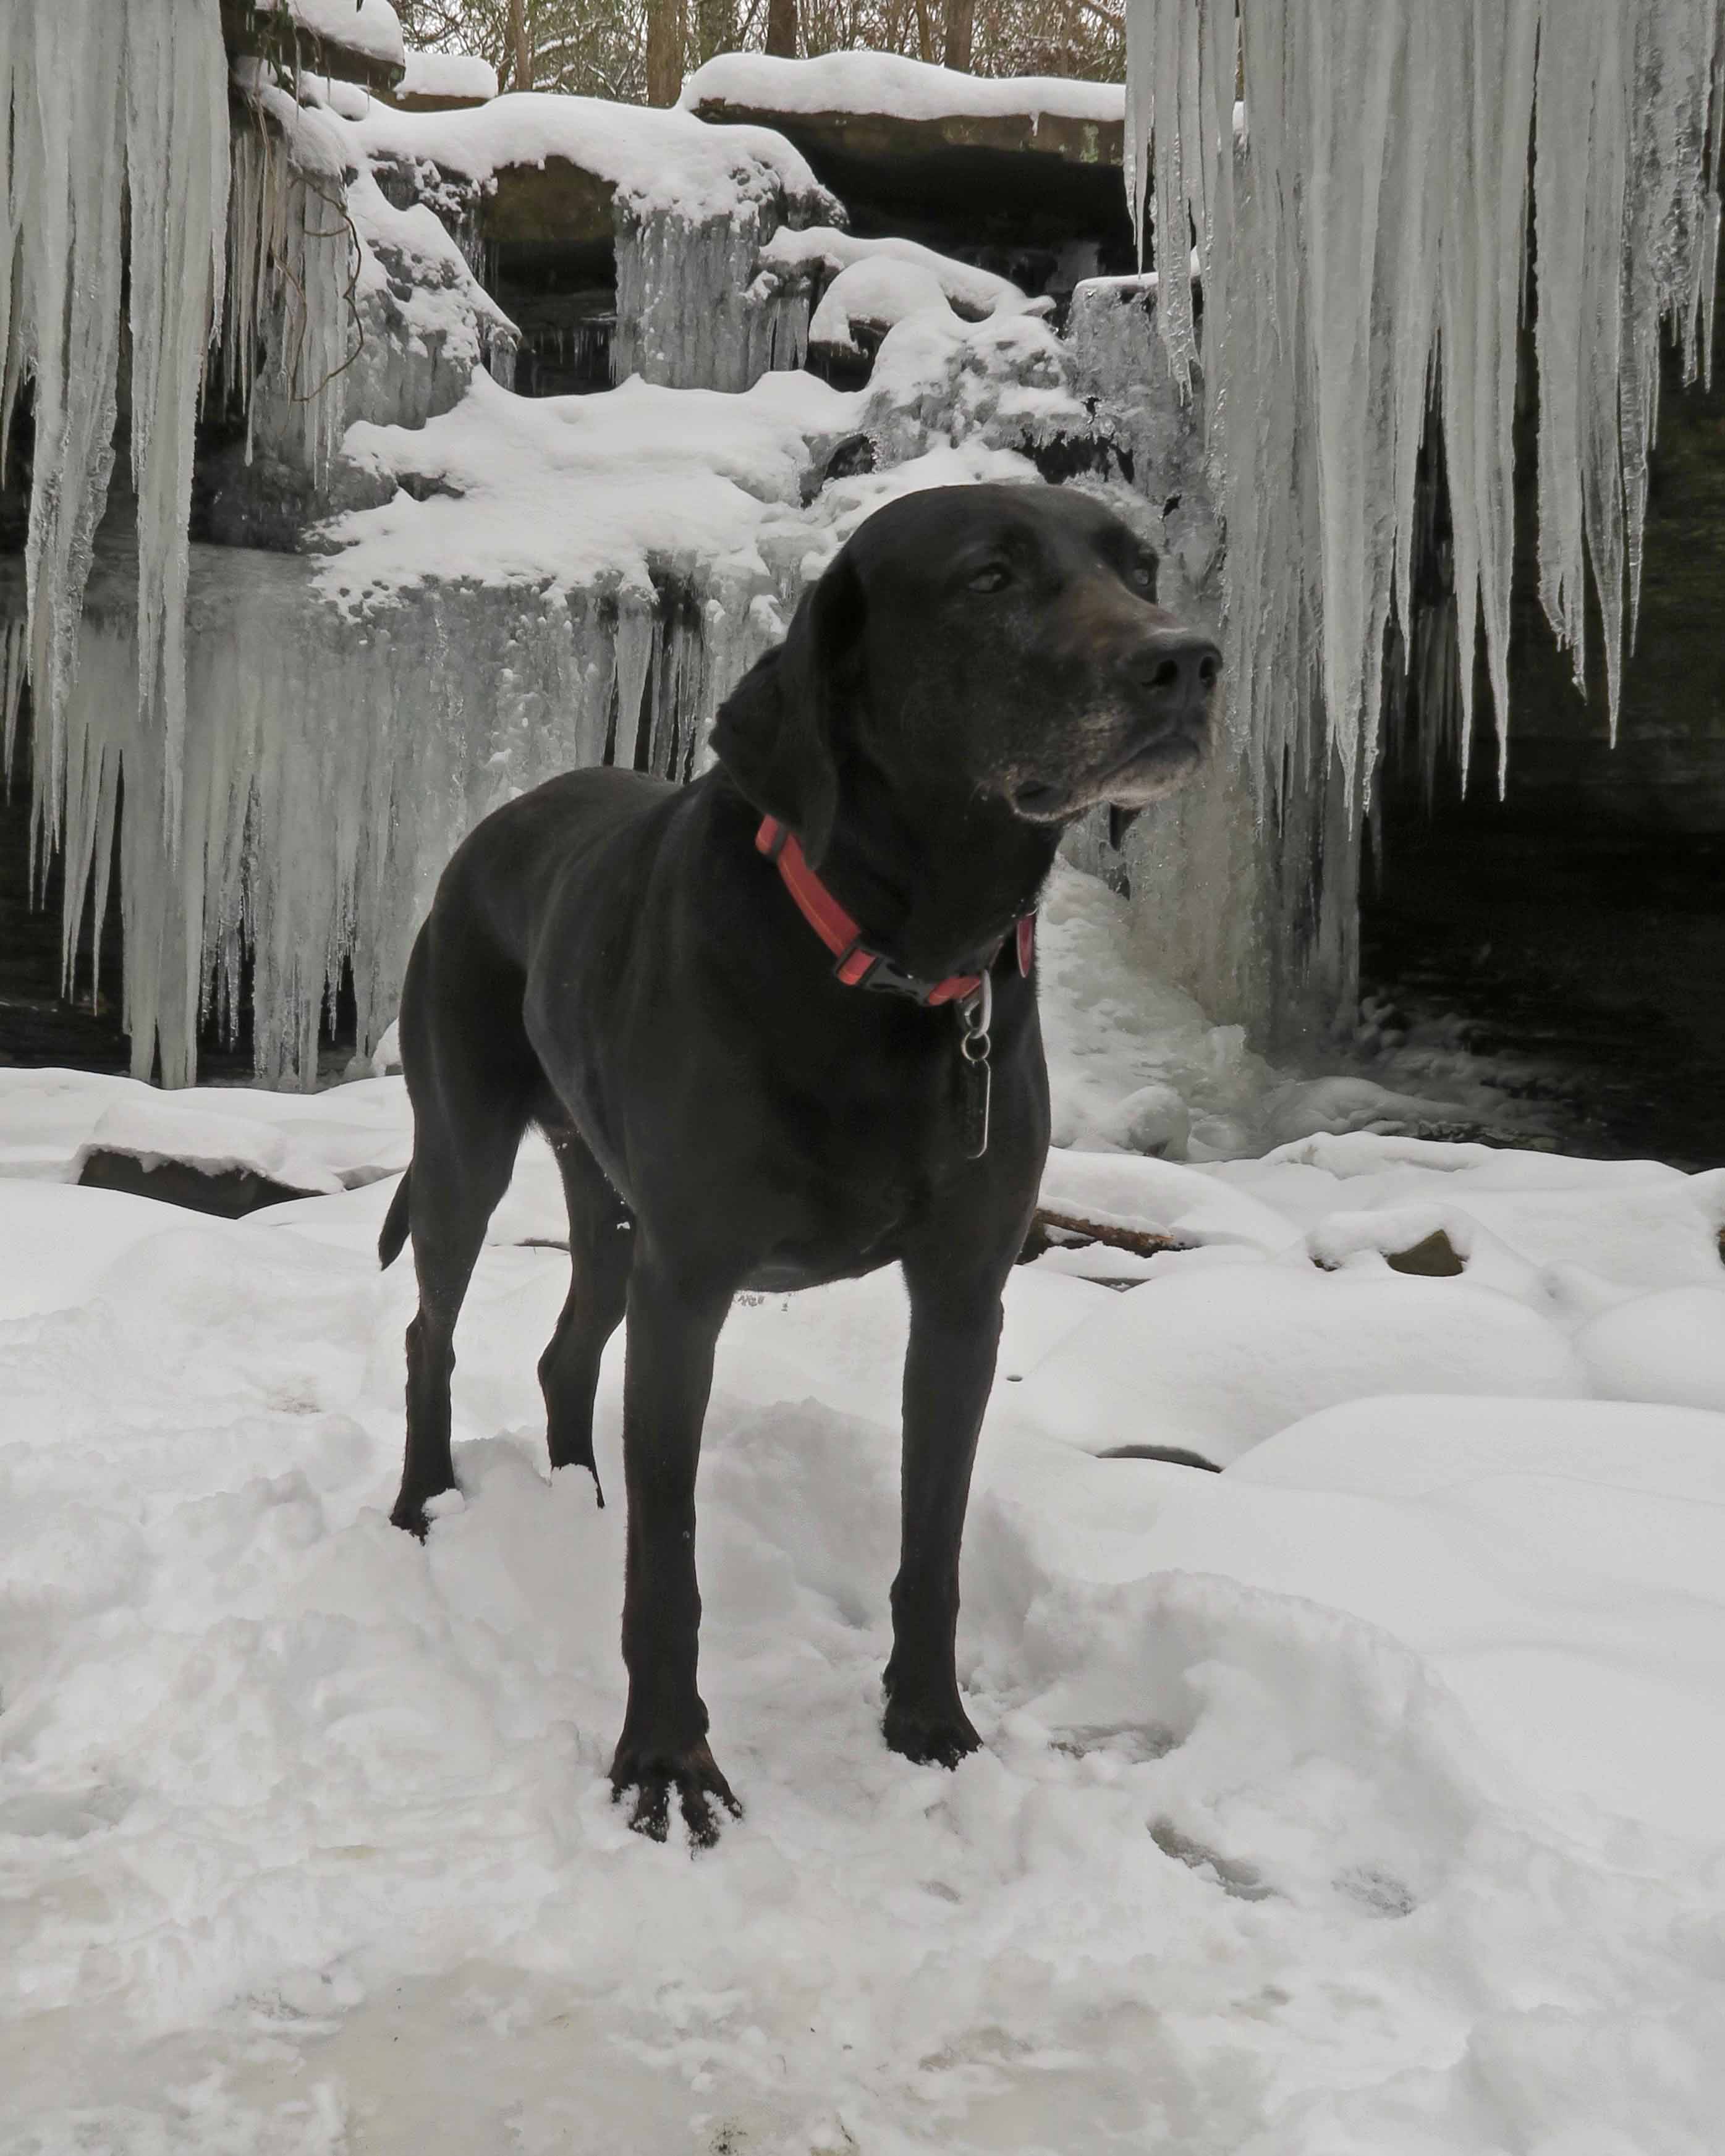
Hiker-dog and I were excited to return to McWater Falls today, but I was not prepared for the difference just two days made in the scene. Ice formations had grown, and it was a pleasure to snap a few shots. It was noticeably warmer than it was on Monday when it was 12-degrees. On Tuesday morning, the temperature dropped to 4-degrees below zero, a record for our twenty years in Alma. On Tuesday afternoon, it warmed into the low 20s, and we got another couple of inches of snow.
I enjoyed finding different perspectives around the ice formations. Hiker-dog was calm and posed with a former student who was hiking with his family.