
A reader emailed several good questions while preparing for a backpacking trip on the Ozark Highlands Trail. I enjoy responding to these type of inquiries and decided to write this post.
Many trip failures can be traced to the planning process or something overlooked in preparation. Even on the best of trips, I usually learn of things I should have done differently, often related to travel distance, packing, or food.
What follows is not intended as an all-inclusive guide, and there’s no “right way” to prepare and pack, but some of the lessons I’ve learned and resources shared here might inform your preparation. I include links to some items mentioned, but am not endorsing products or sources. I prefer to use my local outfitters, suppliers, and bookstores for most backpacking purchases.
Planning the route: Since a good friend, Bob, and I recently completed 88 miles on the Ozark Trail and we’re presently planning our second outing on the trail, I’ll use it as an example. After determining an overview of the route, usually looking at online resources, I order or print maps. The Ozark Trail Association website is very useful for this. Most long trails have associated websites that are helpful in planning.

I printed Ozark Trail maps but purchased section maps because of ease of use and durability. To be sure I ordered the right maps I used this map that labels the sections.
Since portions of the Ozark Trail haven’t been built yet, our goal is to walk the finished sections. We began working our way from south to north with the Eleven Point, Between the Rivers, and Current River sections. For this hike, we’ll continue north on the Blair Creek, Karkaghen, and Middle Fork John Roth sections.

For me, planning campsites involves guesswork and looking at topographical maps. I cut post-it notes into strips and stick them to the map where I think we might camp. I move them around while planning, sometimes even after changes are made while on the trail. I sometimes enjoy not knowing exactly where we’ll stop to spend the night.
Determining when and where water will be available is part of route planning. Sometimes you have to make informed guesses. Monitoring rain in the area you’re going to hike and contacting locals can help you determine if smaller creeks might act as water sources. Last fall when hiking dry sections of the Ouachita Trail, we planted water caches for insurance, but this involved driving to pick up empty jugs after the trip.
How many miles to travel each day is a common question. When in doubt, go short and enjoy the views. It’s easy to bite off too many miles and end up injured and having to leave the trail. With a pack between 18 and 26 pounds, 10-12 miles is a good distance for me, but there’s nothing wrong with a 6-mile day. I occasionally do 14 and might go longer after I correct my foot issue (see the next topic). Update: The foot-fix worked making 15-20 mile days a possibility.
The feet: The most common saboteurs of multi-day trips are down at the end of our legs. Feet are so far away that it’s easy to ignore them. Things we hardly notice on dayhikes, become serious problems when walking day after day with 18-35 pounds on our backs.
On our first 88-mile section of the Ozark Trail, the third toe on my left foot was a problem that reared its ugly head beginning about day four of eight. This same toe was a problem earlier on the Ouachita Trail, but I tolerated the discomfort on both trips.
After the Ozark Trail experience, I found a good podiatrist. He used a spacer and small lifting device to correct this wayward toe’s position, the result of a childhood injury. If something hurts, check it out. It might be an easy fix.
When hiking, doing gentle stretches each morning and evening can avoid problems. Using some lotion on the feet each night after cleaning also helps prevent blisters. Pack a file for smoothing the toenails during your trip.
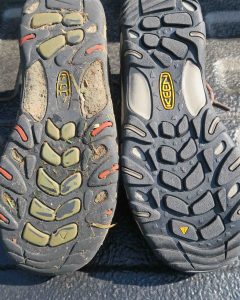
Wool blend socks help prevent blisters. I use Darn Tough Socks. They last! Comfortable shoes are also essential, and I go light as possible with footwear as in low cut hiking or trail running shoes. No need for heavy boots!
Resource: My favorite (and only) book about this subject is Fixing Your Feet by John Vonhof

Packing light: Pack weight is a challenge, especially for multi-day trips when the addition of food increases weight. Looking at the “big three” has helped me. Shelter, sleep system and the pack itself – These three are the big weight items. If you swap a 4-pound tent for a 1-pound tarp, that’s huge! Sometimes I’ll use a tarp, but I have a 2-pound tent I also use depending on anticipated conditions. Moving from a heavy sleeping bag to a down quilt and silk bag liner has reduced weight for me.
Many never think about the actual weight of the pack, but some are close to 5-pounds. Having a fancy suspension system doesn’t reduce the weight your feet and knees are feeling so go as light as possible with the pack. Most ultra-light packs do fine with loads of 15-30 pounds.

Next, I go through the pack to see what I can leave at home. Example: toothpast and toothbrush – I don’t need them. I take floss and use a green twig to clean my teeth as I walk in the morning. I’m veering into the “too much information” category here, but this was the first example that came to mind. I consider Wet Wipes a luxury item but worth carrying. Cleaning up before getting in the bag liner reduces the stink and makes sleep easier.

I pack needed items in small containers when possible to save weight. No need for a tube of foot cream or sunscreen, so I estimate what might be needed and pack that amount. As you can see from the photo, I still had foot cream, sunscreen, first aid cream, and Dawn Soap at the end of eight days. The floss is for size reference, but I’m looking for smaller floss containers. I despise plastic floss picks when I see them in the woods. Whatever you use should be placed in your trash bag and carried out. I use an empty coffee bag for trash because it’s light and can be folded down to the size needed. At the end of the trip, the bag goes into the trash.
Clothing: I wear one outfit for the duration of the trip. Layers are added depending on the expected weather. I use a silk weight base layer for cold hiking and an even lighter layer for sleeping. I like to carry a down vest and, if temperatures in the low 20s are forecasted, I’ll add my down pants for sleeping if the quilt needs extra help. A hat for the sun is essential. For a warm hat, I use a stretch-fabric tube (brand isn’t important). Beanie hats work well too, but they tend to be heavier and aren’t as multi-use.
Deciding what needs to remain dry is essential. I pack my clothes and personal items in a waterproof stuff sack, then place that along with my down quilt inside a trash compactor bag. The compactor bag fills cracks and crevices in the pack to utilize space and has kept items dry on rainy days.
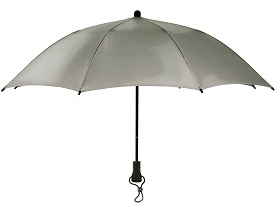
When I expect rain, I pack an ultra-light umbrella. This is a personal choice because I’d rather have some wetness on my lower body and not be sweating and cold all over. I sweat under the best of rain shells when hiking hard in moderately cold temps. The umbrella gives me a little roof to walk under, but it’s not for everybody. I’ve also used a poncho which kept my upper body dry, but I still get clammy.

Fire, Food & Water: Like most backpackers, I have a varied collection of stoves. My hiking buddy carries an MSR WhisperLite. It’s great, but I need something simpler. I’ve used a PocketRocket when at higher elevations (like the John Muir Trail) but for the Ozarks, I like my Esbit Stove that uses two Esbit fuel tabs per day. Sometimes I’ll build a fire for cooking if there is an existing fire ring.

Food can get heavy! I avoid freeze dried meals because of their saltiness, expense, and packaging. I prefer using powdered soup mixes, instant potatoes, and Knorr side dishes as a base with my own dehydrated vegetables and meat added. I purchase dried chicken from Mountain House and add it to most meals. I repackage all in ziplock bags. Results are best if I place the chicken and vegetables in water when I first arrive at camp to increase their hydrating time.
In the Ozarks, bears aren’t usually a concern. I never carry bear spray and only used a bear canister once in the High Sierras of California where it was required. I use a bag for food and tie it in a tree, but mainly to keep the little critters out.
Water is heavy! One liter is just over two pounds. Its storage and treatment can add even more weight. I avoid Nalgene bottles because they’re heavy and bulky. I use a Platypus 70 oz. pouch for water storage and it doubles as a pillow filled with air and wrapped in fabric. I use one-liter Vapur collapsible bottles while walking. They’re light and fold up when not in use.
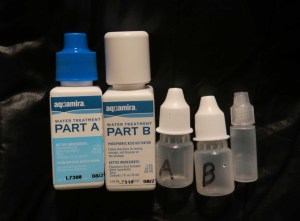
I typically use Aquamira drops for water treatment but carry it in smaller bottles with a tiny bottle for mixing.
Sawyer filters are light and effective. They’re cheap, so I usually carry one in my daypack even though I rarely use it on multi-day backpacking trips.

I must interject a note about coffee here as I consider it essential! I sometimes use Mount Hagen instant, but you end up with a small wrapper to carry out. My tastiest morning brew involves using espresso grind coffee and leaves no trash to carry out.
Here is a link to my Backpacking List. It’s a working document that I update from time to time.
Resource: Ultra-Light Backpackin’ Tips by Mike McClelland – I love this book!
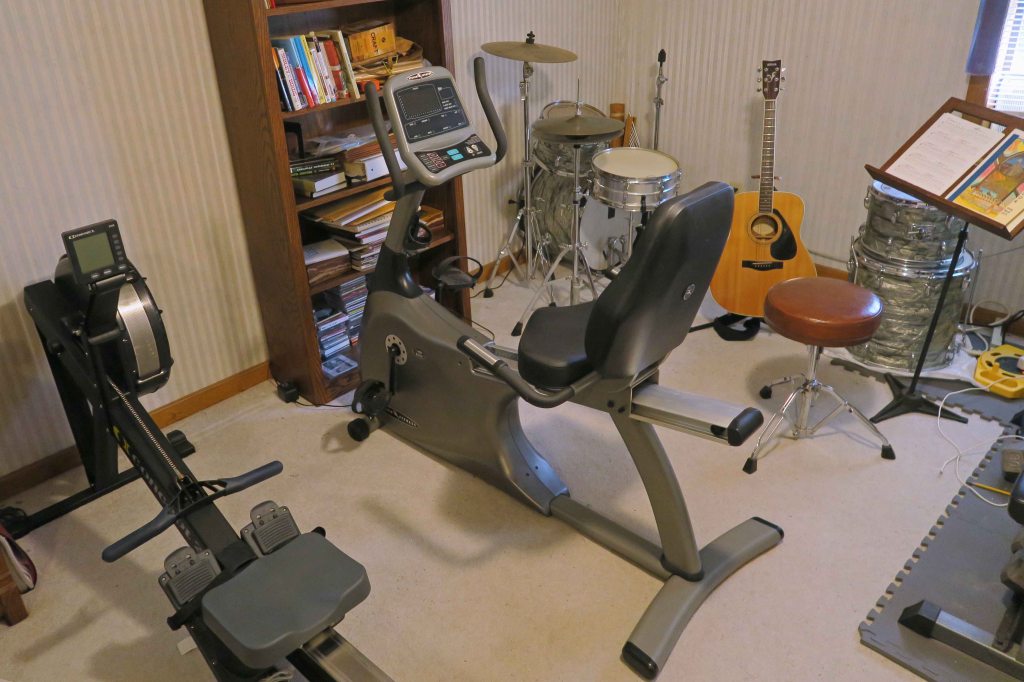
Physical preparation: The best way to prepare for backpacking is to walk with a backpack. I put magazines in my bear canister and place it in an extra pack for this purpose. I love my rowing machine, but biking, running, or any similar exercise will be helpful in preparing for backpacking. Update: In August of 2020, I added a stationary bike (pictured above) to my regular workout and love it! Lunges, squats and toe raises are going to be helpful but don’t start a new activity in the weeks before a long trip because an injury will interfere with preparations. Rest, nutrition and safe stretching are all important to general health and in helping you avoid illness prior to your trip.
Resource: The Stark Reality on Stretching by Dr. Steven D. Stark – This book shows safe stretching techniques and points out the dangers of some common stretches.
I’ve shared what I think are important things to remember when preparing for a multi-day backpacking trip. I’ll update this post as questions reveal other areas to include.
Enjoy your planning! If things go well, you’ll gain lifelong memories of indescribable beauty and the satisfying sense of personal accomplishment. If things don’t go as planned, you still might have great memories of your time in the wilderness, but with the addition of new learning to apply on your next trip.

While I love the long trails, I enjoy a good dayhike! If you need a great guidebook for the Ozarks of Arkansas and Missouri, check out my book, Five Star Trails: The Ozarks.

Sometime since I was that active in the hills and mountains….so it was rather nice to recall some issues, highlights and possible issues you have to overcome on the spot. It was great fun both reading and remembering 🙂
I appreciate your feedback and enjoy knowing you’re virtually hiking along with us.
I do very much enjoy the longer hikes…. mine are now limited to day hikes. 🙂
Love reading about what others pack, in Australia we don’t need to worry about bears (well maybe dropbears lol) but snakes we have to be cautious so a snake bandage is a must carry on long hikes. I’ve been able to get my pack down to 15km with food and water but l guess that’s still not light, always looking for ways to lighten it without taking out my Must Haves lol
Thanks for reading! I didn’t mention snakes, but we do have copperheads and rattlers, though they’re not a problem unless we start sticking our hands under rocks:) Great to hear about trail challenges from Australia!
Yes l would rather come across one of our snakes than yours, ours don’t attack you, I’ve heard yours do 😆
Pingback: Gear Obsession: Spoons | Ozarkmountainhiker