I haven’t shared my current coffee on the trail. I like both of these options that leave me with a small pice of packaging to pack out. The Starbucks is more expensive and taste slightly better to me. The Mount Hagen is cheaper and taste pretty good, too. Both taste great on the trail when made with filtered water from an Ozarks stream. Until doing this post I’d never noticed the weight. Starbucks is 3.3 grams and the Mount Hagen is 2 grams. I’d have to pack a lot of coffee before weight was a factor in my decision.
I used to put espresso grind in a ziplock bag. After pouring the hot water, I’d put a teaspoon of coffee on top of the water and let it sit a minuet before stirring it and letting it settle. This was the best tasting coffee in my opinion but not as simple to make and you have to be careful not to drink the sludge at the bottom of your cup. I dispersed the sludge by adding water and spreading it over foliage.
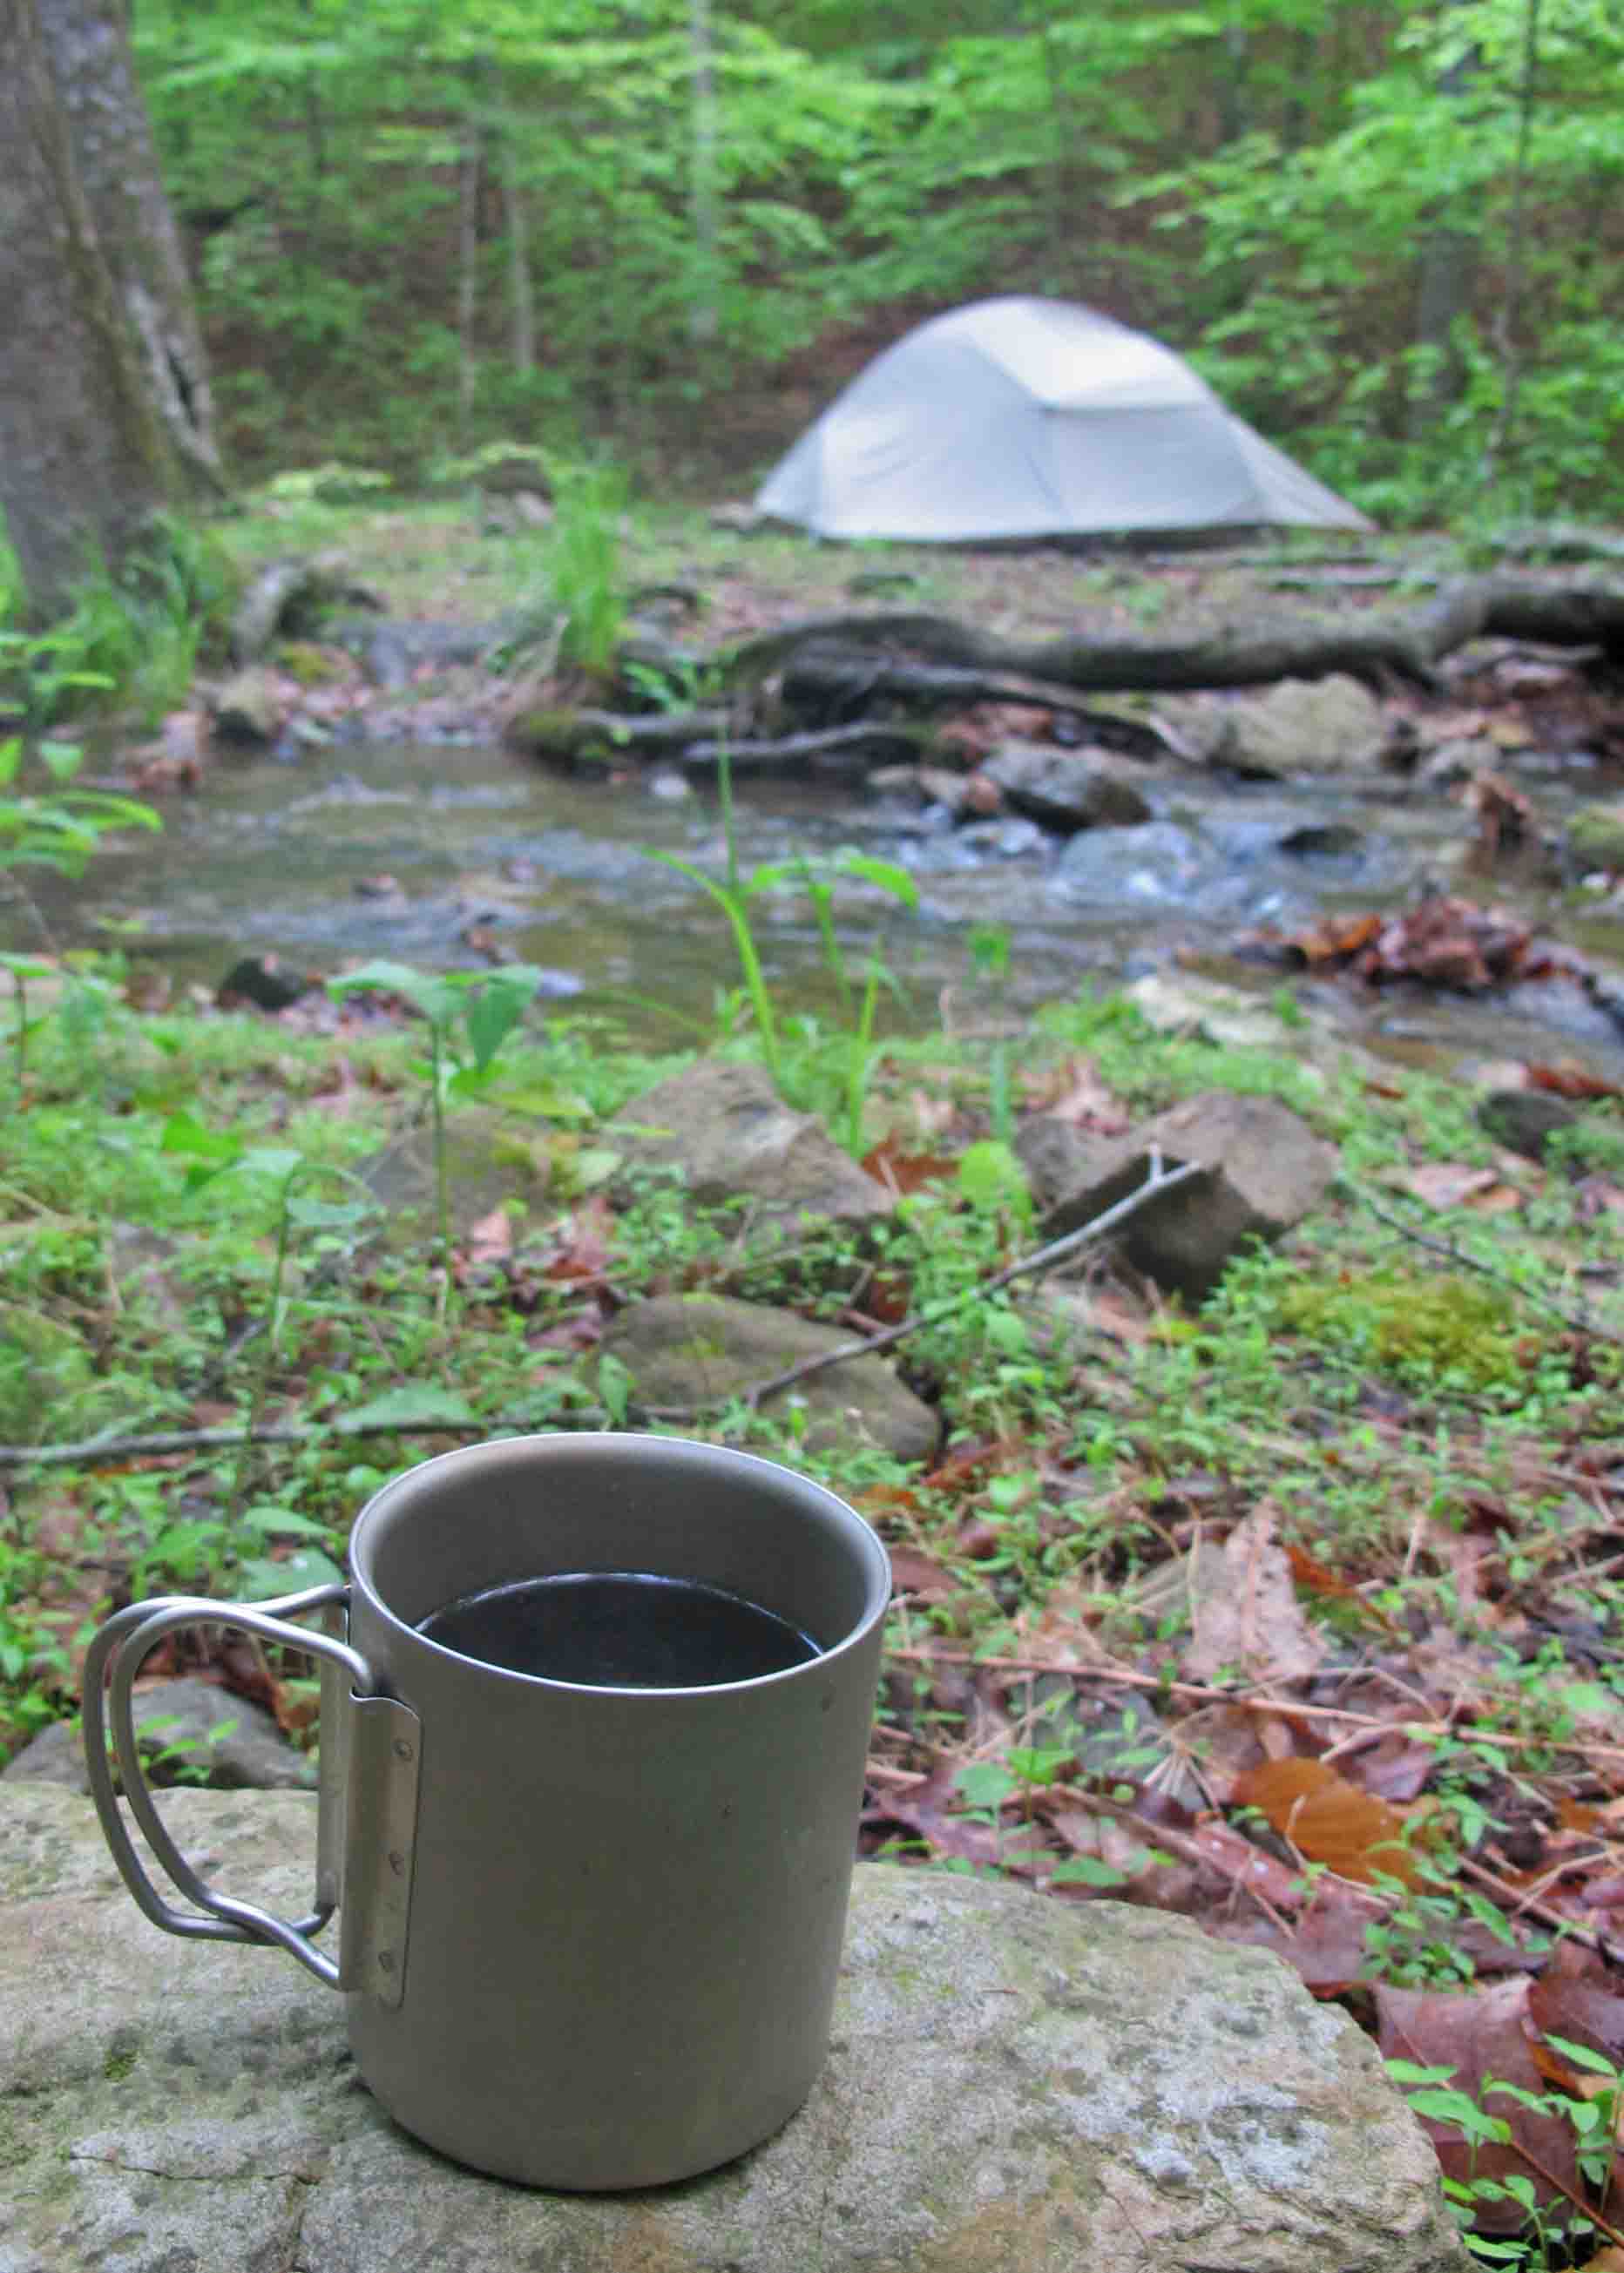
Four-star hotel and gourmet coffee next to Briar Branch
I haven’t been happy with the weight or flavor of packaged hot chocolate. After a little experimenting, I settled on the following recipe. Just as with my coffee recipe, this might not be for everyone, but if you want a healthy hot beverage to sleep on, this is the ticket!
Mix the following ingredients in a bowl and measure into ziplock bags for the trail. Pictured above are three servings in the ziplock. Weight is less than 1.5 oz.
1 cup confectioners powdered sugar (2 cups for less bitter flavor)
Pour a small amount of hot water in the cup and stir in 2 rounded teaspoons of the mix. My titanium cup is small (8 oz.), so adjust your mix to taste. After stirring thoroughly, add remaining water. Disclaimer: I like my drinks dry, so you might prefer that second cup of powdered sugar if you like a more traditional flavor. I find that the coconut milk powder mixes well and I like the flavor.
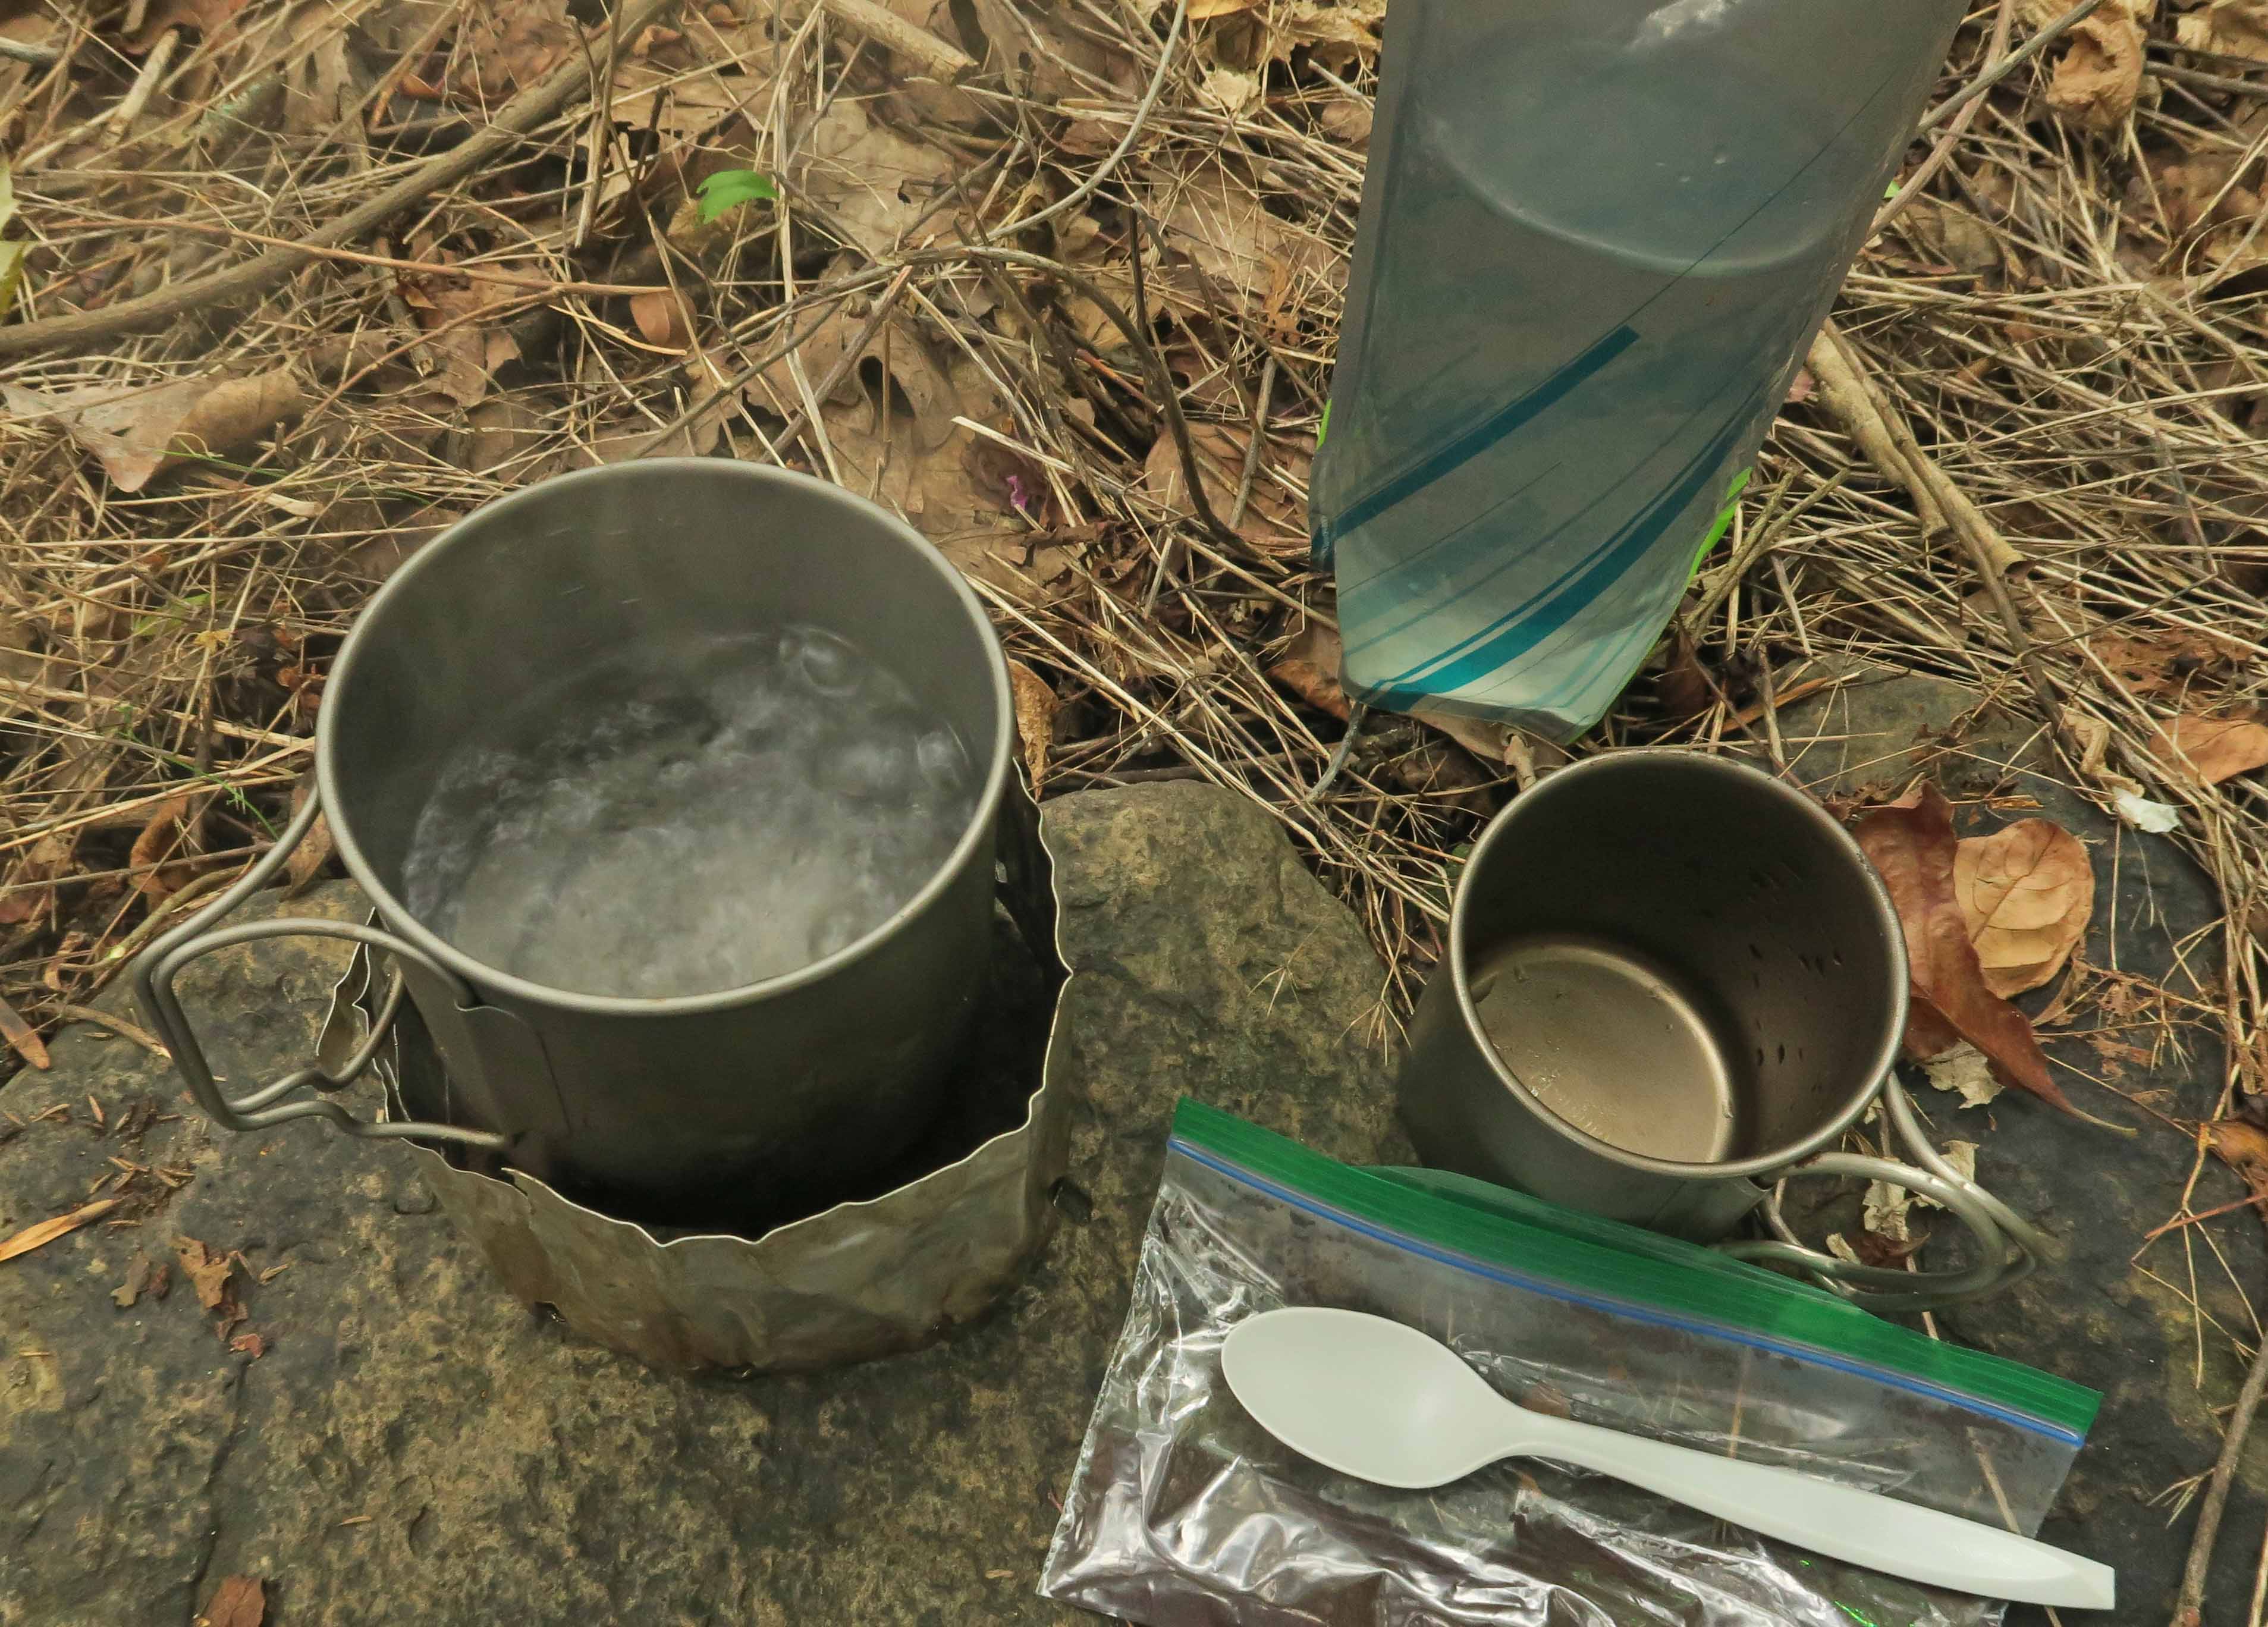
In the photo above, I used a Wendy’s spoon, similar to the one I found in a Ouachita Trail shelter several years ago. There’s a story behind this spoon I now carry in addition to my titanium spoon for good luck. It reminds me that the trails provide. I hope you enjoy your Backpackers’ Hot Chocolate! Let me know if you find good variations that I might want to try.
Carry as little as possible but choose that little with care.
~ Earl Schafer
Carrying 14 lbs. with food and water
I have an obsession with pack weight. I got it honest early in my backpacking days while carrying a base-weight that must have been in the 45-pound range. After a few trips with a 3-pound sleeping bag, 4-pound pack, heavy stove, heavy leather boots, and lots of extra stuff I didn’t need, I began to make different choices when it was possible to replace or eliminate something. I have an older post, “Preparing for Multi-Day Backpacking Trips”, that was well received. For this post, I’m focusing specifically on pack weight.
Over the last twenty years and after a lot of trial and error, I’m carrying a base-weight of 9-10 pounds when I’m using my lightest options. Base-weight is your pack-weight before adding food and water. The photo above shows my pack with food for two nights and water included.
Going lighter is all about personal choices. I’m sharing the following, not because this is how it should be done, but giving ideas and possibilities for going lighter. If you have a trick that works for you, please share with me through the contact page. I love to pick up good ideas from readers. I will mention brand names for clarity in this post, but I’m not endorsing any company.
The big three: 1 Sleep System, 2 Shelter, 3 The Pack – Reducing weight in these three areas has the most significant impact on pack weight.
1 Sleep system: Rest is essential to your trip’s success, so this is no place to skimp on cost, but a good down quilt is less than a sleeping bag. I use an Enlightened Equipment 20-degree down quilt and a silk bag liner for a weight of about 1 lb. 4 oz. Twenty-degree sleeping bags weigh in around 2 lbs. 6 oz. to over 3 pounds.
I’ve used air sleeping pads with good results except for the occasional leak. There are lighter and more rugged options.
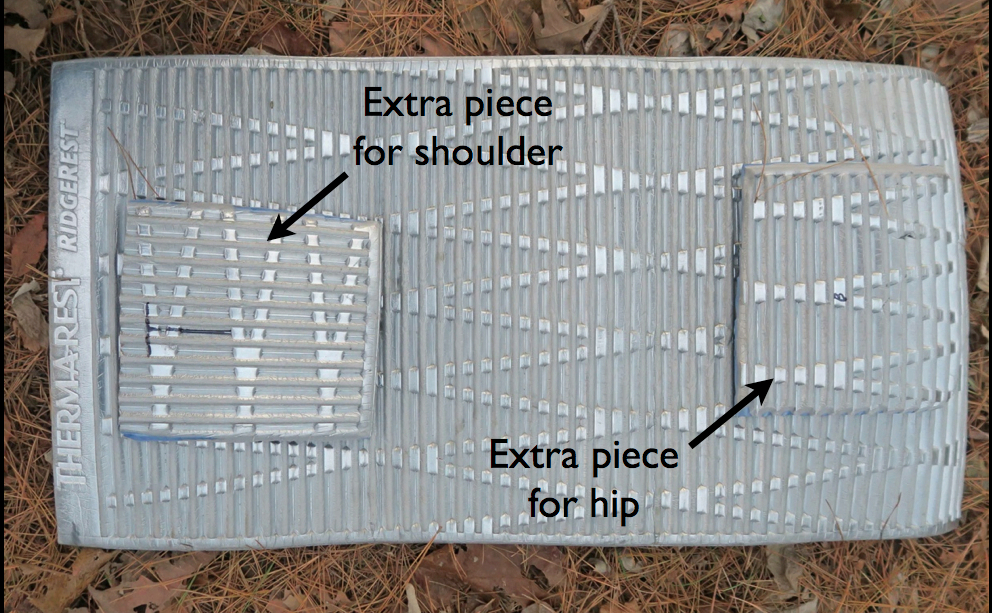
If I’m going my lightest, I prefer a Therm-a-rest foam pad with two extra foam cutouts to avoid cold spots where most of my weight makes contact. I’m a side sleeper, so one extra 6×8 inch pad goes under my hipbone, and the other goes under my shoulder. I cut the two extra pieces from a full-sized RidgeRest to make it a 2/3 pad after cutting another piece for Hiker-dog. She loves her foam sleeping pad! In cold weather, I place my pack under my feet to get up off the ground.
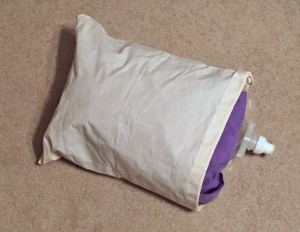
Platypus pillow
For me, a pillow is essential. I now use a Platypus water pouch filled with air inside a small pillowcase along with extra clothes. During the day and in camp, I use the pouch to store extra water. If there’s water in the pouch in the evening, I pour it into my cookpot for the next morning’s eggs and coffee. I like double-use items.
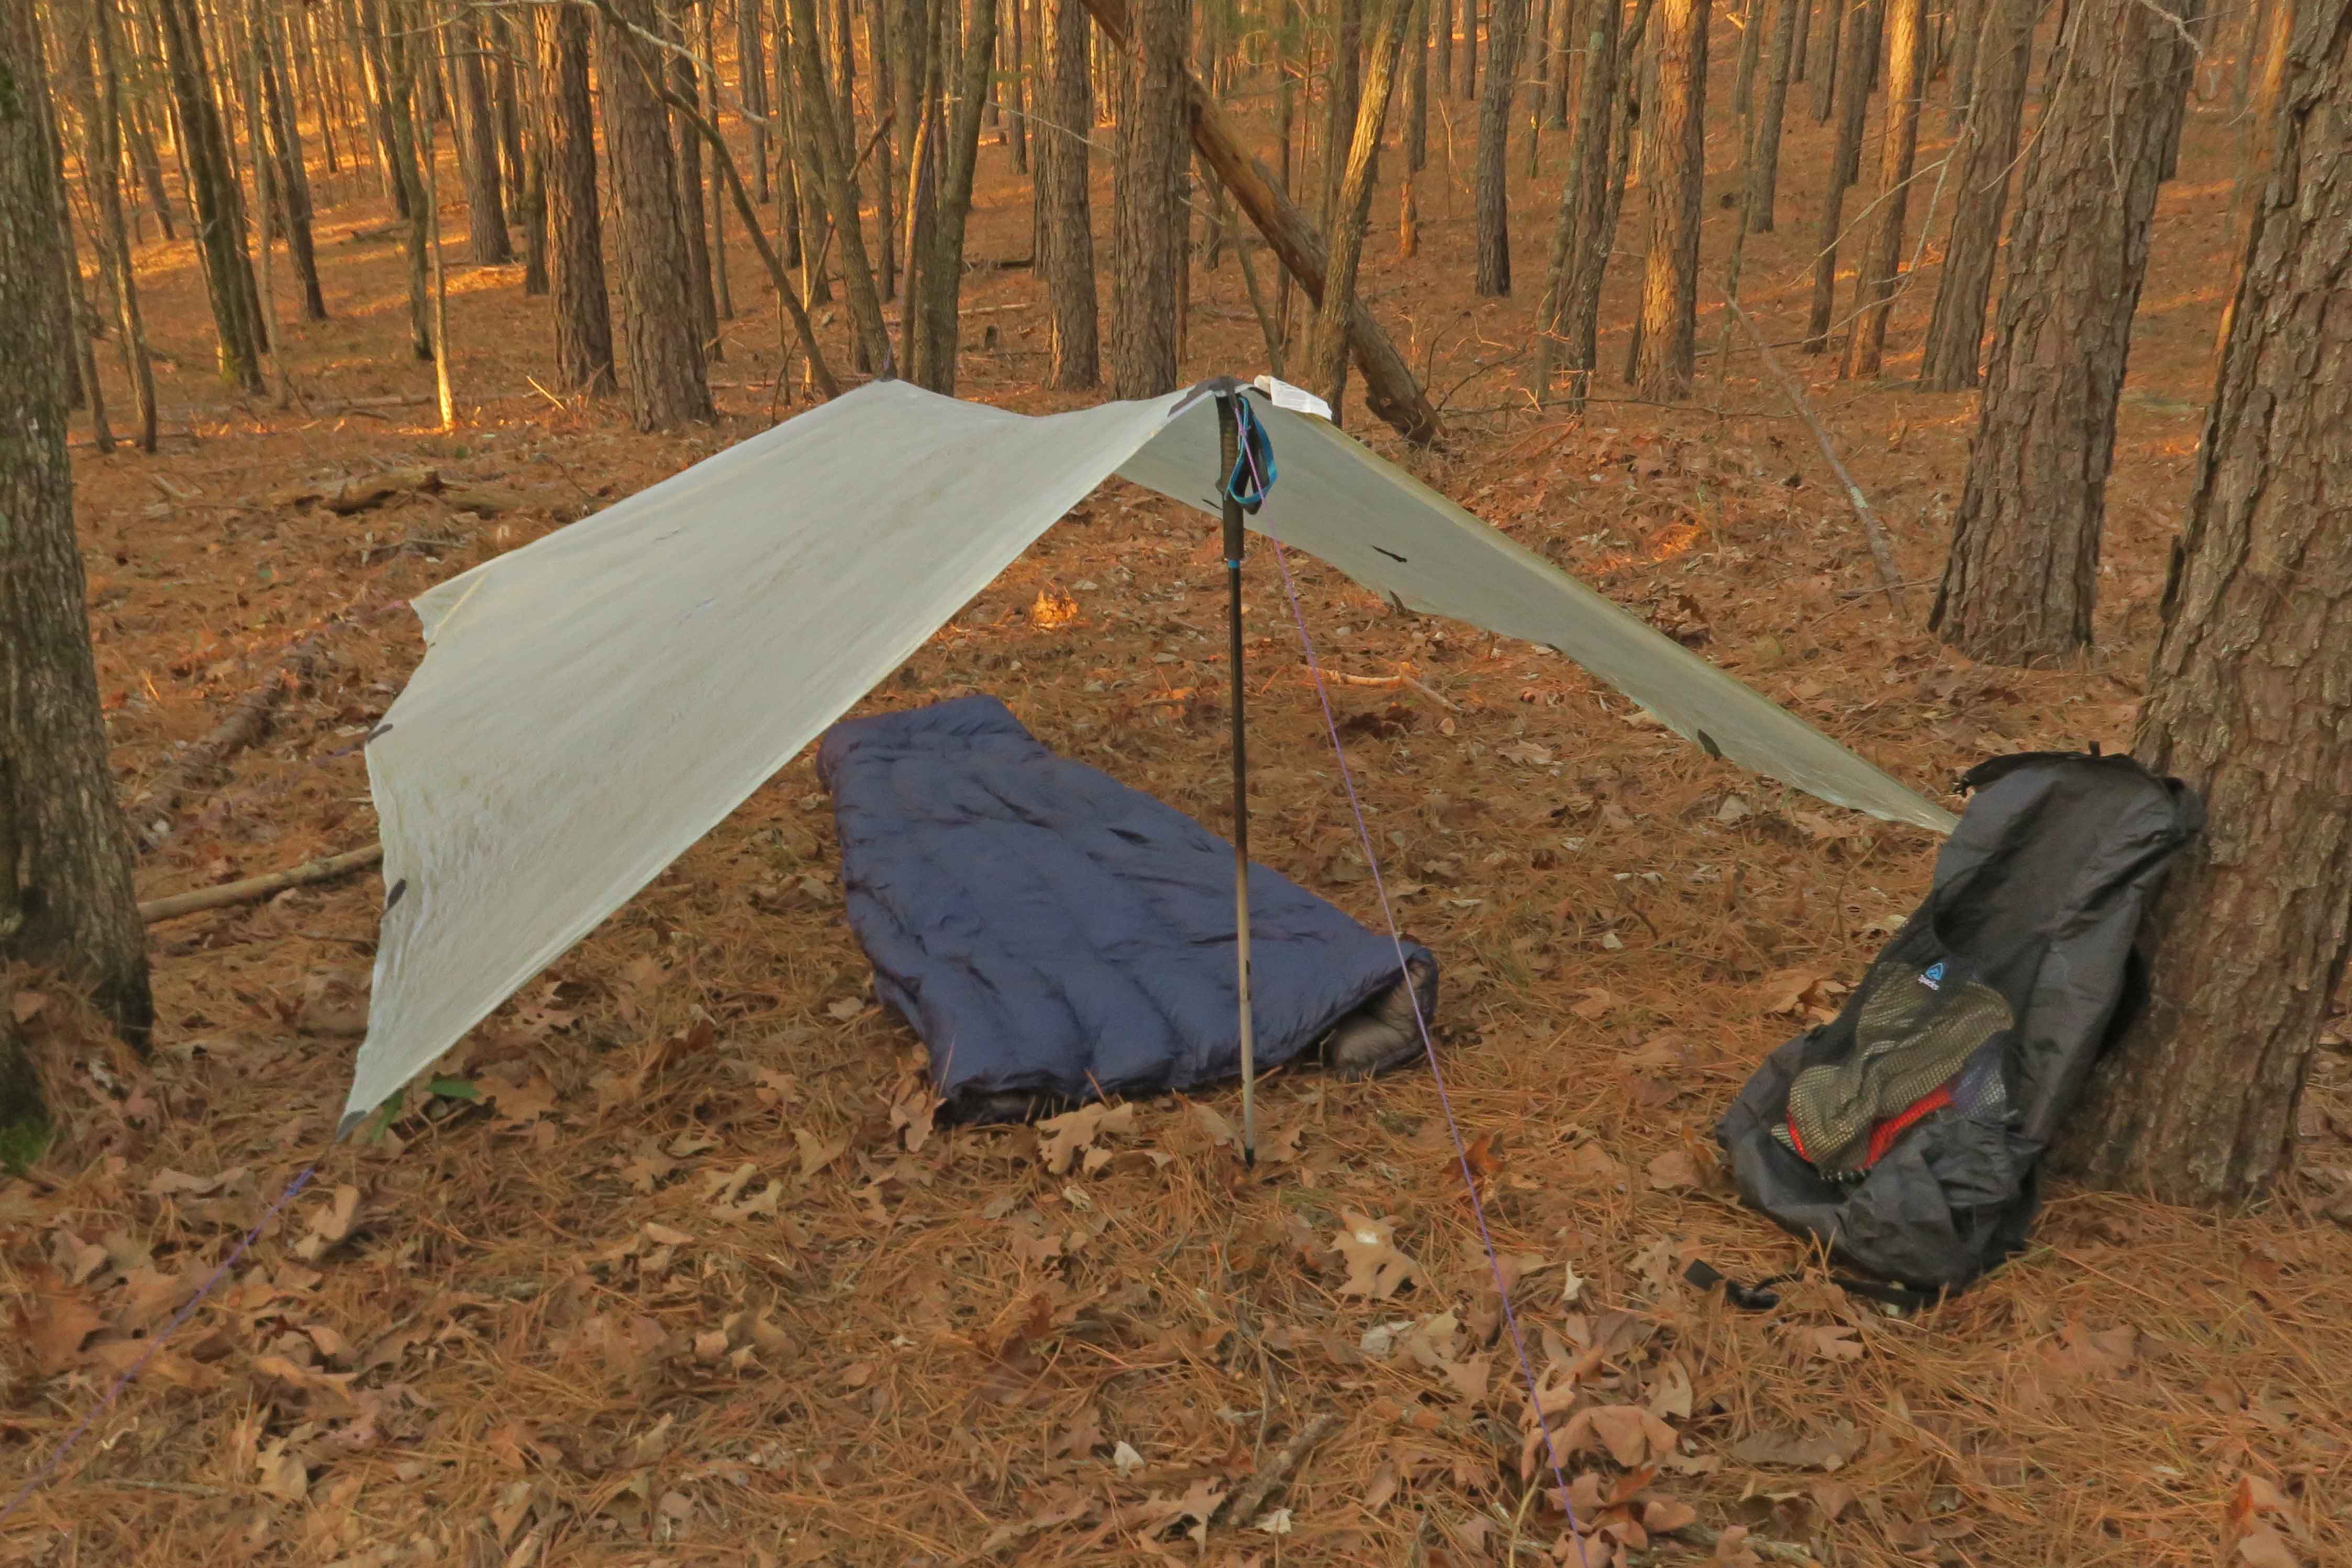
2. Shelter: Lots of options here, and I’ve tried several over the years. Right now, I’m using a Big Agnes Silver Spur 2-person tent (2 lbs. 12 oz.) when I expect cold temperatures and want to keep Hiker-dog in the tent with me. When I want to go my lightest, I use a ZPacks tarp. Love the tarp because it’s flexible, lightweight, and I can feel close to my surroundings. If it’s bug season, I pitch a screened Enlightened Equipment bivy sack under the tarp. I sometimes use a piece of plastic under the foam pad in non-bug season. A backpacking tent can easily weigh 4 lbs. The tarp, stakes, and plastic ground cloth add up to 16 oz. With a bivy sack it’s 21 oz.
ZPacks tarp, Enlightened Equipment quilt on Therm-a-rest foam pad
Crown 60 pack packed bear canister for the High Sierras
3 The Pack: On the John Muir Trail and for many Ozarks trips, I use my Granite Gear Crown 60 pack. Love that pack, and it handles a bear canister well. If I’m going my lightest and a bear canister isn’t required, I use a ZPacks Nero that is super light.
Down quilt and extra clothes in trash compactor bag
sleeping pad with dry bag
food and kitchen in pack
Packing the pack (my way) – Place all items that must remain dry in a trash compactor bag. Both the Zpacks and Crown 60 packs area simple tubes. Pockets, compartments, and zippers are nice but add weight. The foam sleeping pad is placed against the pack walls adding structure to the lightweight floppy pack. I press the tarp into the bottom so any moisture will move down from there. Then I press the trash compactor bag into the tube containing the down quilt, silk sleeping bag liner, and extra clothes. Last, I pack the food/kitchen bag.
Loaded pack next to Hiker-dog who is policing the campsite for any crumbs
Lightweight hacks: Here are a few tricks I’ve picked up from other hikers and reading.
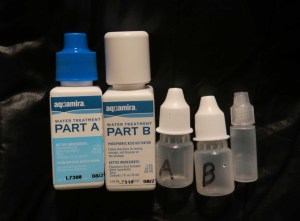
Hydrating light – If I use a filter, it’s the Sawyer mini squeeze filter. If the water is cloudy, I sometime pre-filter with my bandana and then the Sawyer filter. If I’m going my lightest, I use Aquamira water treatment drops, rebottled in small plastic bottles. I prefer the drops and leaving the filter in the bag or at home. Sometimes I carry both drops and a Sawyer, depending on what I expect to find out there.
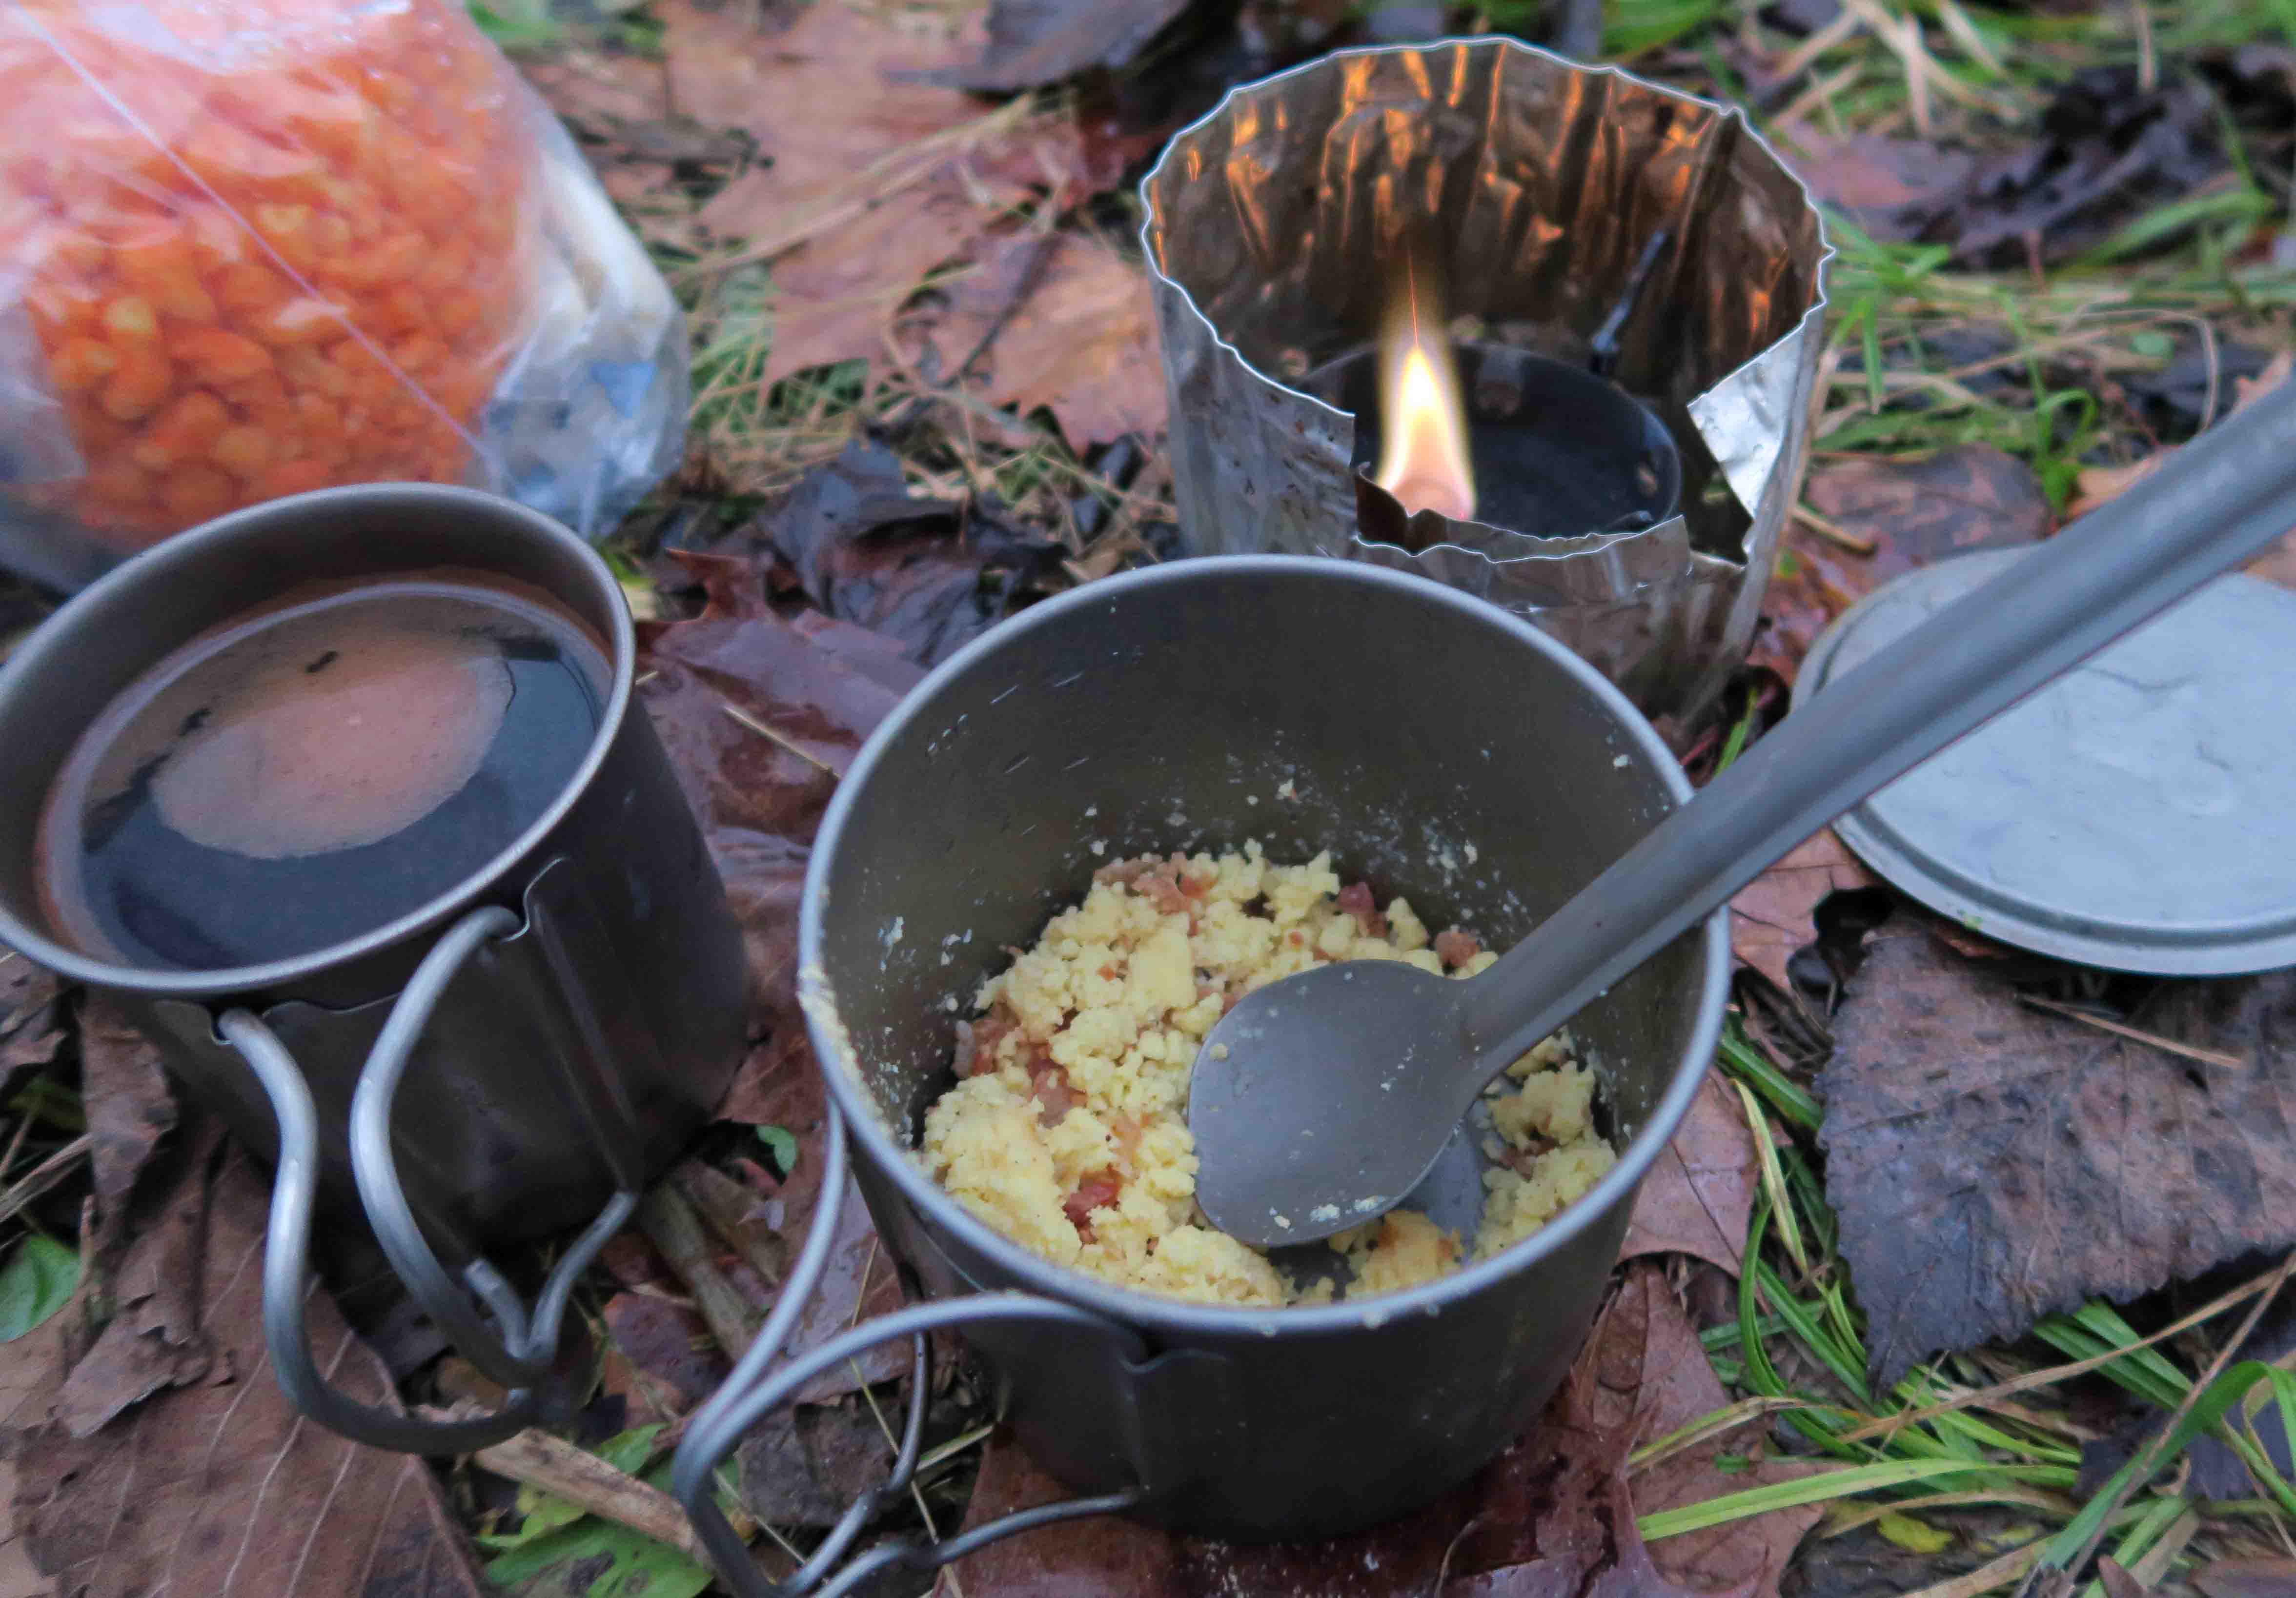
Cooking light – Sometimes, I cook on a fire if there’s already a fire ring and it’s a high impact campsite, but the stove I carry is a titanium Esbit stove with two fuel cubes for each day. I have a pocket rocket type stove that works well, and sometimes I carry that, but it’s heavier, and I despise giving pack space to fuel canisters. I have a Jetboil and would use it for a large group where we wanted to boil lots of water quickly without having a bunch of stoves. A Jetboil could save weight for a group, but it’s heavy for an individual. One of my main trail friends uses a Whisperlite and he’s masterful with it, but it is a slightly heavier option.
Gourmet coffee and eggs with bacon bits
My cookpot (Toaks 550 ml) and cup are titanium. Some prefer a larger pot, but this one boils water for coffee and scrambled eggs though it does get close to the rim with evening meals. I made a pot cozy using foam and Gorilla Glue that extends the cooking time and keeps the food warm while I eat it. I love coffee and have a somewhat unique coffee recipe. I sometimes wish my mug were bigger, but it fits nicely inside my pot.
eggs and vegetables
meat options
Food is generally heavy. I rarely use commercial freeze-dried meals, preferring to pack my own using soups, instant potatoes, and Knorr meals as a base. Add dehydrated vegetables and freeze-dried chicken to make good meals with less packaging and weight. I carry trash in an empty coffee bag. It’s light, durable, and I don’t have to look at my trash as with a plastic bag.
Black Diamond trekking pole & titanium tarp stakes
Trekking Poles: Hiking poles aren’t a necessity, but I find they improve my stability, especially going downhill. They can also serve a dual purpose as tarp poles. Lightweight and simple are my favorite features. I don’t care for fancy adjustments/shock absorbers and sometimes see hikers playing with their stick lengths to the point of frustration because of tricky mechanisms. I use Black Diamond Distance Z trekking poles (non-adjustable).
Shoes and socks: I wear lightweight, low top hiking shoes or trail running shoes. I use crocs for creek crossing and around camp. I carry two pairs of Darn Tough socks with one pair on my feet and a backup pair in my pack. Everything adds up, so wearing lightweight clothes makes a difference in the weight your knees and feet will feel on the trail.
Personal items…what do I really need? I used to tweak around with toothbrushes, trying to lower the weight. I settled on tooth powder for a while instead of toothpaste. Now I just carry a roll of floss, that’s all. I floss each evening. Each morning a snap off a green twig and “brush” my teeth while walking along. After a few minutes, my teeth feel as clean as ever.
Luxury Item: Give yourself one. It might be an iPod or some other item that adds to your enjoyment. I love my double wall titanium mug, but it would qualify as a luxury item, so it never makes backpacking trips. My favorite luxury item is a package of wet-wipes. It feels good to clean up before sleeping, keeps the silk bag liner cleaner, and keeps down the stink.
Speaking of stink…. Proper pooping is important! There’s a whole book on the subject! For the Ozarks, bury your business away from the trail or water and pack out any toilet paper. I like to use leaves when possible to reduce the use of toilet paper though I still carry a little. I like what Ultralight Backpackin’ Tips by Mike Clelland has on this subject and many more.
Life is all about nuanced choices, and the same is true of packing light. Experimenting with your gear can be fun and add to the anticipation of a trip, or it can drive you crazy and annoy those around you.
I think maybe “closet ultra-light backpacker” is the way to go. Quietly make decisions that reduce your pack weight, but don’t initiate conversations about subtle differences between the Toaks titanium cookpot over the MSR Titan Camping Kettle. Better to have campfire conversations about the trail, scenery, and life.
Enjoy your light pack, and the places your happy feet will take you!
A reader emailed several good questions while preparing for a backpacking trip on the Ozark Highlands Trail. I enjoy responding to these type of inquiries and decided to write this post.
Many trip failures can be traced to the planning process or something overlooked in preparation. Even on the best of trips, I usually learn of things I should have done differently, often related to travel distance, packing, or food.
What follows is not intended as an all-inclusive guide, and there’s no “right way” to prepare and pack, but some of the lessons I’ve learned and resources shared here might inform your preparation. I include links to some items mentioned, but am not endorsing products or sources. I prefer to use my local outfitters, suppliers, and bookstores for most backpacking purchases.
Planning the route: Since a good friend, Bob, and I recently completed 88 miles on the Ozark Trail and we’re presently planning our second outing on the trail, I’ll use it as an example. After determining an overview of the route, usually looking at online resources, I order or print maps. The Ozark Trail Association website is very useful for this. Most long trails have associated websites that are helpful in planning.
Online overview map of the Ozark Trail
I printed Ozark Trail maps but purchased section maps because of ease of use and durability. To be sure I ordered the right maps I used this map that labels the sections.
Since portions of the Ozark Trail haven’t been built yet, our goal is to walk the finished sections. We began working our way from south to north with the Eleven Point, Between the Rivers, and Current River sections. For this hike, we’ll continue north on the Blair Creek, Karkaghen, and Middle Fork John Roth sections.
Portion of Ozark Trail Association map
For me, planning campsites involves guesswork and looking at topographical maps. I cut post-it notes into strips and stick them to the map where I think we might camp. I move them around while planning, sometimes even after changes are made while on the trail. I sometimes enjoy not knowing exactly where we’ll stop to spend the night.
Determining when and where water will be available is part of route planning. Sometimes you have to make informed guesses. Monitoring rain in the area you’re going to hike and contacting locals can help you determine if smaller creeks might act as water sources. Last fall when hiking dry sections of the Ouachita Trail, we planted water caches for insurance, but this involved driving to pick up empty jugs after the trip.
How many miles to travel each day is a common question. When in doubt, go short and enjoy the views. It’s easy to bite off too many miles and end up injured and having to leave the trail. With a pack between 18 and 26 pounds, 10-12 miles is a good distance for me, but there’s nothing wrong with a 6-mile day. I occasionally do 14 and might go longer after I correct my foot issue (see the next topic). Update: The foot-fix worked making 15-20 mile days a possibility.
The feet: The most common saboteurs of multi-day trips are down at the end of our legs. Feet are so far away that it’s easy to ignore them. Things we hardly notice on dayhikes, become serious problems when walking day after day with 18-35 pounds on our backs.
On our first 88-mile section of the Ozark Trail, the third toe on my left foot was a problem that reared its ugly head beginning about day four of eight. This same toe was a problem earlier on the Ouachita Trail, but I tolerated the discomfort on both trips.
After the Ozark Trail experience, I found a good podiatrist. He used a spacer and small lifting device to correct this wayward toe’s position, the result of a childhood injury. If something hurts, check it out. It might be an easy fix.
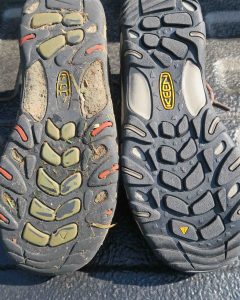
Comparing worn and new shoes
When hiking, doing gentle stretches each morning and evening can avoid problems. Using some lotion on the feet each night after cleaning also helps prevent blisters. Pack a file for smoothing the toenails during your trip.
Wool blend socks help prevent blisters. I use Darn Tough Socks. They last! Comfortable shoes are also essential, and I go light as possible with footwear as in low cut hiking or trail running shoes. No need for heavy boots!
Resource: My favorite (and only) book about this subject is Fixing Your Feet by John Vonhof
Packed for the John Muir Trail
Packing light: Pack weight is a challenge, especially for multi-day trips when the addition of food increases weight. Looking at the “big three” has helped me. Shelter, sleep system and the pack itself – These three are the big weight items. If you swap a 4-pound tent for a 1-pound tarp, that’s huge! Sometimes I’ll use a tarp, but I have a 2-pound tent I also use depending on anticipated conditions. Moving from a heavy sleeping bag to a down quilt and silk bag liner has reduced weight for me.
Many never think about the actual weight of the pack, but some are close to 5-pounds. Having a fancy suspension system doesn’t reduce the weight your feet and knees are feeling so go as light as possible with the pack. Most ultra-light packs do fine with loads of 15-30 pounds.
Next, I go through the pack to see what I can leave at home. Example: toothpast and toothbrush – I don’t need them. I take floss and use a green twig to clean my teeth as I walk in the morning. I’m veering into the “too much information” category here, but this was the first example that came to mind. I consider Wet Wipes a luxury item but worth carrying. Cleaning up before getting in the bag liner reduces the stink and makes sleep easier.
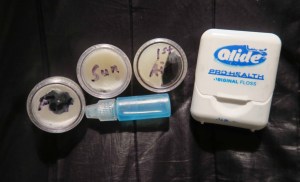
I pack needed items in small containers when possible to save weight. No need for a tube of foot cream or sunscreen, so I estimate what might be needed and pack that amount. As you can see from the photo, I still had foot cream, sunscreen, first aid cream, and Dawn Soap at the end of eight days. The floss is for size reference, but I’m looking for smaller floss containers. I despise plastic floss picks when I see them in the woods. Whatever you use should be placed in your trash bag and carried out. I use an empty coffee bag for trash because it’s light and can be folded down to the size needed. At the end of the trip, the bag goes into the trash.
Clothing: I wear one outfit for the duration of the trip. Layers are added depending on the expected weather. I use a silk weight base layer for cold hiking and an even lighter layer for sleeping. I like to carry a down vest and, if temperatures in the low 20s are forecasted, I’ll add my down pants for sleeping if the quilt needs extra help. A hat for the sun is essential. For a warm hat, I use a stretch-fabric tube (brand isn’t important). Beanie hats work well too, but they tend to be heavier and aren’t as multi-use.
Deciding what needs to remain dry is essential. I pack my clothes and personal items in a waterproof stuff sack, then place that along with my down quilt inside a trash compactor bag. The compactor bag fills cracks and crevices in the pack to utilize space and has kept items dry on rainy days.
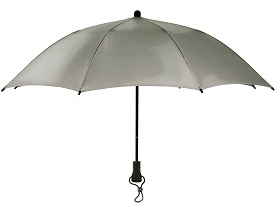
When I expect rain, I pack an ultra-light umbrella. This is a personal choice because I’d rather have some wetness on my lower body and not be sweating and cold all over. I sweat under the best of rain shells when hiking hard in moderately cold temps. The umbrella gives me a little roof to walk under, but it’s not for everybody. I’ve also used a poncho which kept my upper body dry, but I still get clammy.
Esbit stove, windscreen, cup and pot
Fire, Food & Water: Like most backpackers, I have a varied collection of stoves. My hiking buddy carries an MSR WhisperLite. It’s great, but I need something simpler. I’ve used a PocketRocket when at higher elevations (like the John Muir Trail) but for the Ozarks, I like my Esbit Stove that uses two Esbit fuel tabs per day. Sometimes I’ll build a fire for cooking if there is an existing fire ring.
Meal in homemade cozy
Food can get heavy! I avoid freeze dried meals because of their saltiness, expense, and packaging. I prefer using powdered soup mixes, instant potatoes, and Knorr side dishes as a base with my own dehydrated vegetables and meat added. I purchase dried chicken from Mountain House and add it to most meals. I repackage all in ziplock bags. Results are best if I place the chicken and vegetables in water when I first arrive at camp to increase their hydrating time.
In the Ozarks, bears aren’t usually a concern. I never carry bear spray and only used a bear canister once in the High Sierras of California where it was required. I use a bag for food and tie it in a tree, but mainly to keep the little critters out.
Water is heavy! One liter is just over two pounds. Its storage and treatment can add even more weight. I avoid Nalgene bottles because they’re heavy and bulky. I use a Platypus 70 oz. pouch for water storage and it doubles as a pillow filled with air and wrapped in fabric. I use one-liter Vapur collapsible bottles while walking. They’re light and fold up when not in use.
I typically use Aquamira drops for water treatment but carry it in smaller bottles with a tiny bottle for mixing.
Sawyer filters are light and effective. They’re cheap, so I usually carry one in my daypack even though I rarely use it on multi-day backpacking trips.
I must interject a note about coffee here as I consider it essential! I sometimes use Mount Hagen instant, but you end up with a small wrapper to carry out. My tastiest morning brew involves using espresso grind coffee and leaves no trash to carry out.
Here is a link to my Backpacking List. It’s a working document that I update from time to time.
Resource: Ultra-Light Backpackin’ Tips by Mike McClelland – I love this book!
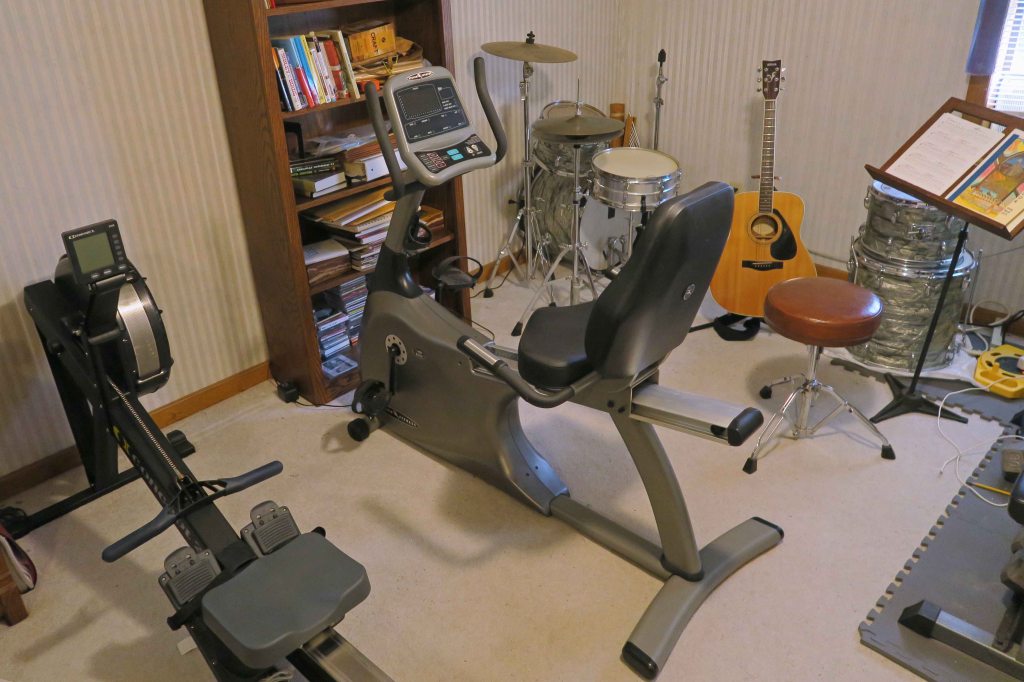
home gym (and music room)
Physical preparation: The best way to prepare for backpacking is to walk with a backpack. I put magazines in my bear canister and place it in an extra pack for this purpose. I love my rowing machine, but biking, running, or any similar exercise will be helpful in preparing for backpacking. Update: In August of 2020, I added a stationary bike (pictured above) to my regular workout and love it! Lunges, squats and toe raises are going to be helpful but don’t start a new activity in the weeks before a long trip because an injury will interfere with preparations. Rest, nutrition and safe stretching are all important to general health and in helping you avoid illness prior to your trip.
Resource: The Stark Reality on Stretching by Dr. Steven D. Stark – This book shows safe stretching techniques and points out the dangers of some common stretches.
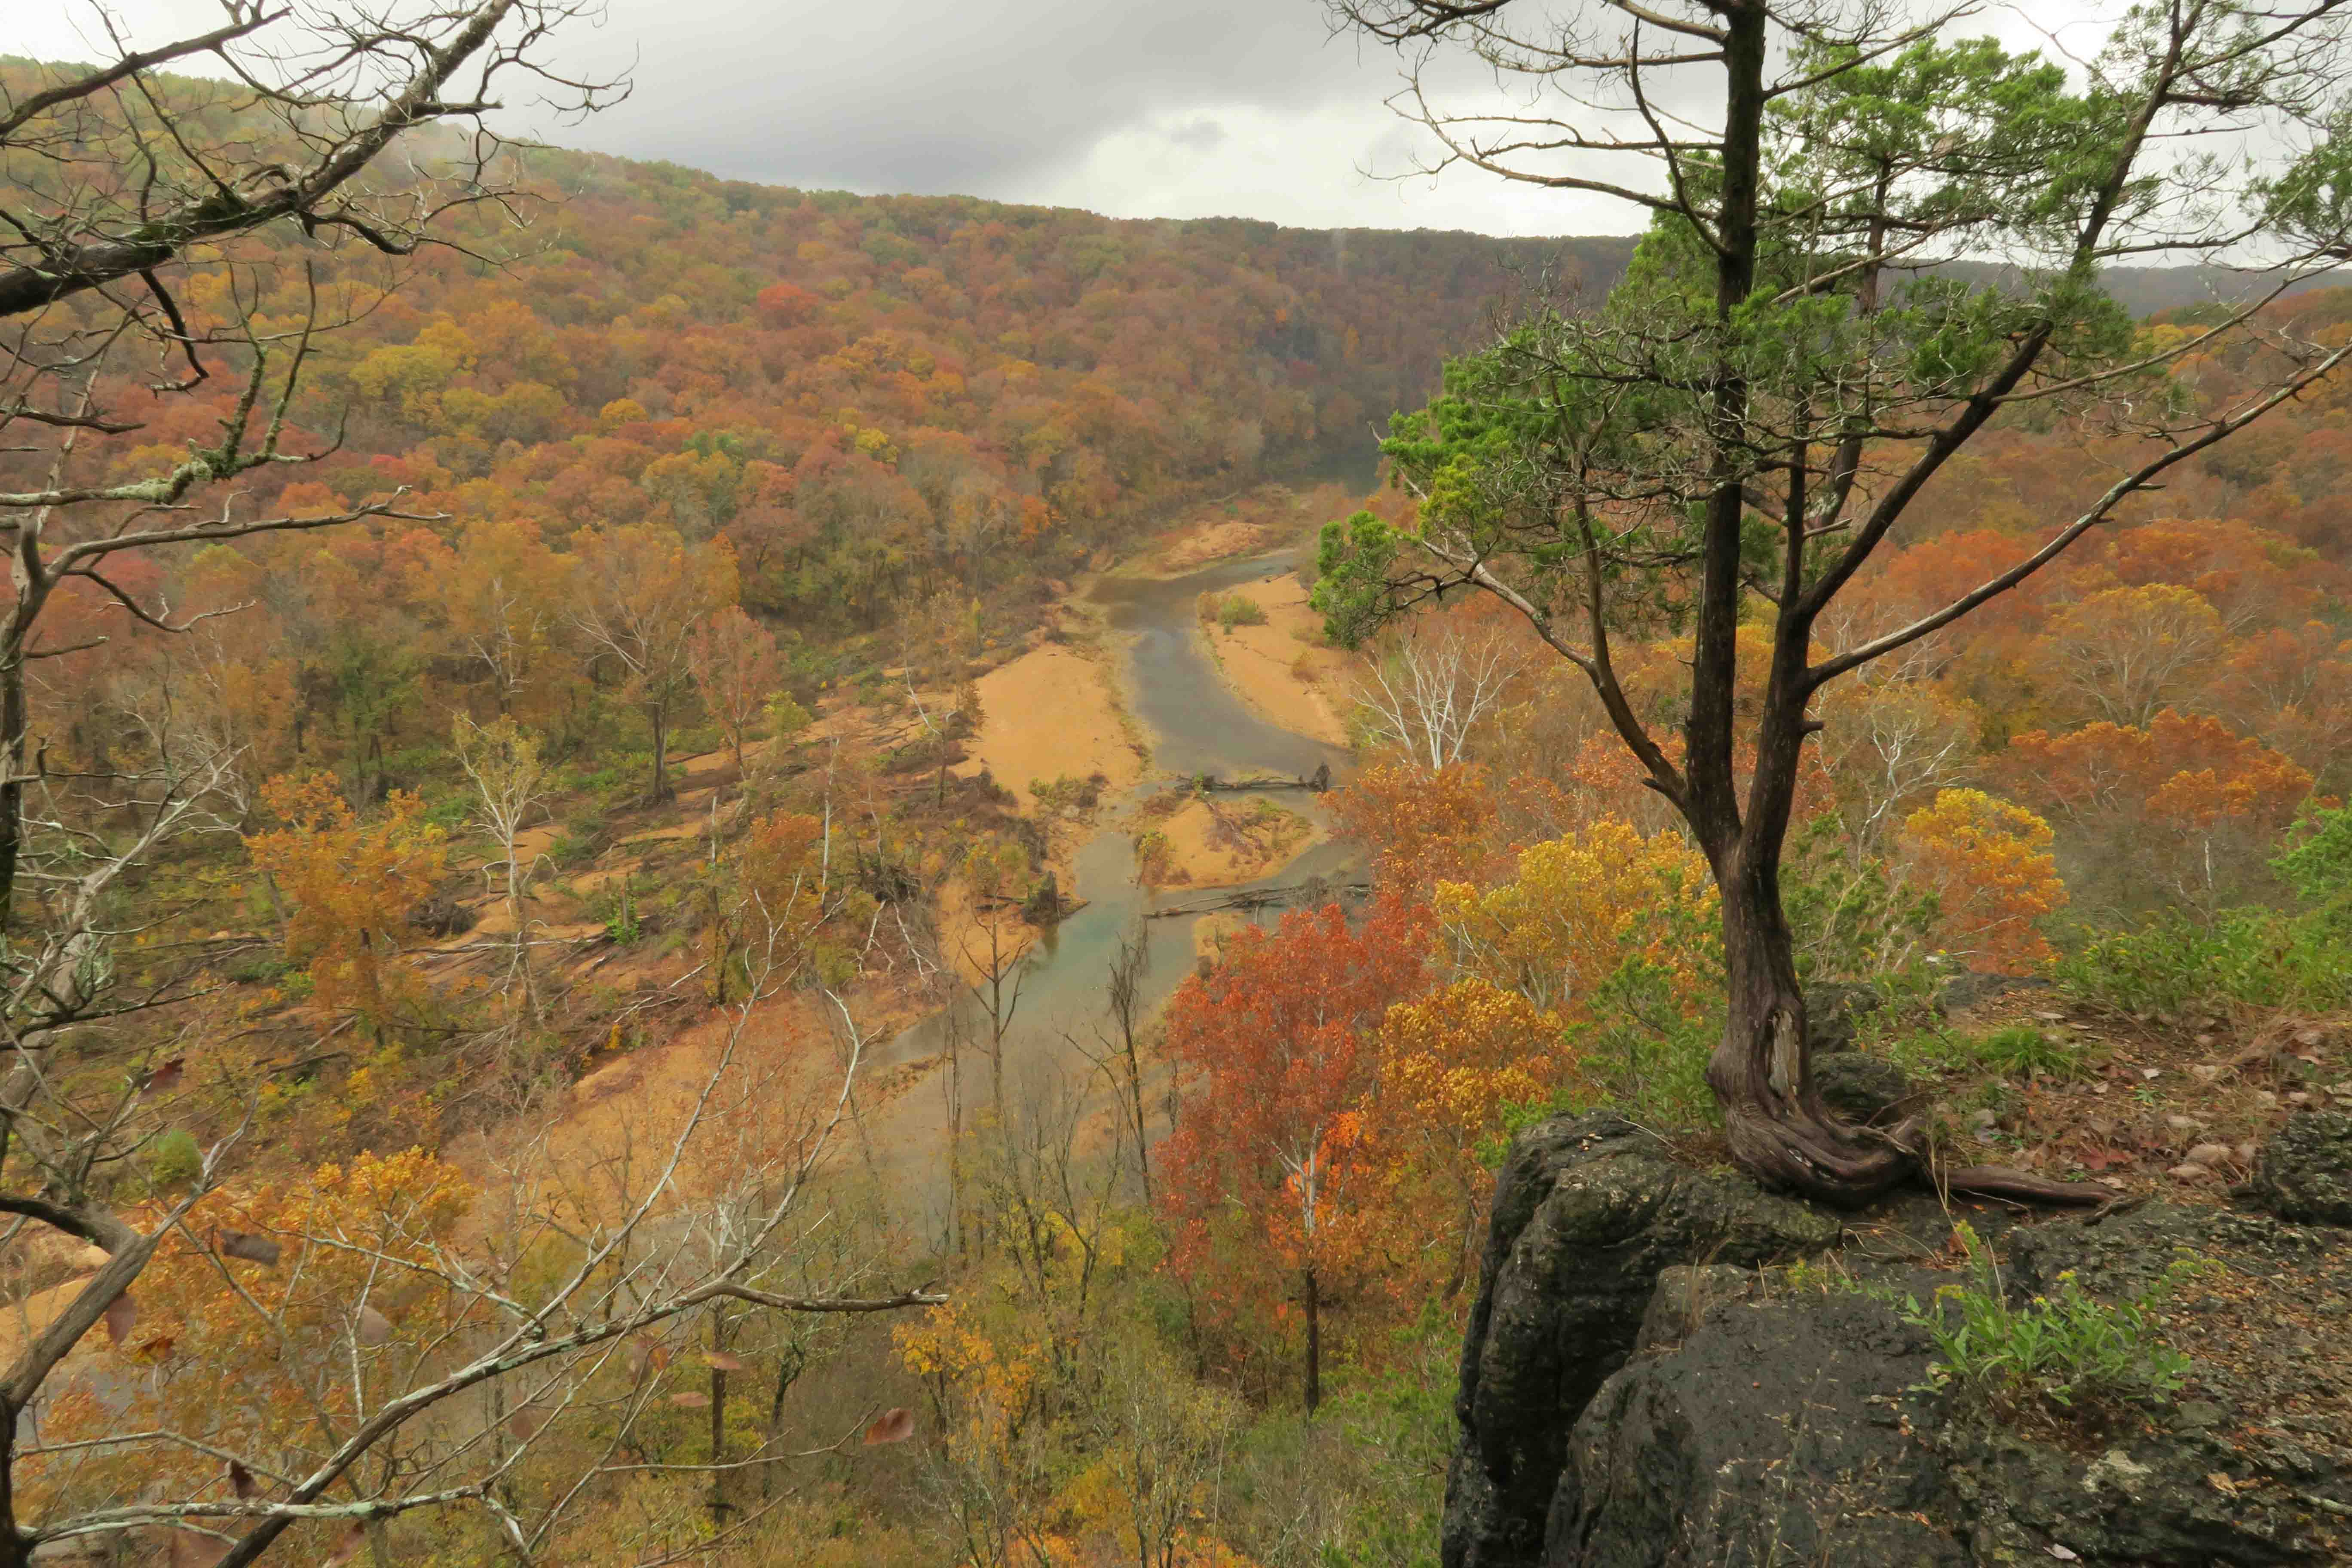
Eleven Point River in Missouri
I’ve shared what I think are important things to remember when preparing for a multi-day backpacking trip. I’ll update this post as questions reveal other areas to include.
Enjoy your planning! If things go well, you’ll gain lifelong memories of indescribable beauty and the satisfying sense of personal accomplishment. If things don’t go as planned, you still might have great memories of your time in the wilderness, but with the addition of new learning to apply on your next trip.
Five Star Trails: The Ozarks in REI, Dallas
While I love the long trails, I enjoy a good dayhike! If you need a great guidebook for the Ozarks of Arkansas and Missouri, check out my book, Five Star Trails: The Ozarks.
I love coffee! On the trail, even the most disgusting instant coffee tastes pretty good, but if we can have gourmet coffee while “roughing it,” why not?
I once felt guilty about my coffee obsession, but many nutritionists now say it’s a healthy drink, so I feel no shame when enjoying my morning shot of stimulant.
There are many instants and brewing techniques out there, but I’ve learned that less is best.Some cringe when they see my backpacking version of “cowboy coffee,” but this is similar to the way professional coffee tasters do their work, so it has some credibility. It also fits into the ultra-light approach because no special equipment is required.
What you’ll need: A cup, spoon (optional), boiling hot water, and espresso grind coffee. Actually, the cup is optional if you just drink from the pot, but I’m usually making my eggs in the pot after pouring off my coffee water.
A coffee shop will do the espresso grind for you. I like a dark roast bean. The important thing is that this coffee is a powder-fine grind. Regular grinds result in a chewy brew with less flavor.
The brew:
Boil creek water and pour into a cup.
Add a rounded teaspoon of espresso grind coffee and let it sit on top of the water for a minute. (A palm of coffee if you don’t want to use a spoon.)
Stir the coffee and let sit another minute or two. (Swirl the cup if not using a spoon.)
Enjoy a great cup of coffee, but don’t drink the sludge at the bottom of your cup. It’s biodegradable, so there’s no mess and no fuss!


 Hydrating light – If I use a filter, it’s the Sawyer mini squeeze filter. If the water is cloudy, I sometime pre-filter with my bandana and then the Sawyer filter. If I’m going my lightest, I use Aquamira water treatment drops, rebottled in small plastic bottles. I prefer the drops and leaving the filter in the bag or at home. Sometimes I carry both drops and a Sawyer, depending on what I expect to find out there.